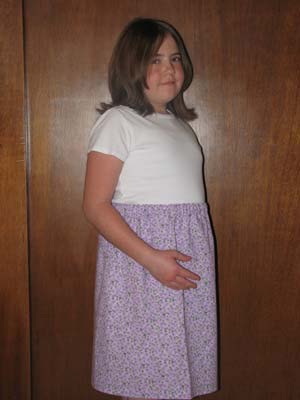
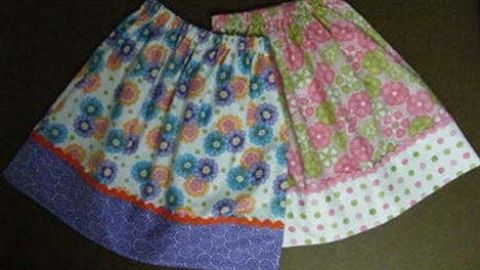
Youth Elastic Waist Skirt
Supplies needed:
- Closely woven skirt weight fabric (amount will be determined by body measurements) Not suitable for plaids, one-way fabric designs, or flannel
- Matching thread
- 1 inch elastic (length needs to be at least waist measurement).
- Basic Sewing Supplies (see Fact Sheet FL/ST/Construction/2007-401)
- ¼ inch twill tape or elastic, heavy string, or shipping cord (for measuring)
Determine the size of skirt:
Sewing clue — When taking measurement it is best to work with a partner. All measurements should be taken snuggly but not pinching. For greater accuracy use a good tape measure and avoid taking measurements over bulky clothing. For accurate measurements, stand straight while being measured.
Step #1
- Take and record your measurements:
- Tie a string snuggly around your natural waistline and measure over the string keeping tape measure snug. Record your waist measurement.
- Hip measurement is taken at the fullest part usually 7 to 9 inches below the waistline (this measurement will vary according to height and body build). Make sure that the tape measure remains parallel with the floor. Record your hip measurement in Table 1.
- Measure from the string tied around the natural waistline down to the desired finished length. Record your length measurement.
Table 1
| Record Measurements | |
|---|---|
| Waist | |
| Hip | |
| Desired finished length |
|
Sewing clue — Wearing ease is the ease built into a pattern to make the finished garment comfortable to wear. Design ease is the ease in addition to the wearing ease which creates the overall outline or style of the finished garment. Wearing ease and design ease determine the fullness of the garment. The fullness of a garment is classified as being: semi-fitted, loose fitting, or very loose.
Step #2
- Determine how full you want your skirt.
- In Table 2 record your hip measurement in the block that matches your selected garment fullness.
- To determine the circumference of the skirt, multiply the hip measurement by the desired ease.
- The skirt circumference and the width of the fabric will determine how much fabric you will need to purchase.
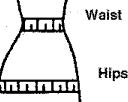
Table 2
|
Skirt Design and Fitting Ease This skirt is designed for one center back seam using 44/45” width fabric*. |
|||||||
| Desired Fullness | Ease | Hip Measurement | Skirt Circumference (inches) | Add seam allowances | Width of Fabric needed* | ||
| Example: Semi-Fitted |
1.2 | X | 30" | = | 36" | 1 ¼" | 37 ¼ " |
| Semi-Fitted | 1.2 | X | = | 1 ¼" | |||
| Loose Fitting | 1.3 | X | = | 1 ¼" | |||
| Very Loose | 1.5 | X | = | 1 ¼" | |||
| Extra Loose | 2 | X | = | 1 ¼" | |||
*If the width of the fabric needed is wider than 44/45”, the skirt will require two side seams. Complete the following formula:
Skirt circumference ________ ÷ 2 = ________+ 1 ¼” seam allowance = ________width of each skirt panel.
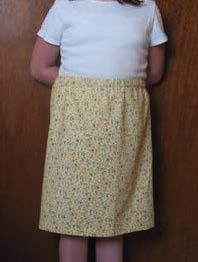
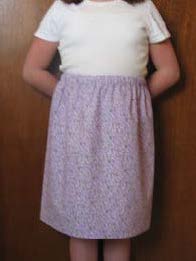
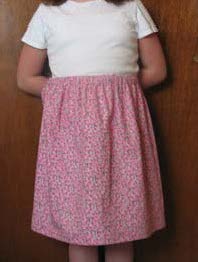
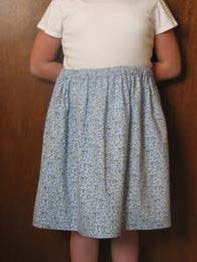
Series of pictures showing fullness:
| Ease: 1.2 | Ease: 1.3 | Ease: 1.5 | Ease 2 |
|---|---|---|---|
| Semi-Fitted | Loose Fitting | Very Loose | Extra Loose |
 |
 |
 |
 |
Determine amount of fabric needed:
Step #1
- Complete Table 3 to determine the length of fabric needed.
Table 3
| Fabric Length | ||||
|---|---|---|---|---|
| Desired Finished Length | Casing and Hem Allowance | Length of Fabric Required* | ||
| Example: 22″ | + | 2 ¾" | = | 24 ¾″ |
| + | 2 ¾" | = | ||
*If the width of the fabric needed is wider than 44/45", purchase two fabric lengths. Length of Fabric Required ______ X 2 = ______ total fabric length.
Sewing clue: When purchasing fabric, it is wise to add an extra 1/4 yard to allow for shrinkage and fabric straightening.
Step #2
- Use Table 4 to convert inches to yardage.
- Example — “Length of Fabric Required” is 24 ¾ " + 9 ″ = 33 ¾ ". Round the 33 ¾″ length up to 36"as shown in Table 4, which is equal to 1 yard of fabric.
- Fabric yardage needed to purchase= ______ Yard/s
| Determining Yardage | ||
|---|---|---|
| Fabric Length | = | Yardage Needed |
| 4 ½ inches | = | 1/8 yard |
| 9 inches | = | ¼ yard |
| 18 inches | = | ½ yard |
| 27 inches | = | ¾ yard |
| 36 inches | = | 1 yard |
| 40 ½ inches | = | 1 1/8 yards |
| 45 inches | = | 1 ¼ yards |
| 54 inches | = | 1 ½ yards |
| 63 inches | = | 1 ¾ yards |
| 72 inches | = | 2 yards |
Fabric preparation:
Step #1
- Wash fabric before cutting to eliminate shrinkage and remove excess dye.
Step #2
- Straighten and press.
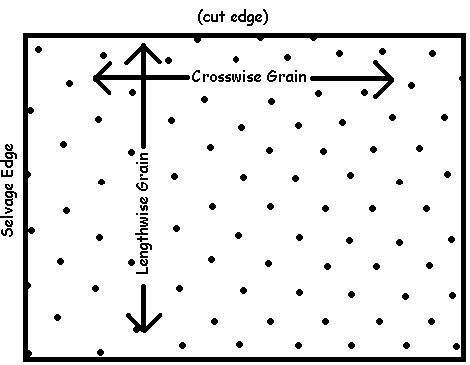
Sewing clue — The lengthwise grain is parallel with the selvage of the fabric. The selvage is a firmly woven strip along the lengthwise edge of the fabric. Lengthwise grain has little give or stretch. Crosswise grain has a little more give.
Figure 1
Woven fabric grainline is established by pulling a thread across the fabric from selvage edge to selvage edge. Clip ½" into the fabric along one selvage edge. Grasp one or two crosswise threads between your thumb and index finger and pull gently while pushing the fabric toward the other selvage edge with your other hand. Cut along the line left by the pulled threads.
Fold the fabric in half matching the selvages and the newly cut edges. The fabric should lie flat. If it does not lie flat, realign the fabric by holding the long edge of the fabric along the selvage and gently pulling upward on the short edge. The “pulling” needs to be on the bias as shown in Figure 1.
Pattern markings:
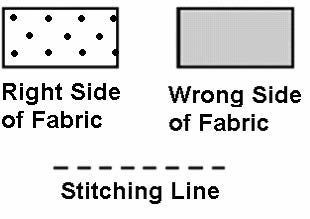
Sewing clue — Becoming familiar with the markings in the Diagram Key will aid you in reading instructions. Most patterns have similar keys.
Diagram Key:
Skirt construction:
Step #1
Transfer skirt measurements: Skirt Length ______
Skirt Width ______
- Cut out skirt using measurements above. The skirt width will be on the crosswise grain and the skirt length will be on the lengthwise grain.
Sewing clue — The selvage is a firmly woven strip formed along each lengthwise edge of the fabric. It is recommended to remove the selvage edge. Selvage edges have a tendency to shrink more than the rest of the fabric. This shrinkage can cause the seam to pucker.
Step #2
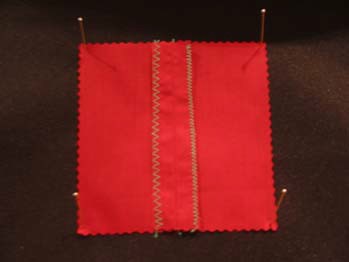
- Finish seam edge, if the fabric is a loose weave and will ravel. Options include: clean-finished, pinked, stitched and- pinked, zigzagged, or serged.
Sewing clue — A seam finish is a way to prevent a seam from fraying. An easy finish is to zigzag over the seam’s raw edge. On a light weight fabric a three step zigzag stitch can help prevent a puckered edge.
To learn more about seam finishes review the activity on page 16 in the Sewing Expressions: Under Construction Level 1, 4-H CCS project booklet, “To Ravel or Not To Ravel” or refer to www.n4hccs.org Projects Online, Sewing Expressions, “Project Activities.”
Zigzag 1
Serged 1
Step #3
- Place right sides of the fabric together along the seam line and pin. See Figure 1 if you are constructing a skirt with a center back seam. Refer to Figure 2 if you are constructing a skirt with side seams.
Sewing clue — Place pins at a right angle to the cut edge of the
fabric. The head of the pin should extend beyond the cut edge. This allows the pin to be easily removed just before the presser foot reaches the pin. Do not sew over pins; they can break or dull the= needle.
Step #4
- Sew a ⅝" seam(s) stitching from the bottom of the skirt to the top. Backstitch at the beginning and end for reinforcement.
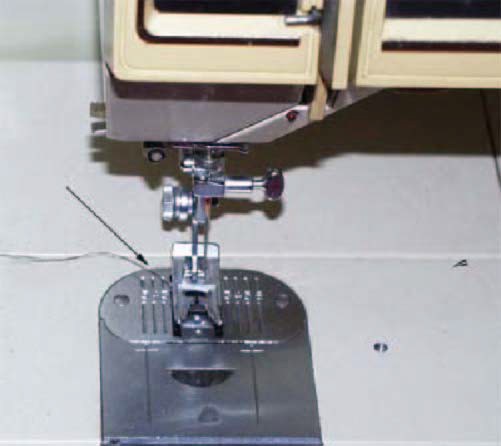
Sewing clue — Sewing machines have a plate which is generally referred to as a throat plate but can be called a stitch plate, or needle plate depending on the machine brand. There will be a series of markings on the plate which will assist in sewing accurate seam widths. Markings indicate ⅛″ distances from the needle, starting at ⅜″ and can continue as wide as 1″. If there is no seam width marking, one can be established by putting the sewing machine needle in the down position through the one inch mark on a tape measure. Measure out to the desired seam width and place a piece of tape at that point on the throat plate.
Step #5
- Press seam flat to set stitches, then press seam allowance(s) open.

Step #6
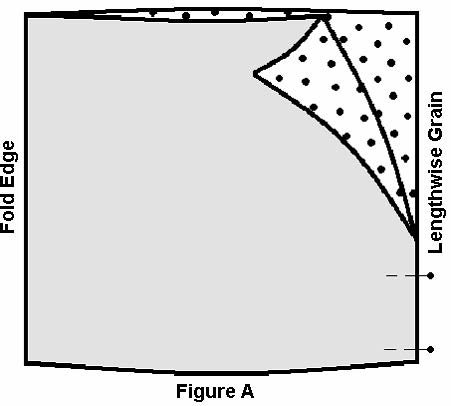
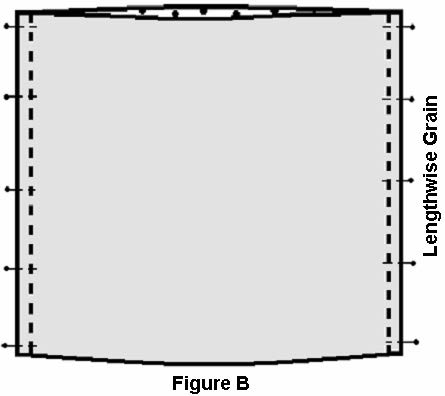
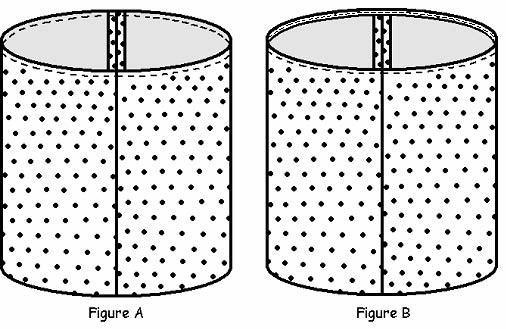
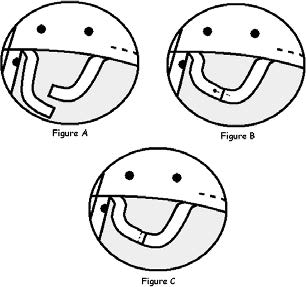
- Stitch waistline casing ¼" from the upper edge all the way around the skirt (Figure A).
- Press to the wrong side on stitching line.
- Stitch ⅛" from the folded edge (Figure B).
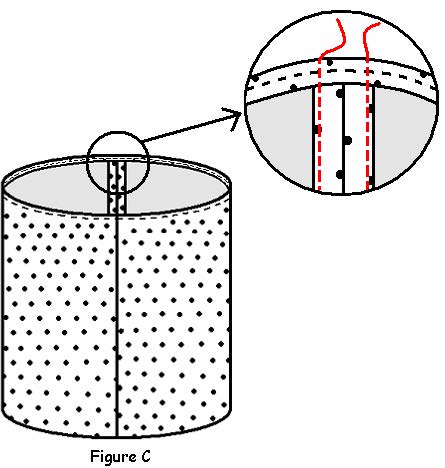
Sewing clue — To prevent the pin or bodkin from getting caught in the seam allowance when inserting the elastic, machine baste (8 stitches per inch) the seam edges to the garment from the top edge down 1 ½". The basting stitch will be removed after the elastic is inserted. Another option for holding the seam allowance in place is to use a water soluble sewing glue. See Figure C.
Step #7
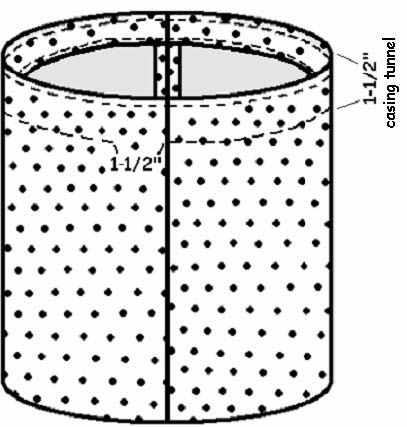
- Press fabric down 1 ½" along the upper edge of the skirt with the wrong sides together to form the casing.
- Stitch top fold ⅛" from the upper edge. Stitch lower edge of casing ⅛" from lower fold leaving a 1½" opening to insert elastic.
Sewing clue — A casing is a fabric tunnel through which elastic can be inserted to form a waistline finish. The casing width is dependent upon the width of the selected elastic. The casing should be at least ⅛" wider than the selected elastic.
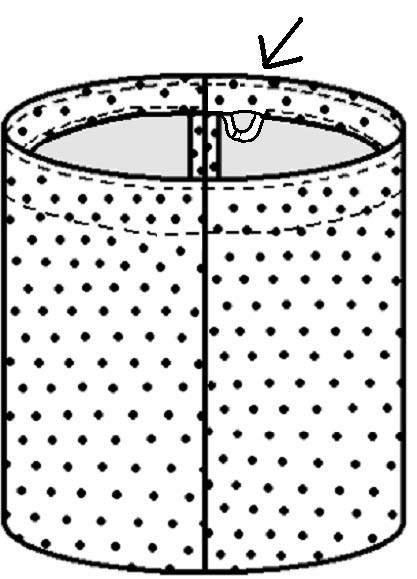
Step #8
- Securely attach a safety pin or bodkin to one end of the elastic. Thread the safety pin or bodkin with elastic attached through the casing opening by pushing it through the tunnel. Working the elastic through the tunnel. Pin the loose end of the elastic to the skirt fabric to prevent pulling the loose end into the casing.
- Elastic should fit tightly in the casing so that it will not roll.
Step #9
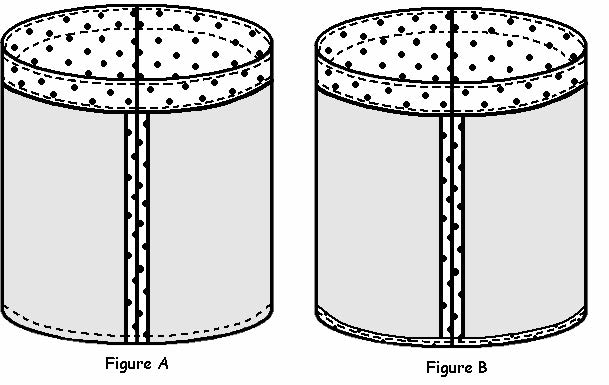
- Overlap elastic 1", Figure A.
- Overlap ends of elastic and pin with a safety pin, Figure B. Try- on the skirt to check the fit of the elastic. Adjust the elastic as needed. Cut off excess elastic.
- Machine stitch overlapped elastic securely as shown in Figure C.
Step #10
- Machine stitch the 1 ½" opening closed.
- Remove basting stitch used to hold seam allowance in place.
Sewing clue — Adjust the elastic so the fullness is evenly distributed around the waist. To prevent elastic from rolling, stitch through the elastic and skirt fabric at the seam, on the right side of the garment. This is referred to as “stitch in the ditch.”

Step #11
- Hem the skirt.
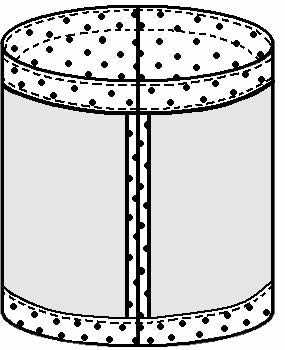
- Stitch ¼" from the lower edge all the way around the skirt, Figure A.
- Press to the wrong side on stitching line.
- Stitch ⅛" from the folded edge, Figure B.
Step #12
- Fold the hem up 1 inch to the inside of the skirt. Stitch upper edge of hem ⅛" from the fold.
Step #13
- Fold the hem up 1 inch to the inside of the skirt. Stitch upper edge of hem ⅛" from the fold.
Authors
Debra Proctor, M.S., USU Extension Agent, Wasatch County; Ronda H. Olsen, M.S., USU Extension Agent, Uintah County; Karen Biers, Ph.D., M.S., USU Extension Specialist
Related Research
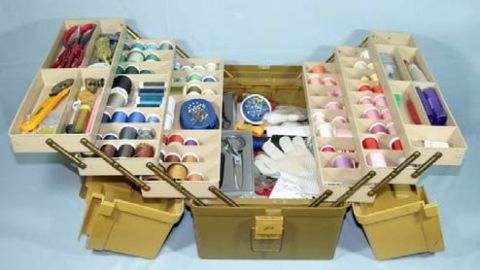
Basic Sewing Supplies
Basic sewing tools are needed for beginning items. A few are essential to use in constructing a sewn item. As you progress in your sewing skills, you may want to include other supplies for more advanced projects. Other supplies make the process easier. Vi
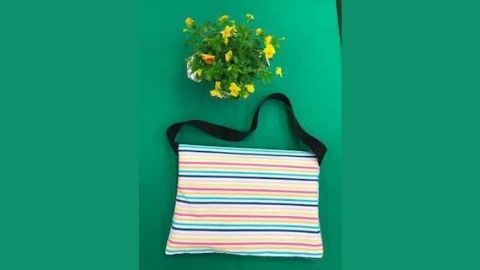

Charity Pillow Cases
Step-by-step instructions on how to make a charity pillow case (assembly line method).


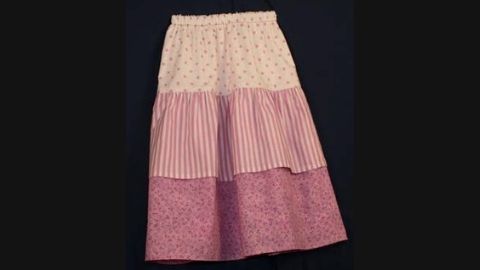
Dropped Waist Skirt with Ruffles
Step-by-step instructions on how to make a dropped waist skirt with ruffles.

Easy Sewing Maker Projects
Step-by-step instructions on how to make a phone charging holder, lanyard wallet, and travel tissue cover.
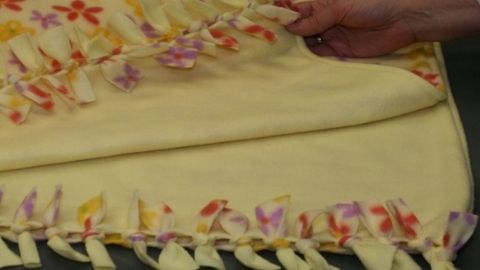
Fleece Blanket With Half Hitch Knots
Step-by-step instructions on how to make a fleece blanket with half hitch knots.


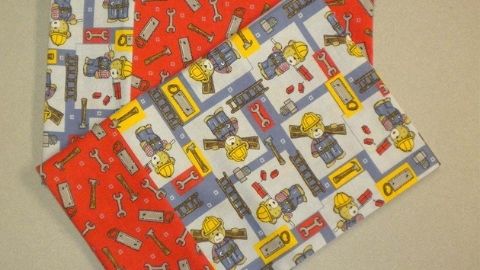
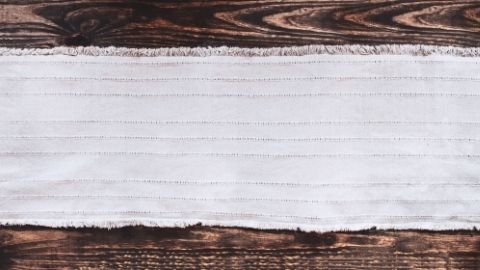
Quilt-as-you-go Table Runner
Step-by-step instructions on how to make a quilt-as-you-go table runner.