Dropped Waist Skirt with Ruffles
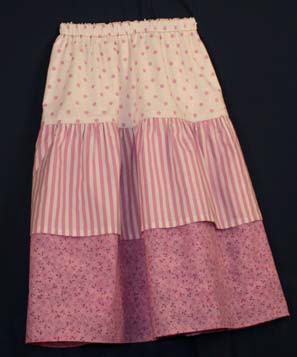
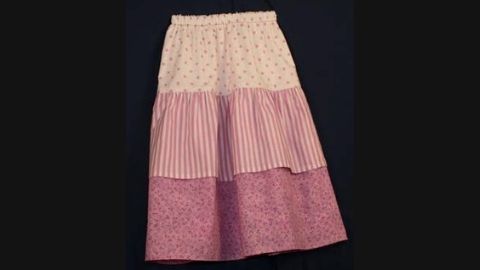
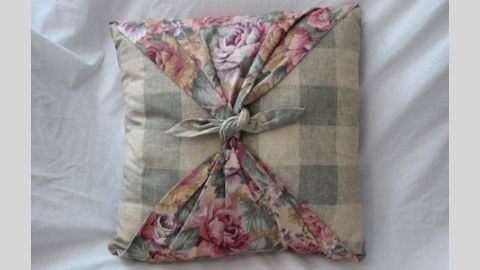
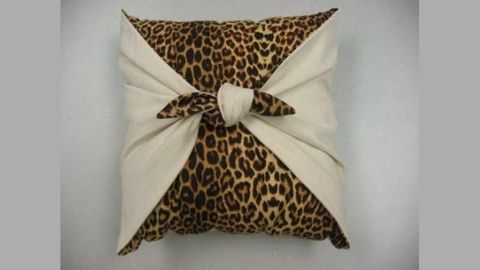
This skirt is made using the same method as the Designer Pillowcase, FL/ST/Construction/2006/102. The top band folds down to form the seam which attaches the skirt ruffles. When finished the seam is enclosed, like a yoke on a man’s shirt. The fold at the top of the band forms the elastic casing.
The middle and bottom ruffles are cut the same width but are different lengths. The ruffle pieces are gathered as one and sewn to the top band. After sewing the seam the ruffles are pulled out through the back seam. The back seam is sewn last with the middle ruffle sewn into the seam. Tacking the center back seam down at the top and bottom gives a finished look.
Supplies needed:
- 1/2 yard coordinating cotton/poly cotton fabric for top band
- 1/2 yard coordinating cotton/poly cotton fabric for middle ruffle
- 1 yard coordinating cotton/poly cotton fabric for bottom ruffle
- 3/4" non-roll elastic to fit waist
- Matching thread
- Heavy thread (buttonhole twist) for gathering
- Safety pin or bodkin
- Basic Sewing Supplies (see Fact Sheet: FL/ST/Construction 2008/101)
Pattern markings:
Sewing clue—Becoming familiar with the markings in the Diagram Key will aid you in reading instructions. Most patterns have similar keys.
Diagram Key:

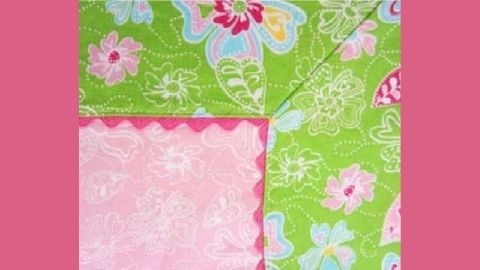
Right side of top band

Right side of middle ruffle

Wrong side of middle ruffle

Right side of bottom ruffle

Wrong side of bottom ruffle
Fabric preparation:
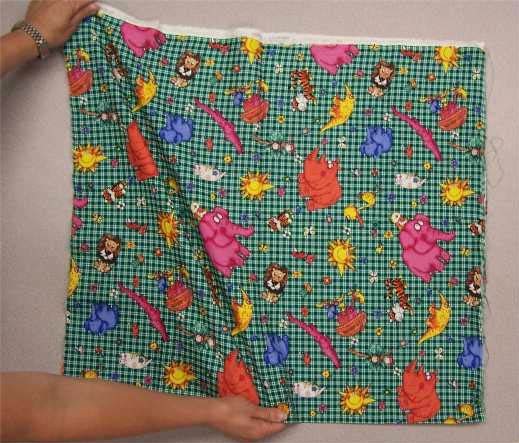 Wash fabric before cutting to eliminate shrinkage and remove excess dye. Straighten edges and press fabric.
Sewing clue—Woven fabric grainline is established by pulling a thread across the fabric from selvage edge to selvage edge. Clip ½ inch into the fabric along one selvage edge. Grasp one or two crosswise threads between your thumb and index finger and pull gently while pushing the fabric toward the other selvage edge with your other hand. Cut along the line left by the pulled threads. Another way to straighten the edge is to tear the fabric. Tearing the fabric causes the edge to become stretched and ruffled. Shrink the stretched edge by steam pressing the fabric back into shape. The fabric will now lie flat. Fold the fabric in half matching the selvages and the newly straightened edges. The fabric should lie flat with the edges matching. If it does not lie flat, realign the fabric by holding the long edge of the
fabric along the selvage edge and gently “pulling” the fabric on the bias. This will realign the threads so that the crosswise threads run at right angles to the lengthwise threads.
Determine the size of skirt:
Step #1
- Take and record your measurements. It is best to work with a partner.
- For greater accuracy use a good tape measure, avoid taking measurements over bulky clothing, and stand straight while being measured.
- Tie a string snuggly not pinching around natural waist and measure over the string keeping tape measure snug. Record your waist measurement.
- Hip measurement is taken at the fullest part usually 7 to 9 inches below the waistline (this measurement will vary according to height and body build). Make sure that the tape measure remains parallel with the floor. Record your hip measurement.
- Measure from the string tied around the natural waistline down to the desired finished length. Record your length measurement.
Table 1
| Record Measurements | |
|---|---|
| Waist | |
| Hip | |
| Desired finished length |
|
Sewing clue — Wearing ease is the ease built into a pattern to make the finished garment comfortable to wear. Design ease is the ease in addition to the wearing ease which creates the overall outline or style of the finished garment. Wearing ease and design ease determine the fullness of the garment. The wearing ease recommended for the top band of this skirt is 1.2 times the hip measurement. The design ease of a garment is classified as being: semi-fitted, loose fitting, very loose, or extra loose. Ease equals the hip measurement times: 1.2, semi- fitted; 1.3, loose fitting; 1.5, very loose; and 2.0, extra loose. You can be the designer and select the desired ease for the ruffle fullness.
Determine the width of top band and ruffles:
Note—round to the nearest 1/2 inch.
| Table 2 - Skirt Design and Fitting Ease of Top Band | |||||||||
|---|---|---|---|---|---|---|---|---|---|
| This skirt is designed for a center back seam using 44/45” width fabric. | |||||||||
| Top Band | Hip Measurement (Table 1) | X | Wearing Ease | = | Skirt Circumference (inches) | + | Seam Allowances | = | Width of Top Band |
| Sample | 29" | X | 1.2 | = | 34.8" or 35" | + | 1" | = | 36" |
| Your Measurement | X | 1.2 | = | + | 1" | = | |||
| Table 3 - Determine the Width of the Middle and Bottom Ruffles | |||||||||
|---|---|---|---|---|---|---|---|---|---|
| The ruffle fullness standard is 1.5 or 2 times wider than the piece it is attached to. If the width of the ruffle is greater than the width of the fabric—minus the selvage edge— the skirt ruffle is cut in three pieces with a seam on each side and one in the center back. | |||||||||
| Design Fullness Desired | Width of Top Band (Table 2) |
X | Design Ease 1.5 or 2 |
= | Ruffle Fullness |
||||
| Width of Top Band— Sample | 36" | X | 1.5 | = | 54" | ||||
| Width of Top Band— Your Measurement | X | = | |||||||
| Table 4 - Width of Front Middle and Bottom Ruffles | |||||||||
|---|---|---|---|---|---|---|---|---|---|
| Ruffle Fullness (Table 3) |
÷ | 2 | = | Ruffle Width |
+ | Seam Allowance |
= | Front Ruffle Width |
|
| Skirt Front Ruffle— Sample | 54" | ÷ | 2 | = | 27" | + | + 1" | = | 28" |
| Skirt Front Ruffle— Your Measurement |
÷ | 2 | = | + | + 1" | = | |||
| Table 5 - Width of Back Middle and Bottom Ruffles | |||||||||||||
|---|---|---|---|---|---|---|---|---|---|---|---|---|---|
| Ruffle Fullness (Table 3) |
÷ | 2 | = | Ruffle Width |
÷ | 2 | = | 1/2 Ruffle Width |
+ | Seam Allowance |
= | Back Ruffle Widths |
|
| Skirt Back Ruffle— Sample |
54" | ÷ | 2 | = | 27" | ÷ | 2 | = | 13.5" | + | + 1" | = | 14.5" |
| Skirt Back Ruffle— Your Measurement |
÷ | 2 | = | ÷ | 2 | = | + | + 1" | = | ||||
Length of top band and middle and bottom ruffles:
| Table 6 - Skirt Length |
|---|
| Determine the length of the top band, middle ruffle, and bottom ruffle. |
| Finished skirt length = ____________(Table 1) Finished skirt length divided by 3 = 1/3 of finished length ____________. Note—round to the nearest 1/2 inch |
| Sample skirt length = 22" . Finished skirt length divided by 3 = 1/3 of finished length = 7 1/3" |
| 6A: Top Band | |||||||
|---|---|---|---|---|---|---|---|
| Piece Length | + | Casing | + | Seam Allowance |
= | Top Band Length |
|
| Top Band— Sample | 1/3 of finished length 7 1/2" X 2 = 15" |
+ | 1 1/2" | + | 1" | = | 17 1/2" |
| Top Band— Your Measurement | 1/3 of finished length _______ X 2 = _______ |
+ | 1 1/2" | + | 1" | = | |
| 6B: Middle Ruffle | |||||||
|---|---|---|---|---|---|---|---|
| Piece Length | + | Hem Allowance |
+ | Seam Allowance |
= | Middle Ruffle Length |
|
| Middle Ruffle—Sample | 1/3 of finished length 7 1/2" | + | 1" | + | 1" | = | 9 1/2" |
| Middle Ruffle— Your Measurement |
1/3 of finished length ________ | + | 1" | + | 1" | = | |
| 6C: Bottom Ruffle | |||||||
|---|---|---|---|---|---|---|---|
| Piece Length | + | Hem Allowance |
+ | Seam Allowance |
= | Bottom Ruffle Length |
|
| Bottom Ruffle— Sample— |
1/3 of finished length 7 1/2" X 2 = 15" | + | 1" | + | 1" | = | 17" |
| Bottom Ruffle— Your Measurement |
1/3 of finished length ______ X 2 = ______ | + | 1" | + | 1" | = | |
Sewing clue—if the individual is short or wants a long skirt using the 1/3 measurement will look out of proportion. To remedy this problem check to see that the top band ends near the hip level. Subtract the new top band length from the desired finished length,
the difference becomes the bottom ruffle measurement. Divide the bottom ruffle length by 2 to determine the middle ruffle length.
Cutting instructions
Step #1
Dimensions for top band:
- Width of top band piece: ______Table 2.
- Length of top band piece: ______ Table 6A.
- From the top band fabric—cut one. Top band piece: ______ Width by ______ Length.

Step #2
Dimensions for middle ruffle front:
- Width of front ruffle piece: ______Table 4.
- Length of front ruffle piece: ______Table 6B.
- From the middle ruffle fabric—cut one. Middle front ruffle piece: ______Width by ______Length.

Dimensions for middle ruffle back:
- Width of back ruffle piece: ______Table 5.
- Length of back ruffle piece: ______Table 6B.
- From the middle ruffle fabric—cut two. Middle back ruffle pieces: ______ Width by ______ Length.
Step #3
Dimensions for bottom ruffle front:
- Width of front ruffle piece: ______ Table 4.
- Length of front ruffle piece: ______Table 6C.
- From the bottom ruffle fabric—cut one. Bottom front ruffle piece: ______Width by ______Length.
Dimensions for bottom ruffle front:
- Width of back ruffle piece: ______Table 5.
- Length of back ruffle piece: ______Table 6C.
- From the bottom ruffle fabric—cut two. Bottom back ruffle pieces: _______Width by ______Length.
Sewing clue—The width will be on the crosswise grain and the length will be on the lengthwise grain.
Skirt Construction
Step #1
- To prevent the edges from fraying select an appropriate seam finish for your fabric.
Sewing clue—A seam finish is a way to prevent a seam from fraying. An easy finish is to zig-zag over
the seam’s raw edge. Set the stitch length at 2.5 and the width at 3.5.On a light weight fabric a three
step zig-zag stitch can help prevent a puckered edge. Serging over the raw edge would also prevent the edge from fraying.
Top band—finish center back seam

Middle ruffle—finish
side seams and center back seam

Bottom ruffle—finish
side seams and center back seam
Step #2
- With right sides together, pin the side seams of the front middle ruffle to the back middle ruffles.
- Sew side seams using a 1/2" seam allowance.
- Repeat process on the bottom ruffle.
Step #3
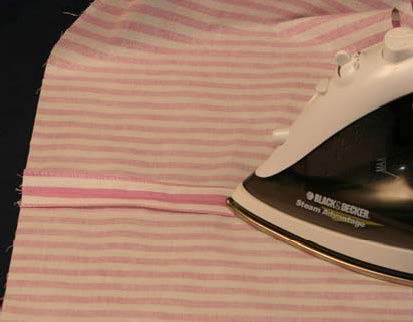
- Press seams flat to set stitches. Press seam allowances open.
Sewing clue—Pressing is an important part of sewing. Press each seam flat on the stitching line on both sides to set the stitches before pressing the seam open.
Step #4
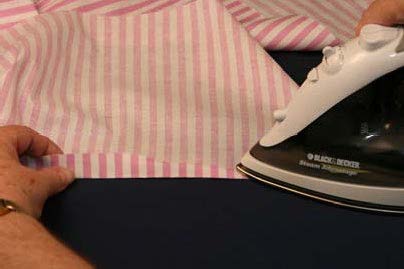
- Make a narrow hem on the bottom of the middle ruffle. Using a seam gauge press up the bottom edge 3/4".
- Press raw edge towards fold and press again—forming a hem—encasing raw edge.
Step #5
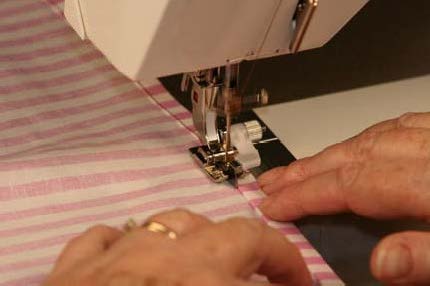
- Stitch 1/8" from the folded edge of the top of the hem.
- Repeat on bottom ruffle.
Sewing clue——Use the hem foot of your sewing machine as a guide to stitch close to the edge of the fold. Place the foot guide next to fold and adjust the needle to be 1/8" from the edge.
Step #6
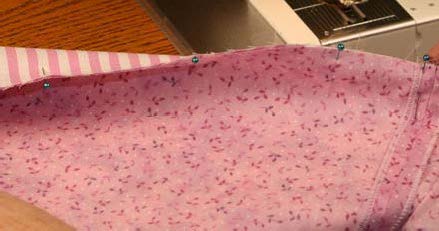
- Place middle ruffle wrong side to the right side of bottom ruffle matching upper edges oftheruffles and pin together.
- Wind bobbin with heavy thread (buttonhole twist). Place in bobbin case The heavy thread will prevent the gathering stitch from breaking.
Step #7
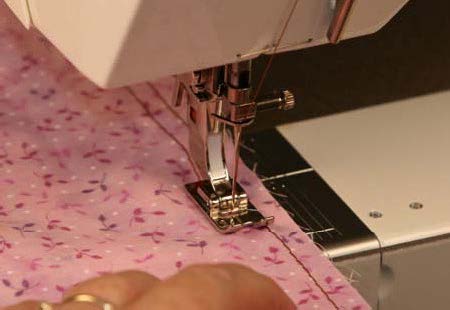
- Sew two gathering stitches along the top edge of the ruffles from edge to edge on the right side of the fabric. One row of stitching should be at 5/8" and the other at 3/8". Leave a long tail at the beginning and the end, do not back stitch.
Step #8
Sewing clue—The stitch length is set at the longest stitch length on the machine for a gathering stitch This allows the bobbin thread to be pulled easily. Be sure to reset stitch length back for normal sewing.
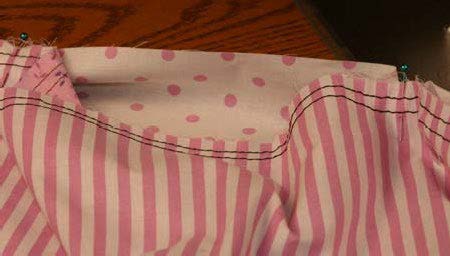
- Divide the top band into quarters. Place a pin to mark the. center. Place the next two pins halfway between the center and the side seam.
- Place a pin to mark the center of the ruffle pieces. This pin will line up with the center pin on the top band. The two pins halfway between the center and the back on the top band will line up with the ruffle side seams.
- With right sides together, match center and side seams. Repin seam.
Step #9
- Lay top band on a flat surface with right side up. Pin the ruffles to the top band matching edges together.
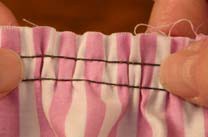
- Gather the middle and bottom ruffles to match the skirt top band. Pull only the bobbin threads to gather the ruffles.
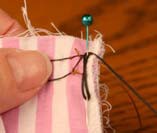
- Place a pin on each side of the back seams and secure the gathering thread by winding around pin.
- Pin baste the ruffles to the top band at 1" intervals. Baste the ruffle to one side of the top band to help hold in place until final stitching, if desired.
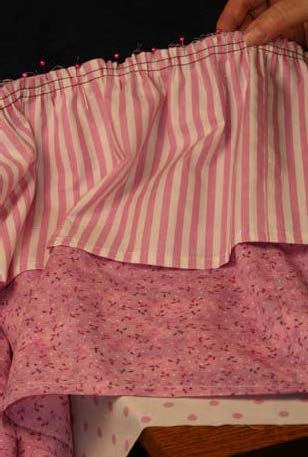
Sewing clue—It is important to pull both threads evenly while gathering. When the gathers fit the straight piece of fabric, even the gathering between the quarter points.
Step #10
- Roll width of gathered ruffles toward the pinned edge. Stop rolling when you reach the center of the top band.
- Top band will lay flat on the table.
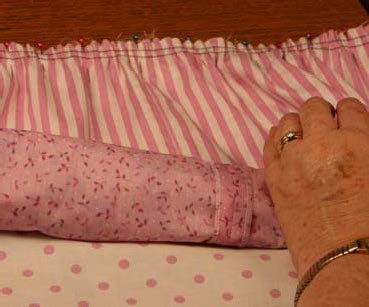
Step #11
- Wrap top band around rolled gathered ruffles. Match raw edge and re-pin.
- Sew a 1/2" seam allowance along the pinned edge. Back stitch three orfour stitches at beginning and end.
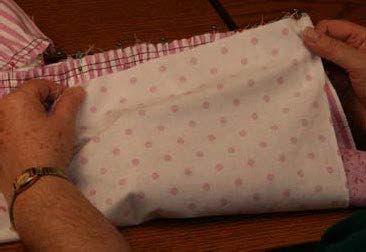
Step #12
- The top band has formed a tube around the rolled gathered ruffles.
- Press seam flat on both sides. Be careful not to press
rolled gathered ruffles.
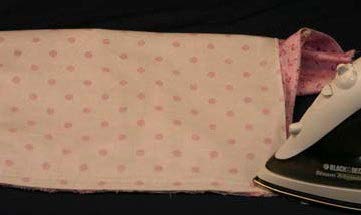
Step #13
- Grasp the top seam with one hand and pull the ruffles through the tube with the other hand.
- Reach into sewn tube and pull the gathered ruffles out through the side opening. The skirt will now be right side out.
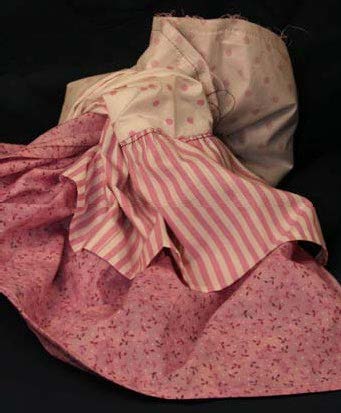
Step #14
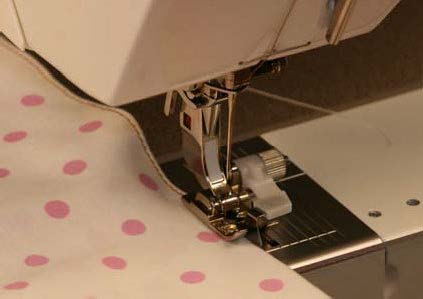
- Press top band flat with no folds next to gathers. Press top fold flat.
- Sew 1/8" from top fold edge.
Sewing clue—Use the hem foot of your sewing machine as a guide to stitch close to the edge of the fold. Place the foot guide next to fold and adjust the needle to be 1/8" from the edge.
Step #15
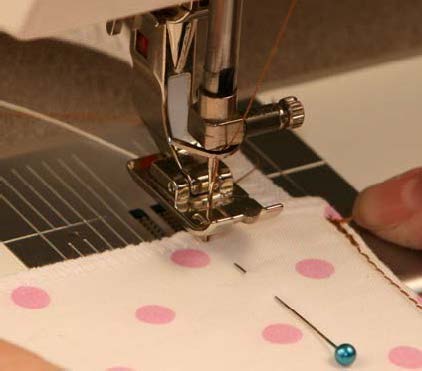
- Place elastic inside top to determine width of casing.
- Push elastic close to stitches, mark with a pin 1/8" below elastic. Drop sewing machineneedleinfabric at pin.
- Remove pin.
Step #16
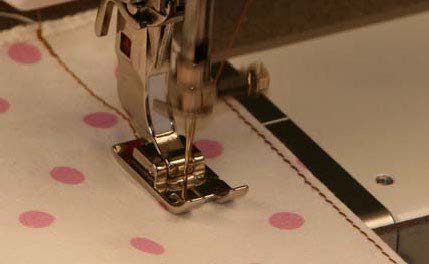
- Remove the elastic before stitching the casing.
Sewing clue—Place a guide next to the folded edge of the fabric at the width needed. This will assist in sewing a straight line. Painter’s tape works well because it has less adhesive than regular masking tape and will not leave a residue on the sewing machine.
Step #17
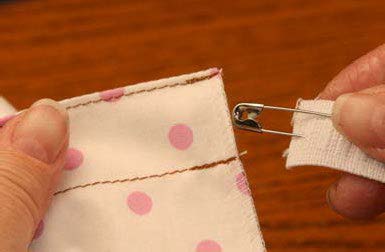
- Securely attach a safety pin or bodkin to one end of elastic. Thread the elastic through the casing opening.
- Pin the loose end of the elastic to the skirt fabric to prevent pulling it into the casing. Pin elastic at the other end.
- Elastic should fit tightly in the casing so that it will not roll.
- Try on skirt to adjust elastic around waist.
Step #18
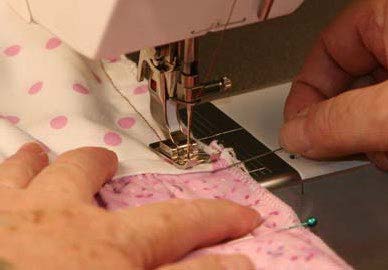
- Pin right sides together for center back seam, matching top of casing, seams and bottom of ruffles.
- Sew center back seam with 1/2" seam allowance
Step #19
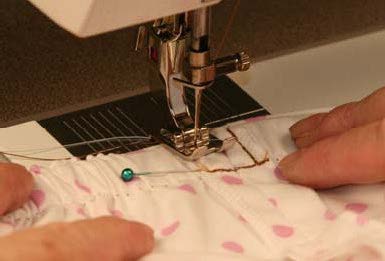
- Press back seam flat. Press seam allowance open.
- Topstitch seam allowance to secure elastic and finish
seam.
Step #20
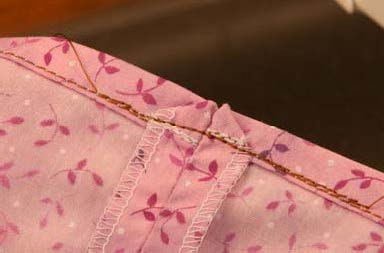
- Fold the seam allowance on the bottom ruffle diagonally toward the seam line, stitch on top of the hem to finish seam.
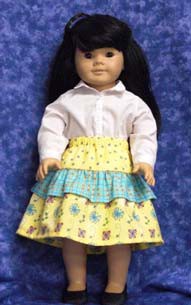
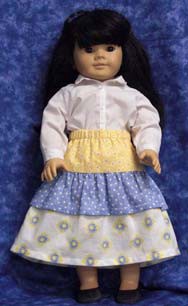
Dropped Waist Skirt with Ruffles for 18" Doll
 Supplies needed:
- 1/4 yard coordinating cotton/poly cotton fabric for top band
- 1/8 yard coordinating cotton/poly cotton fabric for middle ruffle
- 1/4 yard coordinating cotton/poly cotton fabric for bottom ruffle
- 1/2" non-roll elastic to fit waist (approximately 11")
- Matching thread
- Heavy thread (buttonhole twist) for gathering
- Safety pin or bodkin
- Basic Sewing Supplies (see Fact Sheet: FL/ST/Construction 2008/101)
Cutting instructions:
Step #1
- Top band fabric
- Cut one rectangle piece 17" X 6"

Step #2
- Middle ruffle fabric
- Cut one front piece 14" X 3 1/4"
- Cut two back pieces 7 1/2" X 3 1/4"


Step #3
- Bottom ruffle fabric
- Cut one front piece 14" X 6"
- Cut two back pieces 7 1/2" X 6"


Skirt construction:
Step #1
Follow steps for skirt construction as outlined in Dropped Waist Skirt with Ruffles, FL/ST/Construction/2009/205
Authors
Ronda H. Olsen, M.S., USU Extension Agent, Uintah County; Debra Proctor, M.S., USU Extension Agent, Wasatch County; Karen Biers, Ph.D. USU Extension Specialist
Related Research


 Utah 4-H & Youth