Three Methods of Continuous: Band Prairie Points
Fall 2008
Sewing Project Skill: Create a decorative edge for a quilt.
Life Skills: Learning to learn, making decisions, applying technology
Level: 3
The traditional method for making a prairie point edging requires individually cut squares of fabric that can be positioned in several ways to create a variety of edgings. There is another way, though, to make a prairie-point edge that is faster and easier, although there are fewer possibilities for variation. The technique begins with a continuous band of fabric. Because the prairie points are not made individually, they are evenly spaced and are always the same size.
The example shown here yields an edging with finished triangles about 1 ¾" high and 3 ½" wide along the base (an average size). We recommend that you make a sample edging in this size, then (if you like) vary the size when making the edging for a quilt.
Supplies needed:
- Matching or contrasting fabric
- Matching thread
- Rotary cutter and mat
- Basic Sewing Supplies (see Fact Sheet FL/ST/Construction 2007-101)
Fabric preparation:
Step #1
Measure around the quilt to determine the length needed for the Prairie Point edge.
Cut an 8" wide band of fabric the same length as one edge of your quilt plus about 6" extra. (If you are just making a sample to try out the technique, the band can be any convenient length.) The band can be one continuous, unseamed length, or it can be pieced from shorter strips.

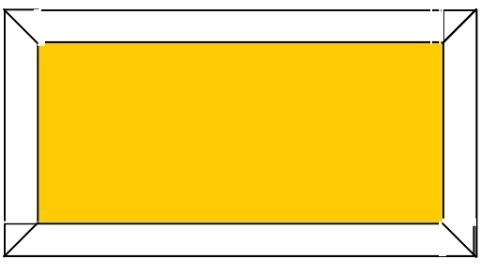
Step #2
Placing wrong sides together, fold the band in half lengthwise; press well.

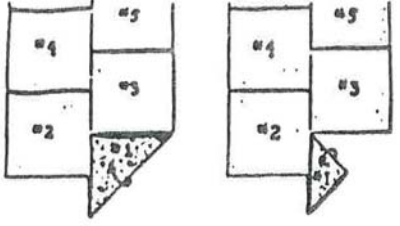
Step #3
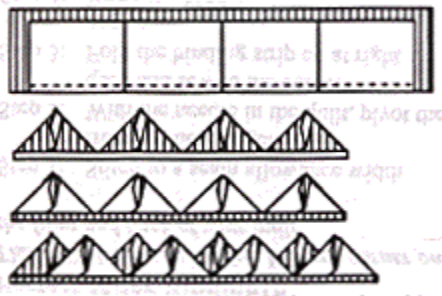
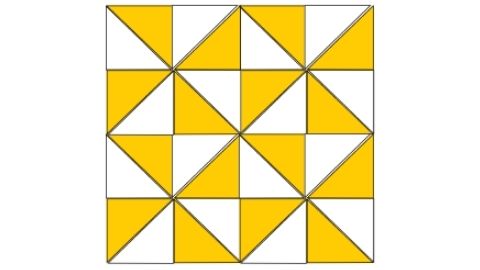
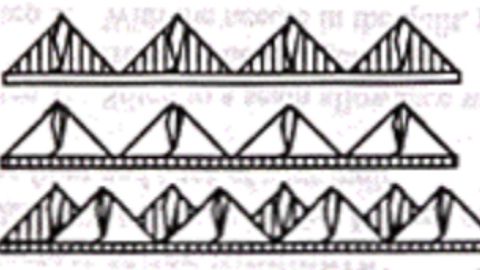
Working on the wrong side of the fabric and beginning at the bottom edge, mark off 4" segments. The 2"x4" section at the bottom of the left side and the same size segment at the top of the right-hand will be cut away. Any extra fabric that is not included in the 4" increments also will be cut off. The marked band will look like the diagram, except that there will be many more repeats. It makes no difference which side is longer, one side might have one more square than the other side.
Step #4
Cut the squares on the marked lines from outer edges to the center fold line. Do not cut the center fold line.

Step #5
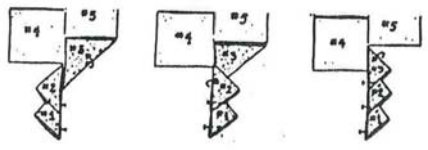
Working at the ironing board so that folds can be pressed as you proceed, turn the fabric face down and fold the points as follows:
a. Begin with Point #1. Place it nearest to you and make the first fold. Then turn the top corner down for the second fold.
b. Start with Point #2, and make the first fold. Now fold Point #1 across the bottom part of Point #2. Make the second fold of Point #2. Point #2 will enclose half of the base of Point #1. Put in place.
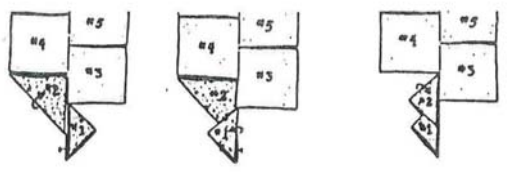
c. Make the first fold of Point #3. Now fold Points #. And #2 over and make the last fold on Point #3. Point #3 will enclose half of the base of Point #2. Pin in place.
d. Continue in this manner, alternating from side to side, until all points are folded and pinned, keeping pins on one side of work.
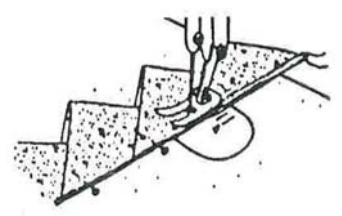
Step #6
Once the band has been folded and pinned, machine stitch about 1/8" from the base edge so the pins can be removed. Press the edging.
Step #7
Repeat to make bands of prairie point edging for each side of the quilt.
Step #8
Pin the edging in place on the right side of the quilt pillow matching raw edges and folding the lining out of the way. Cut off extra whole points that fall beyond the quilt edge (do not cut through points). Ease in the edging to make it fit exactly. (The most extra length you will have to ease in will be 2"; that amount of easing along one side of the quilt probably will not be noticeable.
Step #9
Sew through the prairie points, quilt/pillow top, and batting, taking a ¼" seam allowance. Trim batting close to stitching
Step #10
When all four sides of the quilt have had prairie points sewn to the quilt/pillow top, fold the edging away from the quilt/pillow and hand sew the lining in place along the seam line on the back..
Two fabric continuous Prairie Points
Step #1
Cut 4-1/2" wide strips.
Step #2
On the wrong side, mark a line 1/2" from one long edge. Cut the strips with vertical lines every 4 inches (only down to the 1/2" line).

Step #3
Fold and press each section of the strip diagonally; wrong sides together. Then fold each section diagonally again One of the fabrics will be folded in one direction; the other folded in the opposite direction.

Step #4
Weave and pin the two strips, wrong sides together. Baste zigzag the raw edges. Trim the band to 1/4" allowance.
Step #5
Stitch the band to the edge of the quilt; the points should lay toward the center. Finish by sewing the backing, top and batting together in an envelope style finish or a binding strip can be added on top of the prairie points, layer the quilt, fold the binding strip to the wrong side of the quilt.
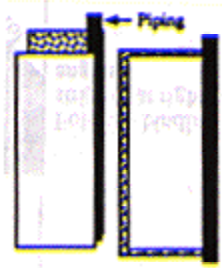
Piped Prairie Points
Step #1
Place a piping strip between two strips of fabric (use a solid and a print or stripes), right sides together, the raw edge of the piping even with raw edges of the fabric. Use a piping foot or a zipper foot and sew through both layers of fabric and piping. Turn fabric right sides out.
Pin raw edges of fabric strips together and baste together 1/2" from edge. Measure the width of strip from this basting line to the top of the piping. Double this measurement to cut the strip from piping just down to basting line.
Fold both sides, of these cut edges, into the center, down to the basting line.
Fold with the print or stripe on the outside; or fold with the print or stripe on the inside, or fold some of each and combine them into an interesting finish.
Pin two prairie point strips together with points offset. Baste zigzag the raw edges to basting line. Place the prairie point strip, right sides together, with the quilt top. Keep raw edges of the quilt even with raw edges of prairie points. Sew using an envelope style finish. http://www.kayewood.com/tips.html
Authors
Revised by Debra Proctor, Wasatch County Extension Agent, FCS/4-H; Ronda Olsen, Uintah County Extension Agent, FCS/4-H
Related Research
Baby Rail Blues
This is a great quilt for beginning and experienced quilters. Step-by-step instructions are included on how to make this baby rail blues quilt.

Binding a Quilt
Thread a needle the same color as the binding. Pull the binding over the edge of the quilt and to the back. Hand stitch the binding hiding the stitches in the fold. Continue around the quilt. Miter the corners in the same fashion as when sewing it on with
Double Crosswise Grain Binding
The final step in finishing a quilt is putting a binding on the edge of the quilt. A crosswise grain binding is cut across the width of the fabric and is straight. This is used for straight-edged quilts. Quilts that are curved need a bias edge that will b
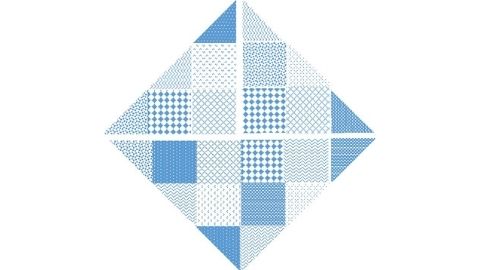
Half Square Triangles, Broken Dishes Block, Pinwheel Block
The triangle is a basic quilt block shape. Half-square triangles are easily made from two squares and cut on the diagonal from corner to corner. When cut the diagonal line is a true bias edge that stretches and distorts very easily. Sewing the bias seam b

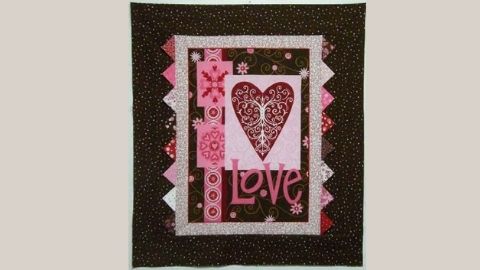
Panel Quilt with Prairie Points
This pattern is for a quick and easy wall hanging using a pre-printed panel for the center and added borders to make it the desired size. It has wider borders on the sides to trick the eye into thinking that the borders are the same size on all four sides

Three Methods of Continuous – Band Prairie Points
The traditional method for making a prairie point edging requires individually cut squares of fabric that can be positioned in several ways to create a variety of edgings. There is another way, though, to make a prairie-point edge that is faster and eas