T-Shirt Quilts
This is a great way to preserve and show off your activities that you have been involved in. It is a great Graduation, wedding, birthday or anniversary gift.
Sizes will vary. It will depend on the size of the t-shirt. Largest square that I cut is 17" because that is how wide wonder-under is, and then I don't have to piece it. You can get this large of a square from most adult shirts. Youth shirts you will have to adjust your sizes.
There are other products out there, besides the wonder-under. But to me they are all too stiff when finished.
Following is a table that has the bed size, mattress size, and quilt size for all the standard bed sizes. I thought that this might be useful when figuring your blocks and square sizes.
Bed and Quilt Sizes
| Bed Size | Mattress Size | Quilt Size |
|---|---|---|
| Twin | 39" X 76" | 72" X 90" |
| Double/Full | 54" X 76" | 90" X 99" |
| Queen | 60" X 80" | 90" X 108" |
| King | 78" X 80" | 108" X 102" |
| California King | 72" X 84" | 102" X 108" |
| Crib | 28" X 51" | 45" X 60" |
Prepping T-Shirt Blocks
- Cut t-shirts apart at the side seams, shoulders, and underarms.
- Cut print side of t-shirt into a square, keeping print as close to center as possible. Most t-shirts you will need to cut as close to the top as possible to keep the print centered.
- Cut a square of wonder-under the same size as the t-shirt square.
- Cut a square of broadcloth, or an old sheet. This piece of fabric will never show in finished product. Just make sure if it is dark that it won't show through a white t-shirt.
- Press the wonder-under to the broadcloth square, with a dry iron. Make sure that the paper side (smooth side) of the wonder-under is up towards the iron. Press completely, making sure that the edges are pressed well. Turn over and press from the fabric side.
- Gently peel paper backing from the fabric square. Starting at a corner.
- With the right side of the t-shirt square facing down on the ironing board. Place the wonder-under square on it with the web side facing the t-shirt. Start at a corner and line up one edge. Then gently press the squares together, trying to keep edges even.
- Trim the block 1" smaller. You can take this fabric off any side that you need to. This gives you the opportunity to keep your fabric square and print centered.
- When doing a quilt you will do this for all blocks of the quilt.
Setting the Blocks Together
You will have to determine how many blocks that you have, and the size quilt that you are making. This will determine how wide the sashing will have to be.
Example of figuring your quilt:
Making a twin size quilt: 72" X 90"
You have 20 blocks that are 16" square, they will be 15.5" when sewed in. You will place them in your quilt 4 blocks across and 5 blocks down.
| 4 blocks across 15.5" x 4 = 62" | 72" - 62" = 10" |
| 5 blocks down 15.5" x 5 = 77.5" | 90" - 77.5" = 12.5" |
10" is divided by 5 strips so that is 2"
12.5" is divided by 6 strips so that is 2.08" round it to 2"
Then you will add 1/2" for seam allowance so you will cut sashing 2 1/2" wide.
If you buy 2 1/2 yards of fabric then you will not have to piece the long runs of sashing in your quilt. You will cut 6 - 2 1/2" strips the length of the fabric.
On your front room floor lay all of your t-shirt blocks out in a 4 X 5 pattern. See what order you want them in. I like to make sure that I don't have similar shirts together. Then stack them in 4 piles. Row 1, Row 2, Row 3, Row 4. Placing block E on the bottom and Block A on the top. (You may want to write on the back of each block it's place i.e. 1A, 1B etc. Remember the back will never be seen in the quilt.)
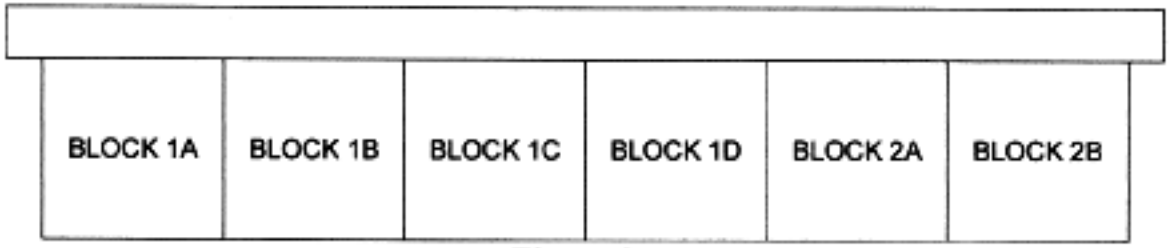
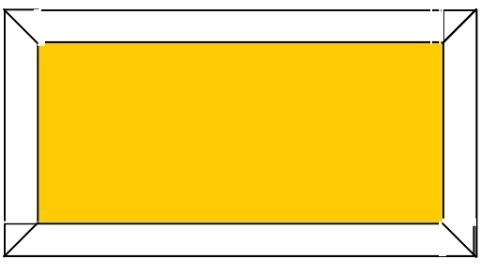
Then you will sew the BOTTOM of blocks A - E to the strips. With right side of t-shirt block facing right side of sashing, bottom edge even with edge of sashing, you will sew 1/4" seam. Fitting about 6 blocks per strip. (figure 1).

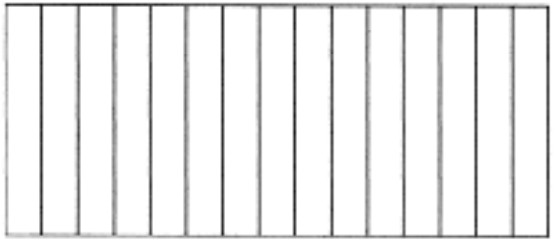
Press with seam allowance going towards the sashing. (fig. 2)
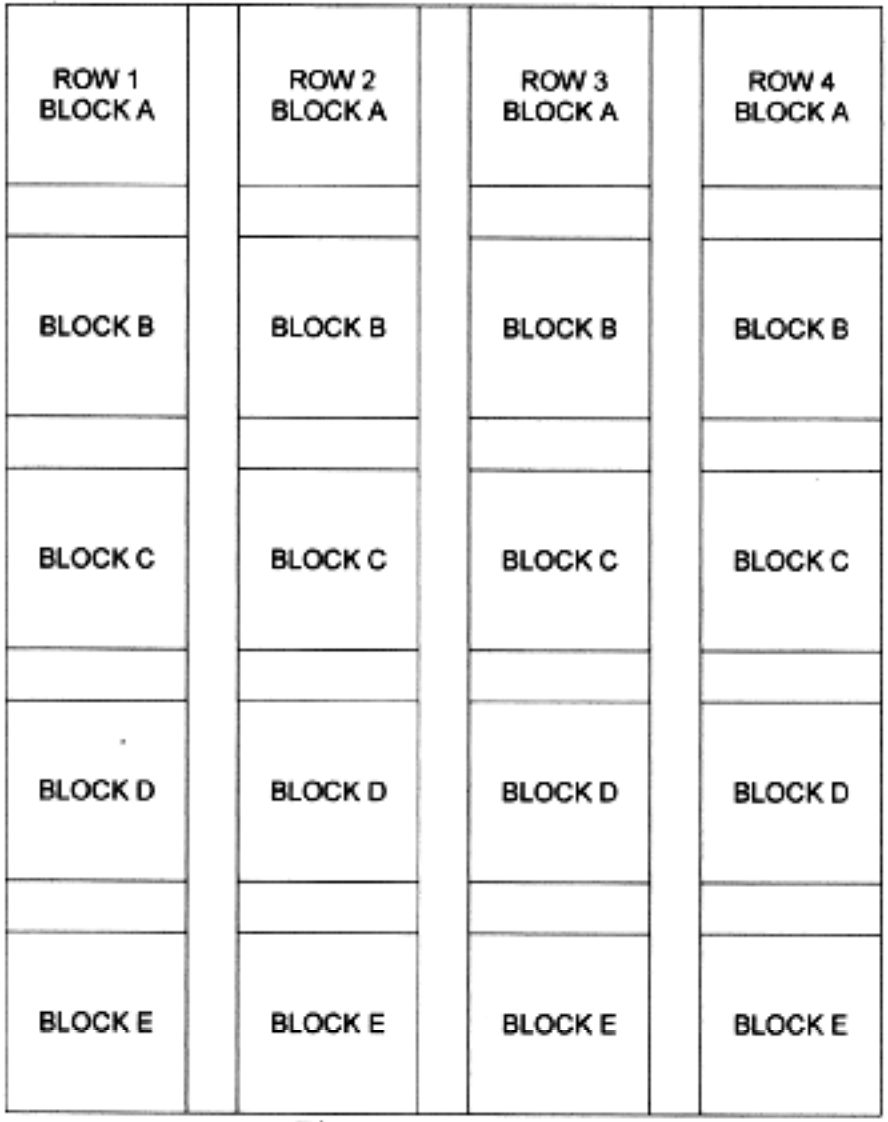
Cut each of these blocks apart. Then sew blocks into rows, ending with block E. You will have 4 strips with 5 blocks in each strip and 4 sashings in each strip (fig. 3)
From the wrong side of strip. Press all seams in the direction of the sashing.
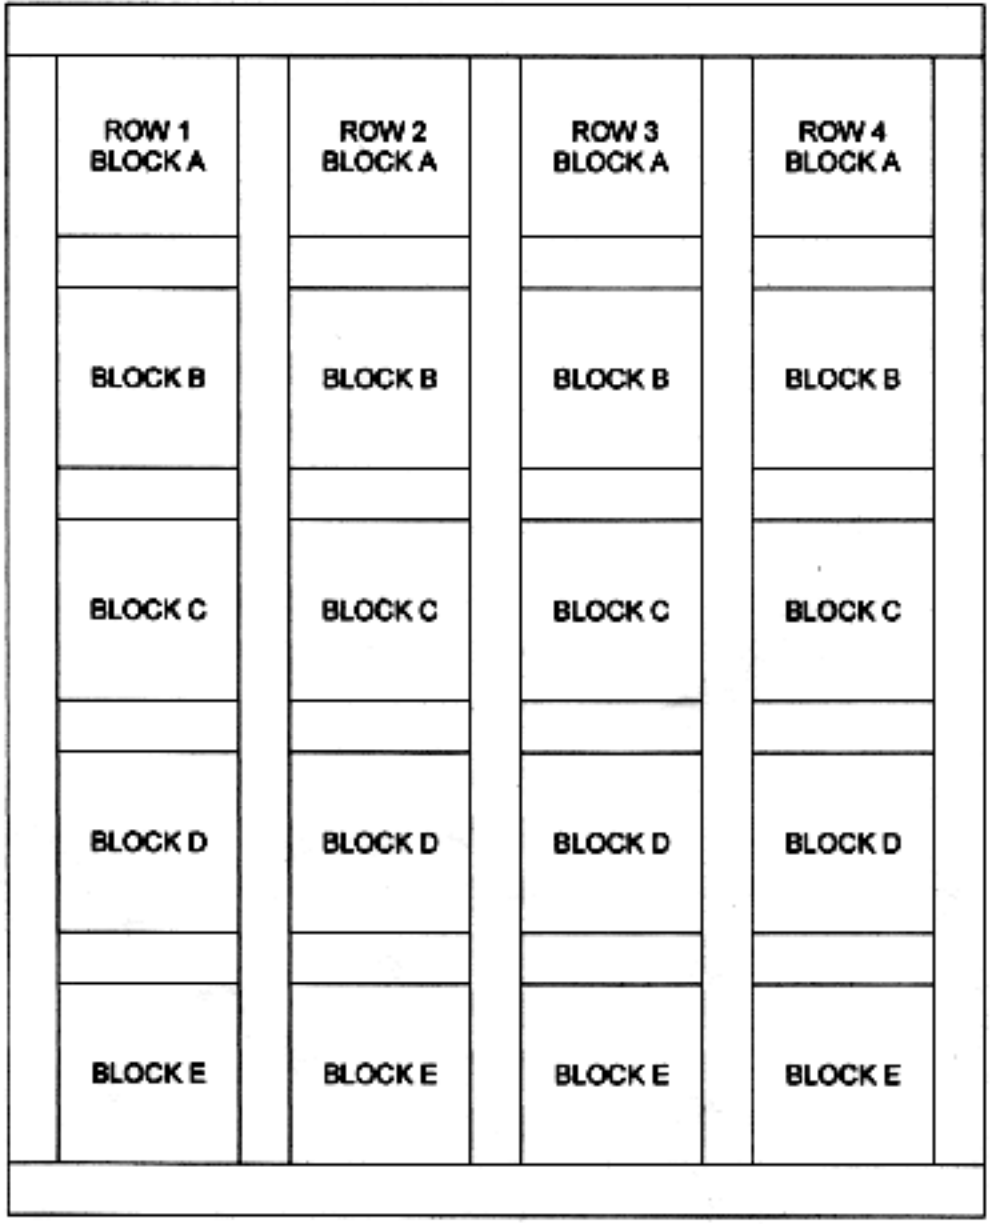
Now sew a long 2 1/2" strip to the right side of Row 2-4. Right side of blocks facing the sashing strip. Sew in 1/4" seam. Sew with the sashing strip down (fig. 4).
Sew making sure all seam allowances are going towards the sashing strip. This will help your quilt to lay flat.


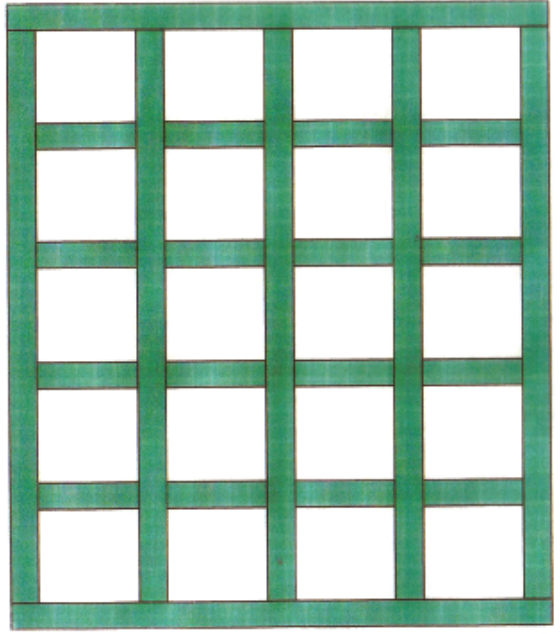
*** Now sew Row 1, Row 2, Row 3, and Row 4 together. You should have 4 rows of blocks & 3 row of sashing. (fig. 5)
Press all seams toward sashing.
Measure your quilt. It should be close to 68 1/2" X 86 1/2". Now figure out how wide the outside borders need to be to make your quilt 72" X 90". It should be close to 2". Remember that your quilt measurement has a 1/2" seam allowance on it. Remember that you need to add the seam allowance to your fabric that you cut. Cut your boarder going the length of your fabric like you did the sashing strips. You will need 4 of them. Sew them on your quilt, starting with the side strips. Then the top and bottom strips.
Press the seam towards the sashing.
Now you have a finished quilt top.

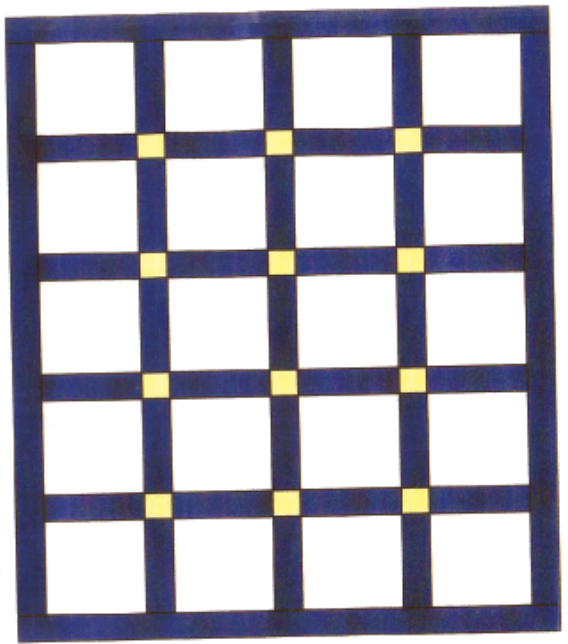
If you want to put a colored square in the corners, you will only cut 3 strips of sashing 2 1/2" wide and you will cut on strip of sashing 16" wide. Cut a 45" wide strip of constrasting fabric 2 1/2" wide. After you completed figure 3, you will cut the 16" wide strip of sashing to 45" long. Placing sashing strip and contrasting color strip, right sides together sew 1/4" seam along long side. Press seam allowance towards the sashing piece. Cut this into 15- 2 1/2" wide pieces. (Figure 6)
Now sew each of these strips together, form 3 long strips. Making sure that the sashing piece is on each end. You will have to unpick one piece of contrast color off of the end of each strip. (figure 7)
Now you will sew these to the right side of blocks 2-4. Make sure that the contrast color lines up with the sashing strip between your blocks.
Now continue as stated as stated above from ***
Related Research
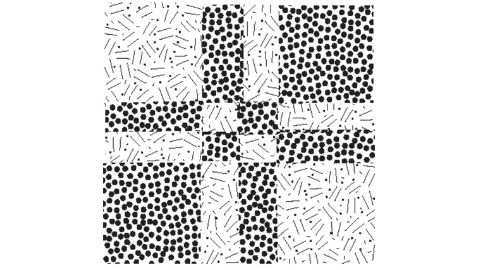
Baby Rail Blues
This is a great quilt for beginning and experienced quilters. Step-by-step instructions are included on how to make this baby rail blues quilt.

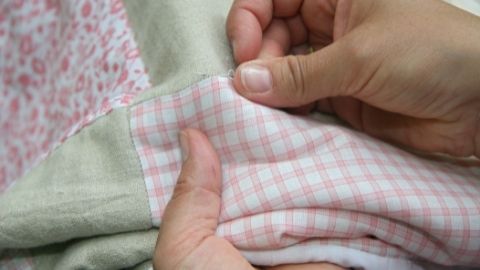
Binding a Quilt
Thread a needle the same color as the binding. Pull the binding over the edge of the quilt and to the back. Hand stitch the binding hiding the stitches in the fold. Continue around the quilt. Miter the corners in the same fashion as when sewing it on with
Double Crosswise Grain Binding
The final step in finishing a quilt is putting a binding on the edge of the quilt. A crosswise grain binding is cut across the width of the fabric and is straight. This is used for straight-edged quilts. Quilts that are curved need a bias edge that will b
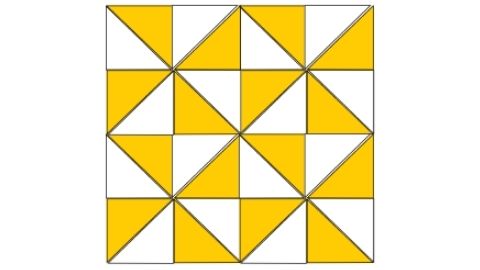
Half Square Triangles, Broken Dishes Block, Pinwheel Block
The triangle is a basic quilt block shape. Half-square triangles are easily made from two squares and cut on the diagonal from corner to corner. When cut the diagonal line is a true bias edge that stretches and distorts very easily. Sewing the bias seam b

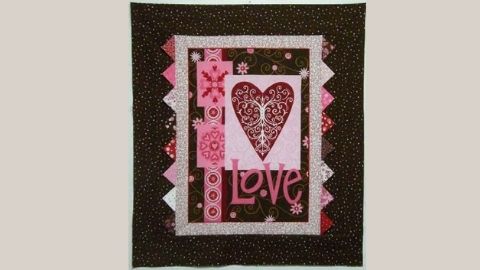
Panel Quilt with Prairie Points
This pattern is for a quick and easy wall hanging using a pre-printed panel for the center and added borders to make it the desired size. It has wider borders on the sides to trick the eye into thinking that the borders are the same size on all four sides


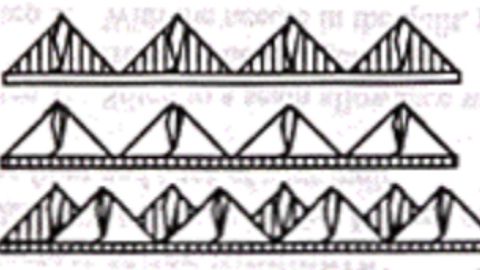
Three Methods of Continuous – Band Prairie Points
The traditional method for making a prairie point edging requires individually cut squares of fabric that can be positioned in several ways to create a variety of edgings. There is another way, though, to make a prairie-point edge that is faster and eas