Hyperlinks
Video Instructions
Please Note: This guide assumes you have already finished the first two steps, however you may navigate back to step 1 or 2 if you need assistance.
Step 1 - Login
The steps to logging in are found by clicking here.
Step 2 - Edit Mode
Click the green "Main Content" button to enter the WYSIWYG (What You See Is What You Get) editor.
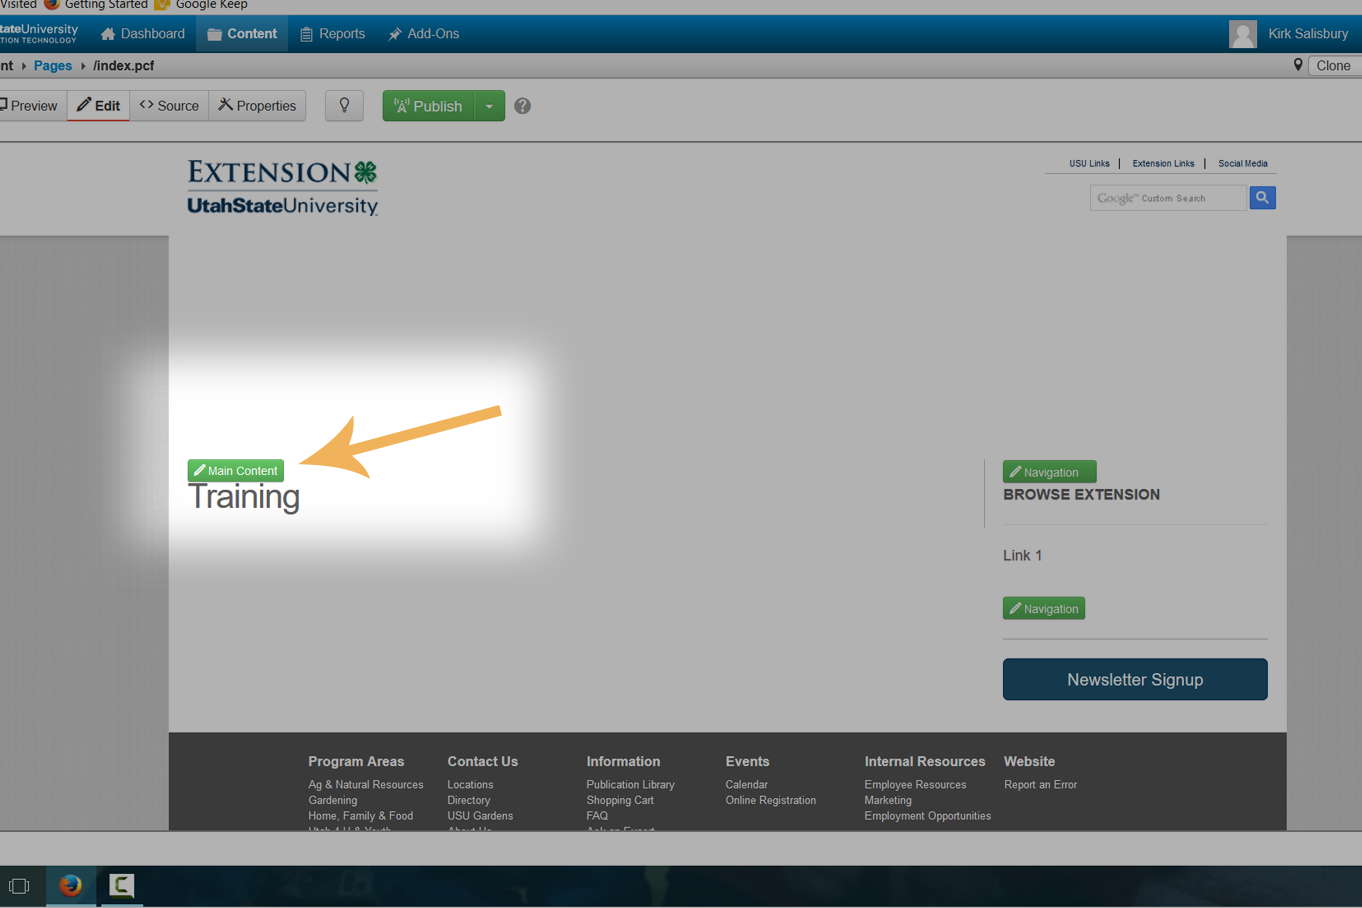
Warning! Only click the green "Main Content" box. Attempting to edit either "Navigation" region will not work.
Step 3 - Hyperlink Button
- Select the text which should become the hyperlink.
- With the text highlighted, click the icon of the chain link in the toolbar.
![]()
Pro Tip! You can make either text or an image a hyperlink. To make an image a hyperlink, instead of highlighting text, simply highlight the image and then click the chain link icon.
It's not always a good idea to make an image a hyperlink. Always be sure the image has
- A clear Call to Action, ie. Learn More or Click Here.
Step 4 - Insert Link
Complete all of the necessary and suggested fields for the "Insert Link" dialogue box.
- The URL is the web address
- When linking to a file or webpage on the website, ALWAYS use the icon of the folder with the magnifying glass (see tip below).
- Determine if the link should open in the current tab, or open a new tab in your browser.
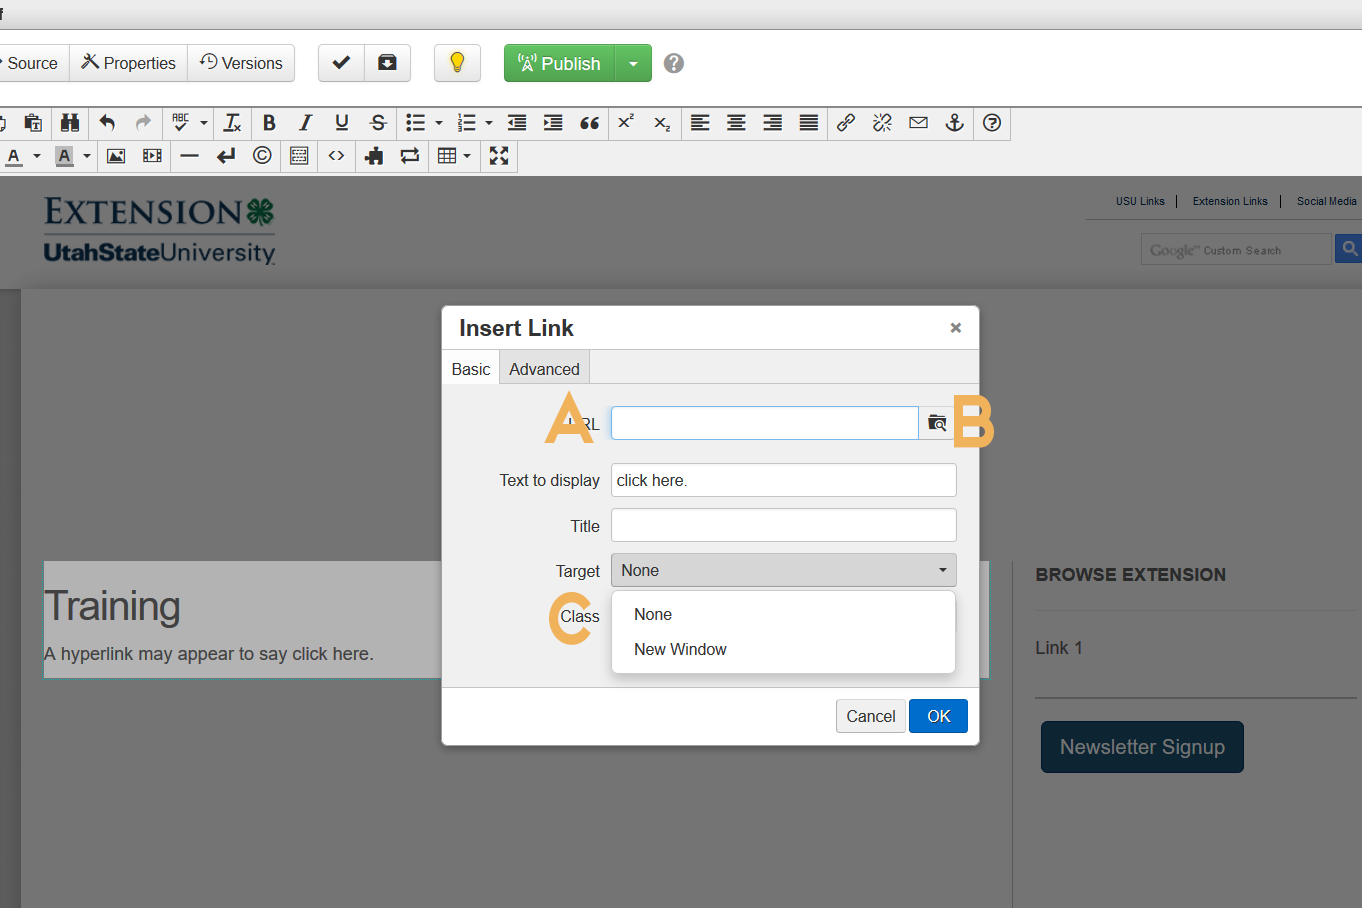
Extra Info!
A) A hyperlink can be any URL which is published on the web. For example, you can link to a PDF document, an image, or (most commonly) to another webpage or website.
B) Using the icon of the folder with the magnifying glass will create a "dependency tag." Dependency tags are used in OU Campus to ensure links stay connected, even when a file is moved or renamed.
C) Only use the default setting of "None" when linking to a page within the site. However, when opening a document or a link to a different site, use the "New Window" option.
Extra Extra Info!
Title Field) This field is not required, but it is helpful for accessibility issues. For example, if a link which says "click here" may not tell the user much about the link, however the title tag will tell you more upon hovering over the link.
Title Field) This field is not required, but it is helpful for accessibility issues. For example, if a link which says "click here" may not tell the user much about the link, however the title tag will tell you more upon hovering over the link.
Step 5 - Save & Publish
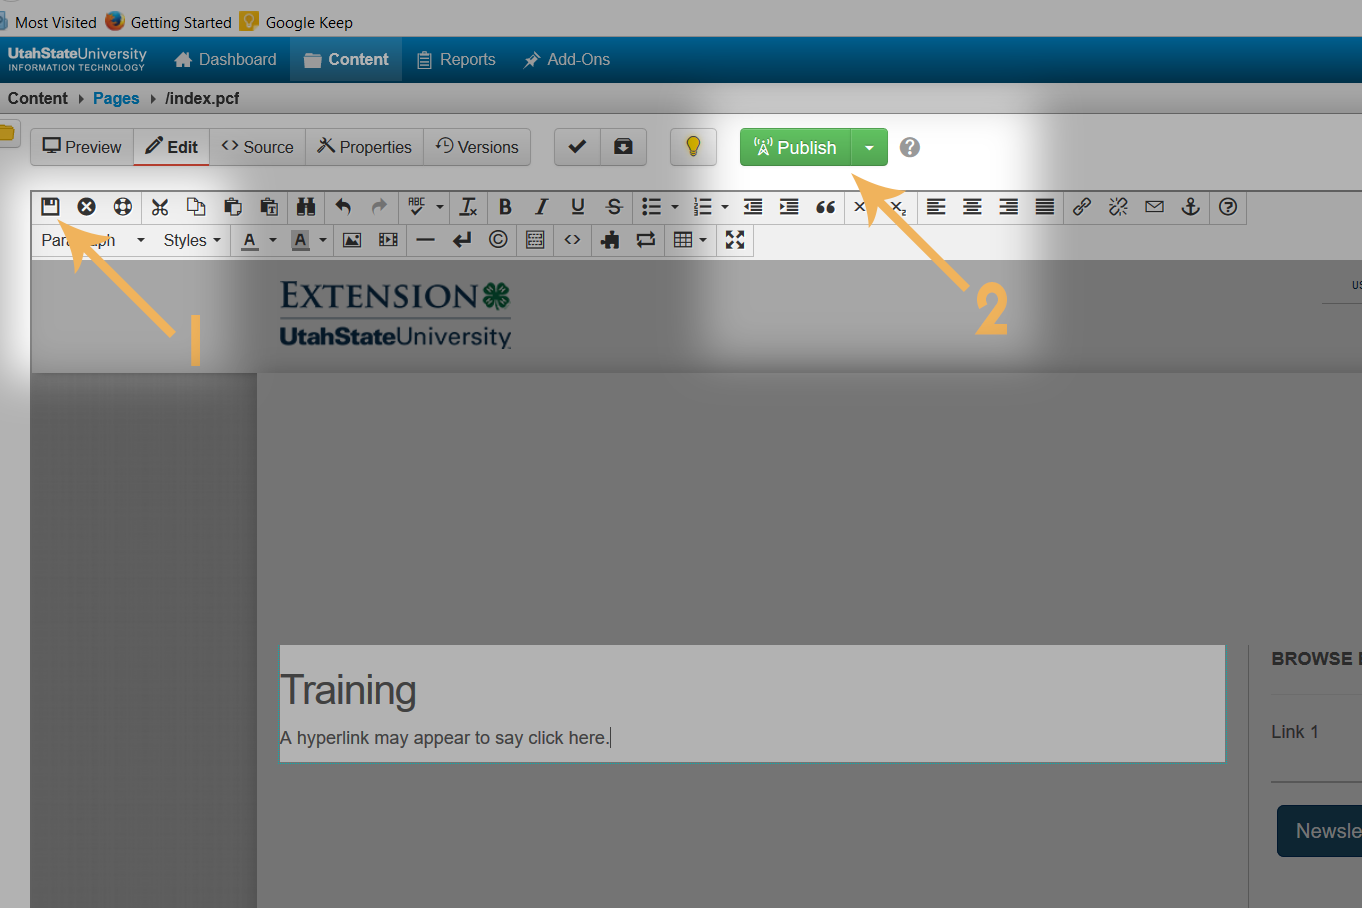
- Click the disc icon to save
- Click "Publish." A publish dialogue box will appear. Run the spell checker, and any other appropriate/relevant checks. Again, click the green "Publish" button.