Adding Files
Video Instructions
Please Note: This guide assumes you have already finished the first two steps, however you may navigate back to step 1 or 2 if you need assistance.
You may notice that these steps are very similar to inserting a hyperlink, or adding an image.
You may notice that these steps are very similar to inserting a hyperlink, or adding an image.
Step-by-Step Instructions
Step 1 - Login
The steps to logging in are found by clicking here.
Step 2 - Edit Mode
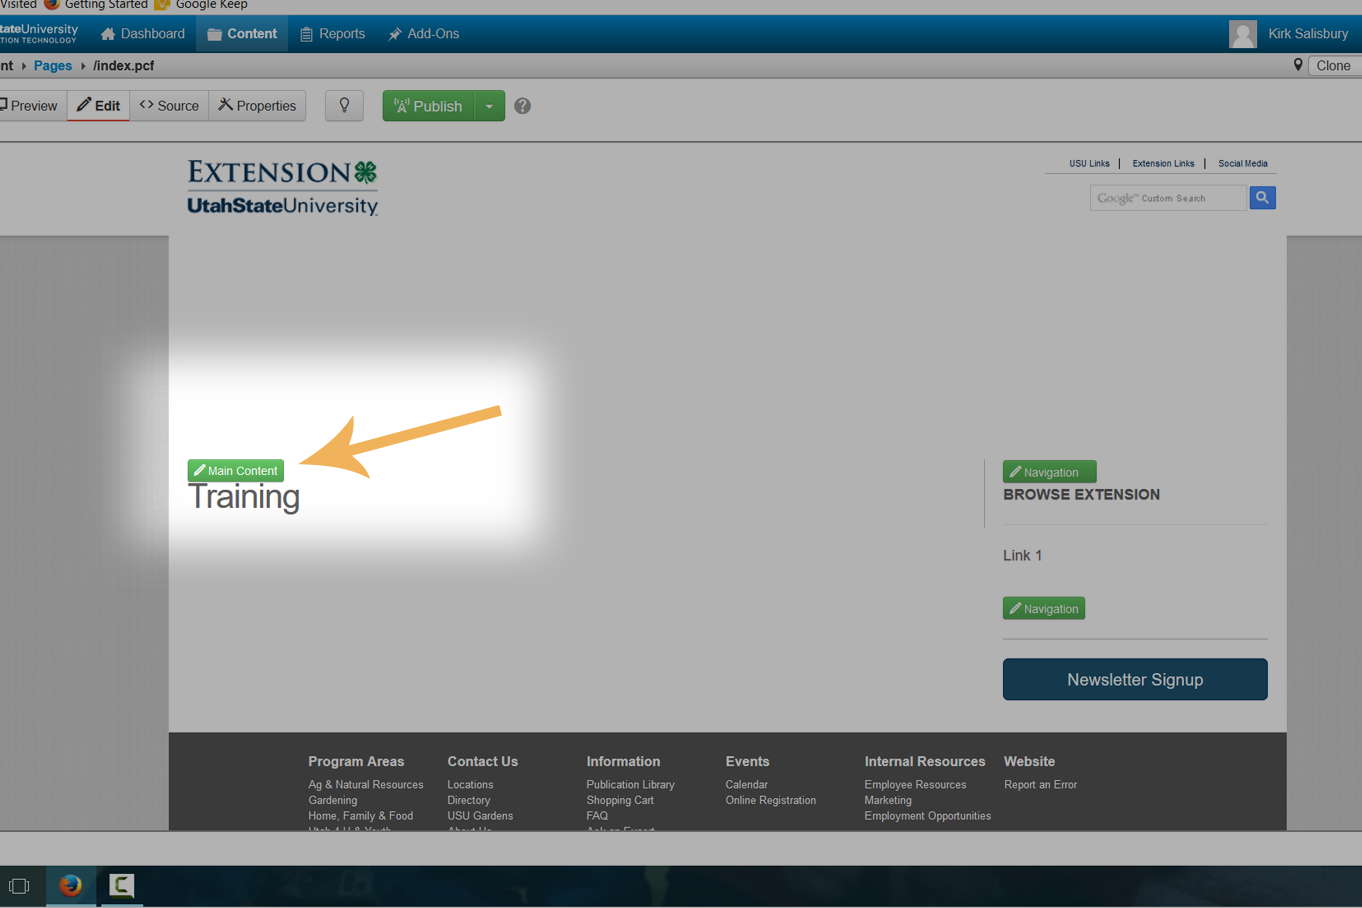
Click the green "Main Content" button to enter the WYSIWYG (What You See Is What You Get) editor.
Warning! Only click the green "Main Content" box. Attempting to edit either "Navigation" region will not work.
Step 3 - Hyperlink icon in toolbar.
![]()
- Highlight the link (or select an image*) which you would like to link to a file.
- Then click the "insert/edit link" icon in the toolbar.
*Please Note: It is not common to link through a file through an image. Please take extra consideration if you are going to do this.
Step 4 - Hyperlink Inserter

- Locate the file which has been uploaded to your site.
- Give the link a title.
- Select to open the file in a "New Window"
- Refer to the "Pro Tip" below.
Accessibility Tip: A title is strongly recommended. This allows screen readers for the blind to describe the file. Keep the title short and accurate.
Pro Tip (Optional)! Add a "Class" to give your button some style. Styles can be found here.
Step 5 - File Selector
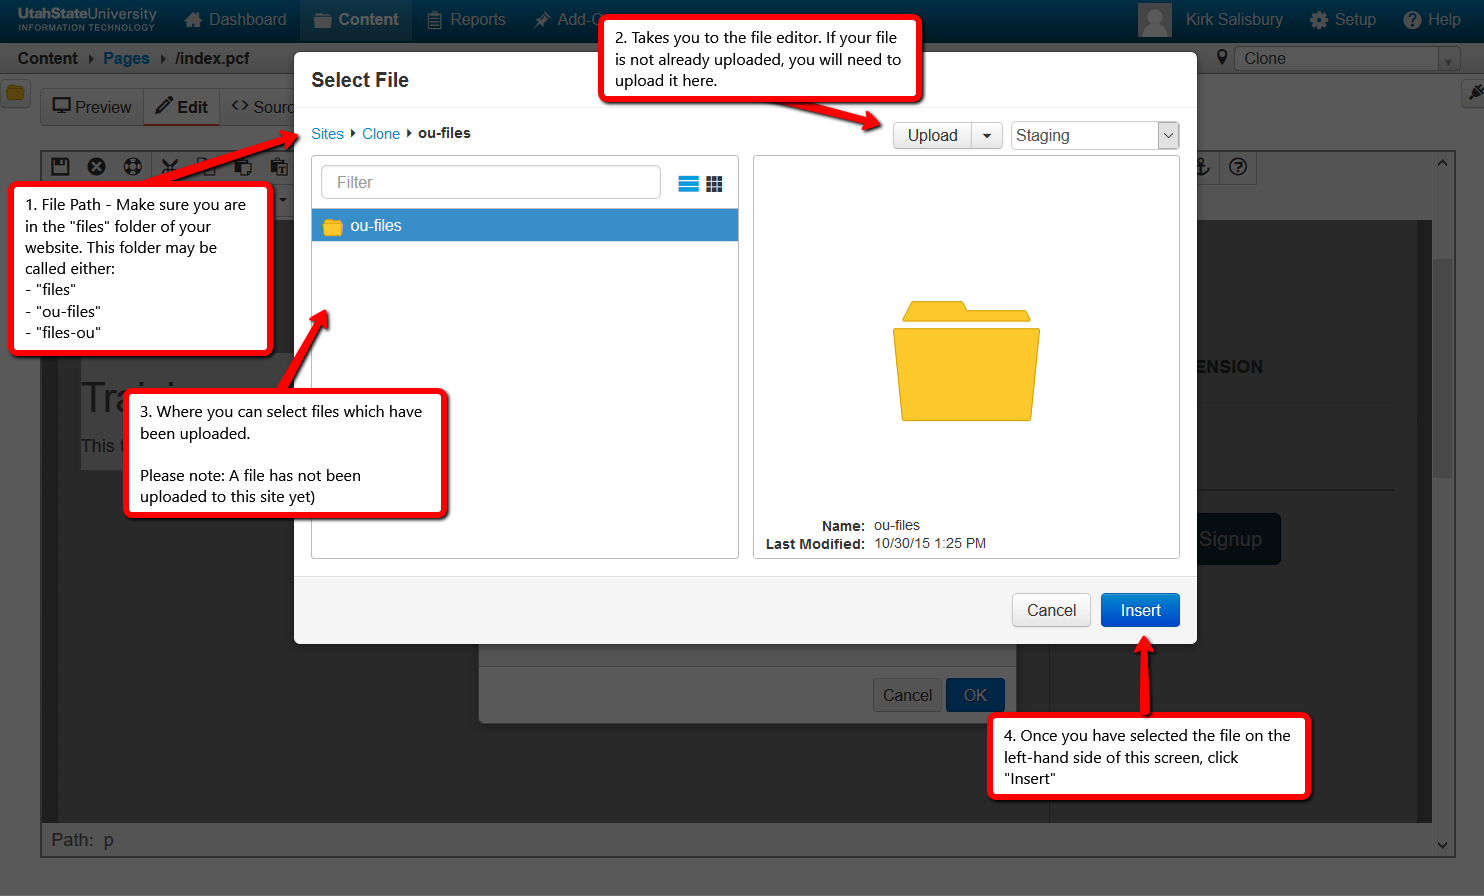
- "File Path" - Be sure that the files is being uploaded into the correct directory (which is always within the "files" folder of your site).
- "File Uploader" - If your file is not on the server yet, you will need to upload the image, continue to step 6. Otherwise, select your file and skip step 6.
- "File Manager" - Where you will navigate to your file. The search filter easily finds files by their name. The selected file will appear in the window viewer on the right.
- "Insert" - After you have selected the file, click "Insert" and add any relevant criteria found in step 4.
Step 6 - File Uploader
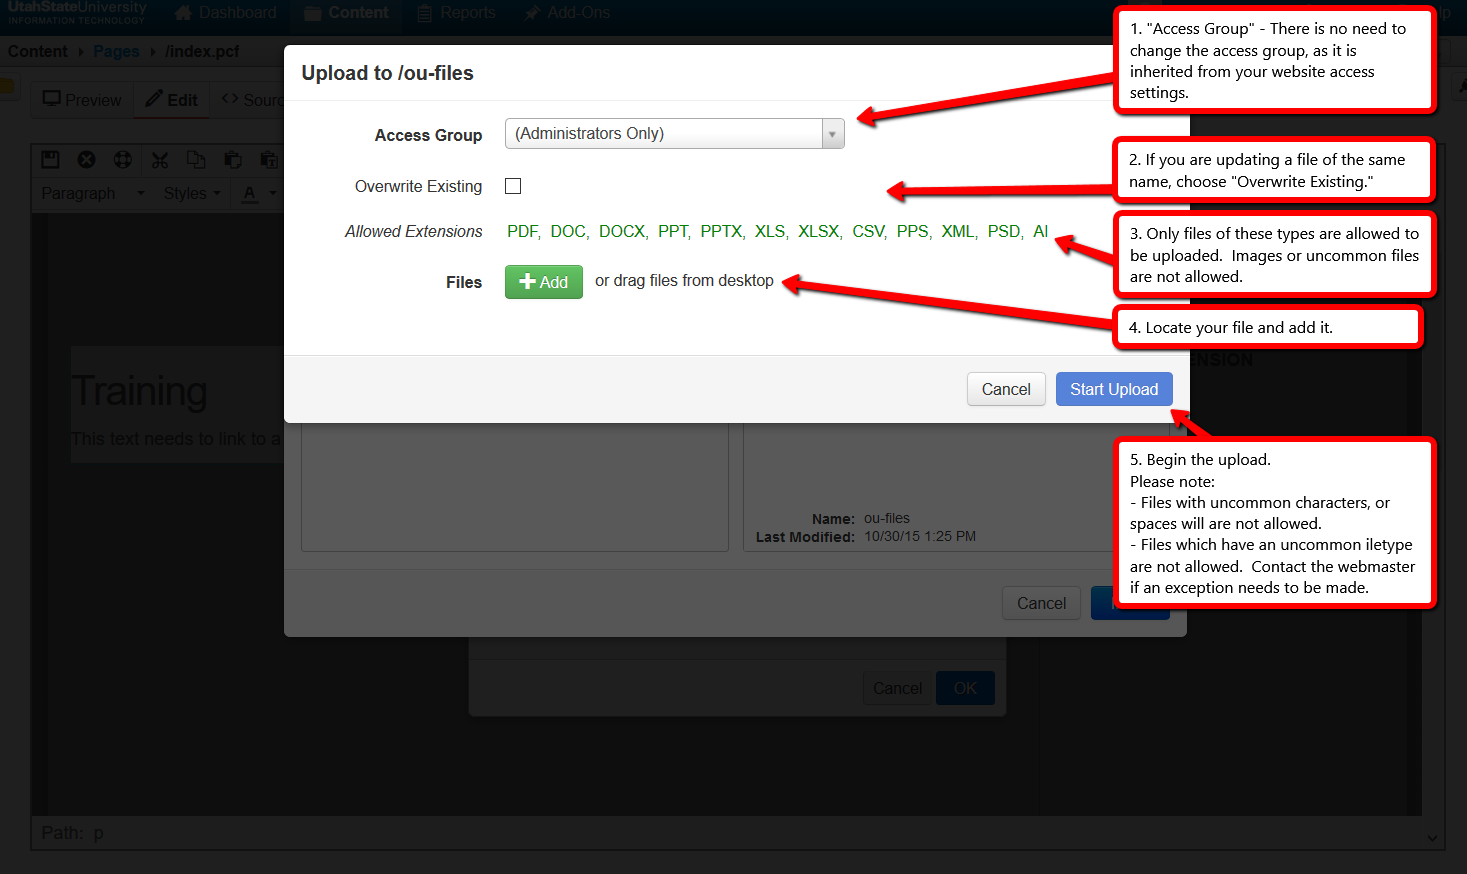
- "Access Group" - This setting is typically inherited from your image folders setting, and does not need to be adjusted.
- "Overwrite Existing" - If you are uploading an updated version of a file, title it the same as the previous and select "Overwrite Existing."
- "Allowed Extensions" - The only types of files allowed in this folder are files (.pdf, .doc, etc...). Image file types (.jpg, .png, etc...) must be added into the "images" folder.
- "Add" - Add the file either through a file manager, or drag and drop the file to this dialogue box.
- "Start Upload" - Once you have the green light, add that image!
Step 7 - Save & Publish
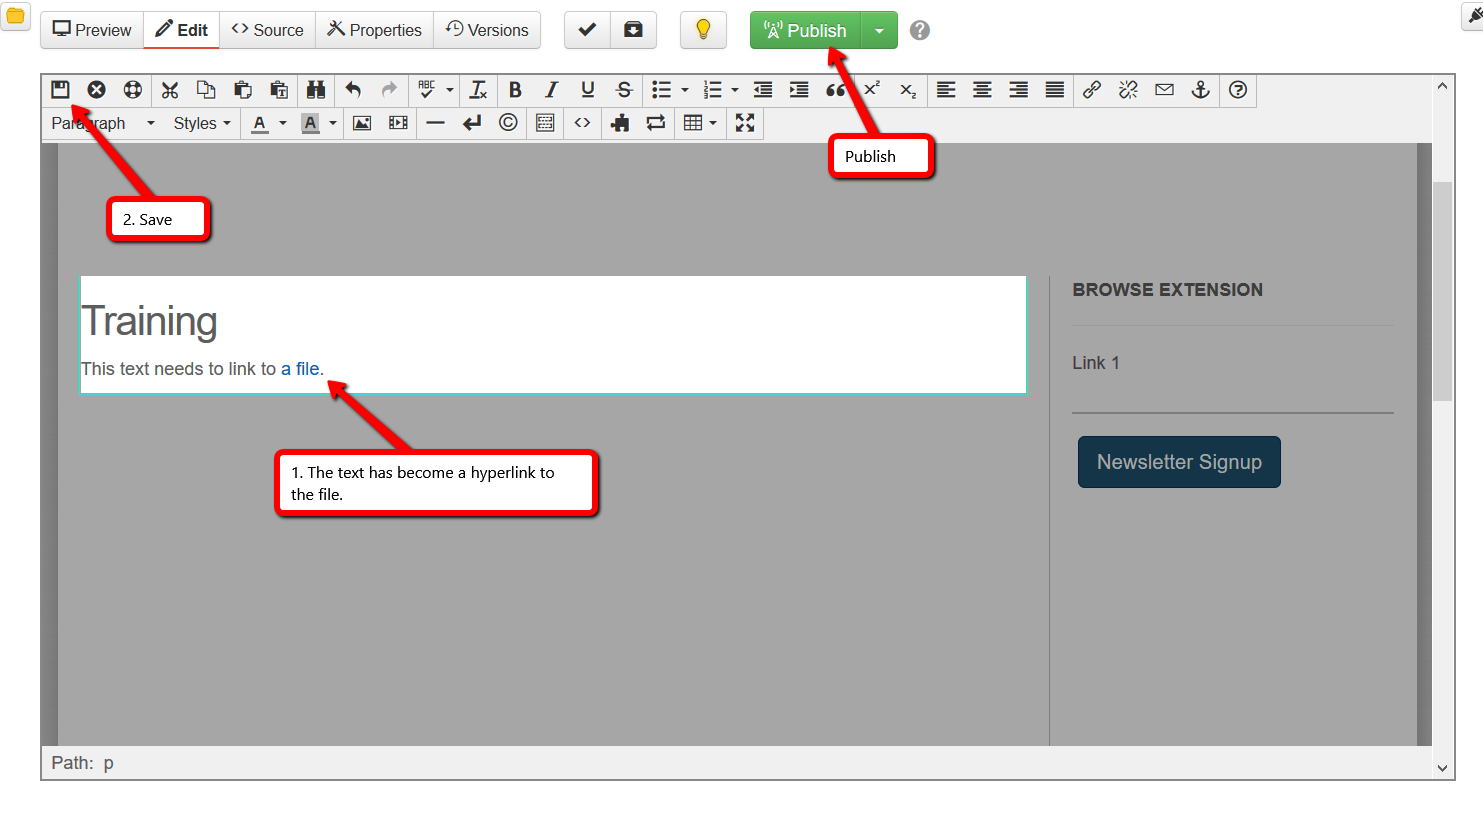
- Once the link to your file is activated, it will appear as a link in the WYSIWYG editor.
- Save those changes by clicking "Save" or "Save As" at the bottom. "Save As" will create a new file, whereas "Save" will overwrite the existing file with your changes.
- Publish the file. Run page checks as needed.
Please Note! If you run the link checker during publish, it will give you an error for the file you just uploaded. Once you publish the file, those links will be live, and you will no longer receive an error.