Soil Sampling Guide for Crops
Why Sample?
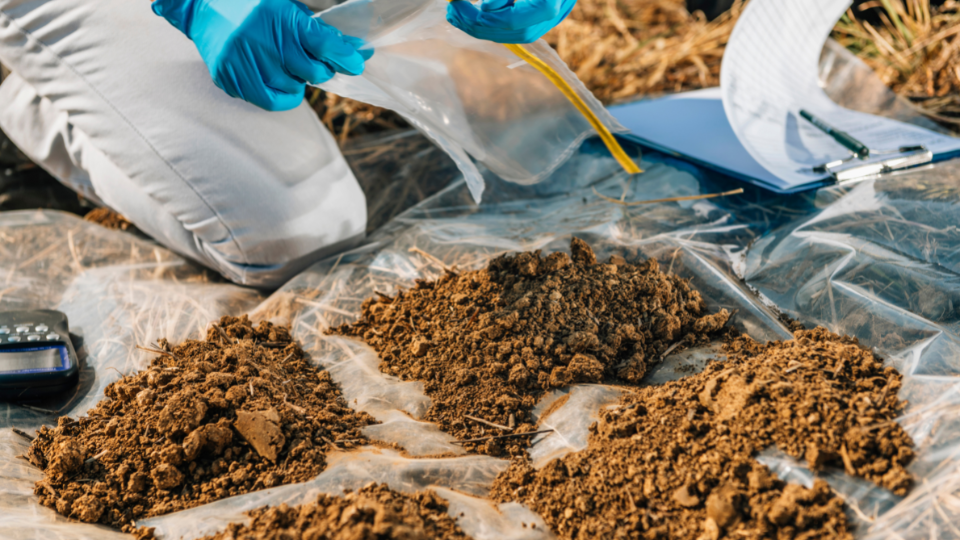
Why conduct soil sampling for crops? The answer is simple and intuitive for most involved in agriculture. Regular soil sampling, testing, and associated guidance on fertilization and soil amendments help develop and maintain more productive and healthy soils. Soil tests can indicate whether plant nutrients are deficient and, if so, what amounts are needed for optimum growth. Soil testing is also a useful diagnostic tool to identify problems related to excessive levels of nutrients and salts, sodicity, high pH, low organic matter, and poor drainage. Soil is one key factor that determines crop productivity levels. Proper soil testing often helps optimize investments in fertilizer and amendments and influences several other agricultural inputs.
What to Sample?
Many soil properties can be measured, with some being more practical than others for making crop management decisions. Soil properties can be broken into three broad categories: chemical, physical, and biological. Each category includes many properties, with some properties having multiple procedures for testing. Below are some of the most common properties measured for agricultural applications:
-
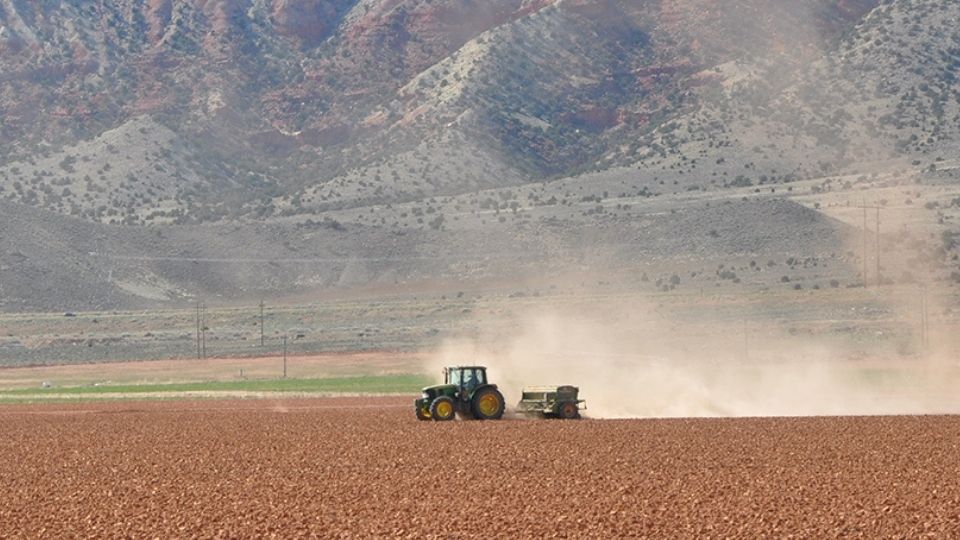
Chemical - for fertilizer and amendment management (examples include macro and micronutrients, pH, salinity, and sodium absorption ratio). Macronutrients generally include nitrogen, phosphorus, potassium, sulfur, calcium, and
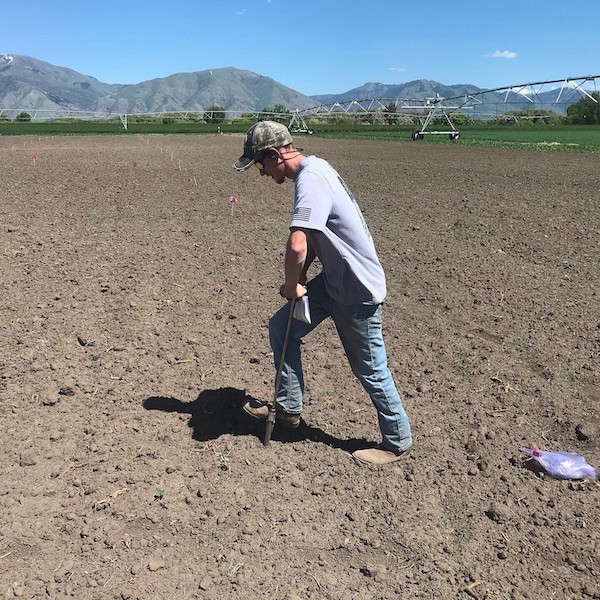
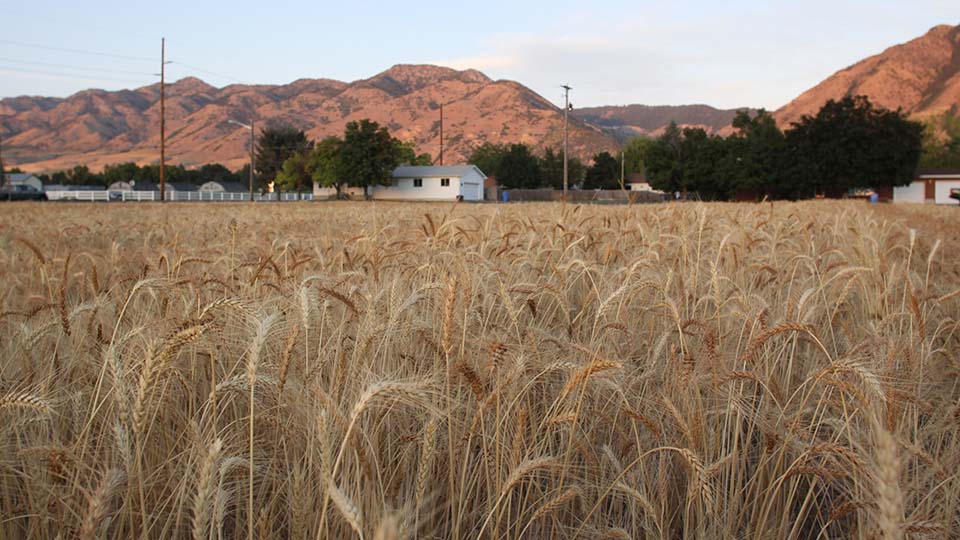
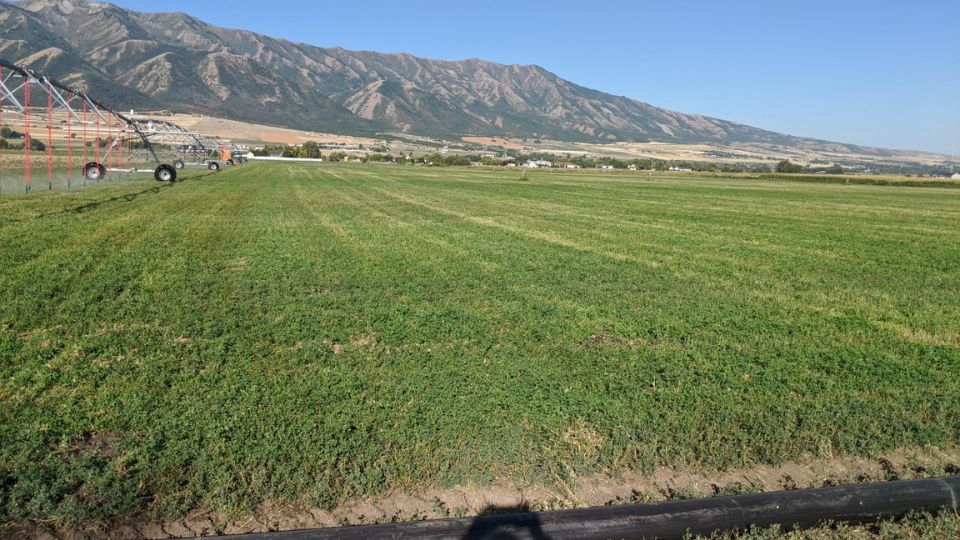
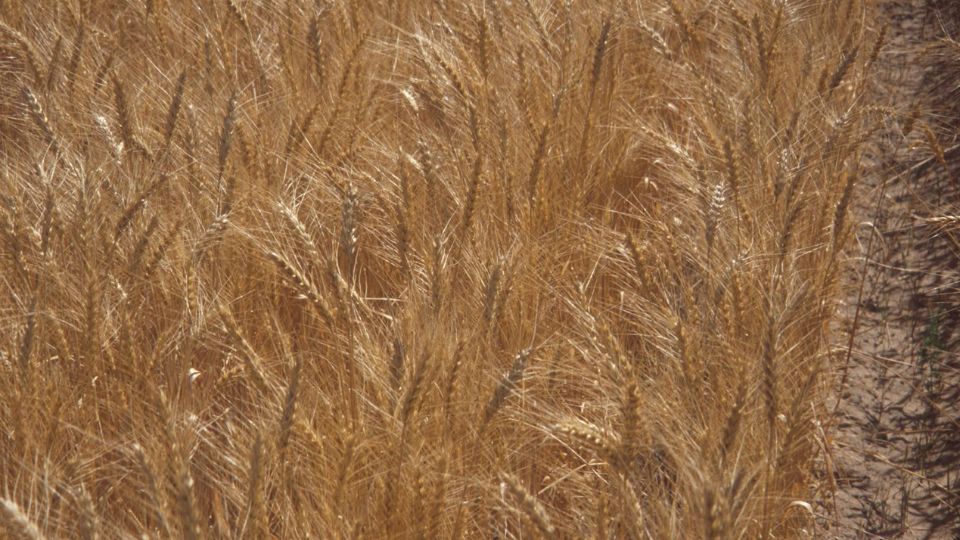
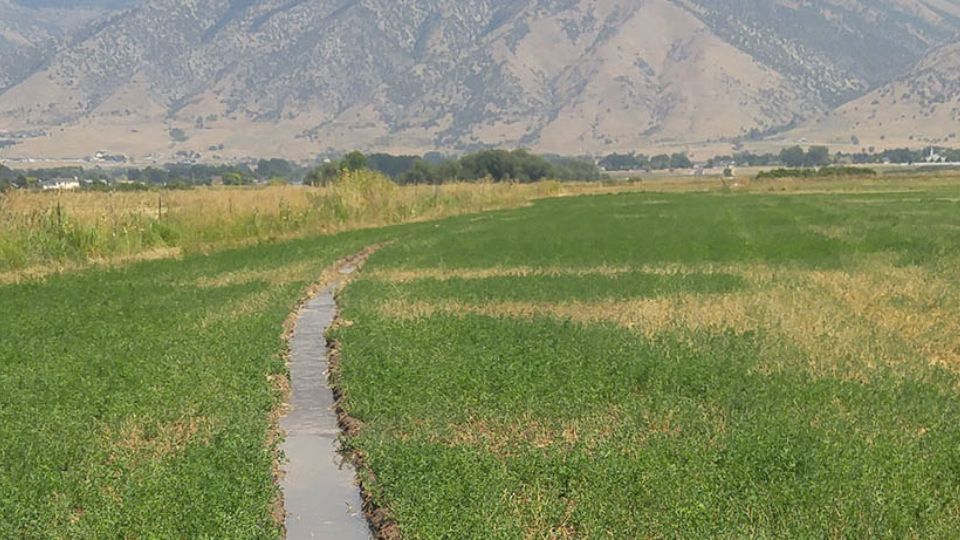
Figure 1. Soil Sampling near Logan, UT magnesium. Micronutrients include zinc, boron, manganese, copper, iron, and chlorine.
- Physical - for soil health and irrigation management (examples include texture, bulk density, available water holding capacity, soil surface hardness, and aggregate stability).
- Biological - for soil health and fertilizer/amendment management (examples include organic matter, soil protein, soil respiration, active C, potentially mineralizable nitrogen, and phospholipid fatty acid [PLFA]).
More detailed descriptions of each of these properties can be found in the fact sheet, Measuring and Building Soil Health (Yost et al., 2019) or the Natural Resources Conservation Service publication Recommended Soil Health Indicators and Associated Laboratory Procedures (Stott, 2019).
The first steps in selecting which properties to measure in your soil are to decide how you will use the information and to weigh whether the cost of testing will outweigh the return on your investment. In most cases, the return on investment easily pays for the small cost of soil testing.
 The most frequently measured properties are “routine” or basic soil fertility (mainly chemical) properties that include soil organic matter, pH, nutrient levels, and salinity because many of these tests have been calibrated to fertilizer and soil amendment needs. Soil health testing (various combinations of chemical, physical, and biological analyses) is becoming more common to evaluate how management practices such as organic amendments, reduced or no-till, cover crops, diversified crop rotations, and other practices improve soil quality or health. Some properties may also be useful for sustainability, carbon marketing, and government assistance programs.
This guide will mainly cover the sampling, extraction, and laboratory analysis of soil properties. Many soil properties can be assessed and measured in the field. These will be the topic of another fact sheet focused on “in-field” soil assessments.
When to Sample?
Timing
Soil sampling timing should coincide with management decisions. Allow adequate time before fertilizer or amendment applications to collect, submit, and receive soil analysis results. Soil testing after harvest in the fall is common because it will give ample time to create a nutrient management plan that works best for the specific field. Sampling can happen at any point during the season. However, for some analyses like soil nitrogen, it is beneficial to collect samples as close to the time of crop nutrient need as possible. As a result, soil nitrogen sampling is ideal in the spring just prior to planting and/or in the early season to guide side dress or fertigation applications.
Avoid collecting samples when the soil is wet for logistical reasons or directly following fertilizer or amendment applications so results are not skewed. For long-term fertility management within a given field, it is important to collect soil samples at the same time of year (fall, spring, etc.) to ensure consistency in results because some nutrients fluctuate based on weather and soil conditions (Franzen, 2018). Also, pay attention to tillage and crop residue present when sampling and try to sample in consistent conditions from year to year.
Frequency
Soil sampling frequency depends on the type of soil analyses being conducted. The three broad categories of tests (chemical, biological, and physical) and some individual tests within these categories can have differences in recommended frequencies (Table 1). This is because some soil properties change and fluctuate much more rapidly than others. The general trend is that biological properties change the most rapidly, followed by chemical and then physical. Therefore, sampling frequency should generally follow these trends.
Table 1 lists suggested frequencies for a variety of common soil tests. Notice that soil nitrogen is often the only test that may be required annually. Any crop that requires annual applications of nitrogen fertilizer or amendments will benefit from soil nitrogen testing so that applications can be adjusted to account for soil nitrogen. Nearly all other soil tests will not be required annually unless you have specific nutrient management goals, need to meet regulations, or are trying to carefully monitor a property to determine if it is changing (e.g., soil salinity after remediation attempts or nutrient levels that may be near critically low levels).
Other macronutrients and micronutrients can generally be tested every 2 to 3 years or longer, depending on the crop, land ownership, management goals, and other factors. Most biological properties of the soil change drastically throughout a growing season, but these tests are often more expensive than chemical and physical tests. Further, biological properties often take time to respond to changes in management. Several studies have shown little to no change in several properties until 4 to 5 years of intensive soil health practices, such as no-tillage or cover crops (Crookston et al., 2021). Soil organic amendments like manure or compost can have more rapid impacts on biology (Atoloye et al., 2020). Thus, most biological testing could happen every 3 to 5 years to reduce costs and to track longer-term trends in biology improvements. Many physical properties also require time to change, and their analyses can be more expensive than routine chemical testing. Most physical properties can also be sampled every 4 to 6 years to monitor changes due to management. Note that these guidelines for sampling frequency can change depending on specific field conditions, management goals or practices, or regulations.
Table 1.
Soil Sampling Guidelines for Various Soil Properties1
| Soil property | Depth (Inches) | Handling2 | Probe lubricant | Suggested frequency (years)3 | Quantity (cups) |
|---|---|---|---|---|---|
| Organic matter | 12 | Air dry or directly to lab | Okay | 2-3 | 1-2 |
| Soil pH | 12 | Air dry or directly to lab | Okay | 2-3 | 1-2 |
| Nitrate | 12 or 24 | Ice, air dry, or directly to lab | Okay | 1 | 1-2 |
| P, K, S | 12 | Air dry, or directly to lab | Okay | 2-3 | 1-2 |
| Micronutrients | 12 | Air dry or directly to lab | Okay | 2-3 | 1-2 |
| Soil health | 6 | Various, depending on tests | Not okay | 3-4 | 3-4 |
| Soil respiration | 6 | Air dry or directly to lab | Not okay | 3-4 | 1-2 |
| Soil DNA | 6 | Dry ice for transport to lab | Not okay | 3-4 | 1-2 |
| PLFA (phospholipid fatty acid) | 6 | Ice and directly to lab | Not okay | 3-4 | 1-2 |
1These guidelines are generalities, and specifics should always be verified with your soil testing laboratory.
2Nearly all samples should be either air-dried at less than 95 °F for about 3 to 5 days depending on moisture content at sampling or sent directly (within 12 hours of sampling if possible) to a lab. Where ice or dry ice is noted, it is important to keep samples cool or frozen during transport and shipping to labs. This depends on the weather conditions during and after sampling and the time required to get samples to a lab. Consult with labs about special handling before collecting samples.
3The frequency will depend on management goals, proximity to critical soil test levels, and other factors. Nitrogen can be required annually for crops that require nitrogen amendments. If management is changing in drastic ways, more frequent sampling should occur to monitor the effects of change.
How to Sample
Soil sampling procedures depend on what soil properties are being measured. The most important guideline for sampling methods is to ensure that you collect a representative sample. Representative samples are affected by several factors, such as the pattern, depth, quantity, equipment, and handling of samples. Below we will describe some major considerations for various soil properties. Sampling Patterns
The two most prominent types of sampling designs include either square grids (based on certain acreage per grid such as 1.0, 2.5, 5.0, or 10.0 acres) or zones (Figure 2). Several advantages and disadvantages exist for each approach. A few of the major differences are shown in Table 2.
Table 2.
Advantages and Disadvantages of Grid vs. Zone Soil Sampling
| Sampling pattern | Advantages | Disadvantages |
|---|---|---|
| Grid | Captures large variation in soil properties throughout entire fields | Requires more samples and increases labor and analysis costs |
| Zone | More economical when known zones exist | Does not represent highly variable fields well |
Sampling grids often range from 1.0 to 5.0 acres (or larger), often depending on precision of data needed and sampling costs. Smaller grid sizes more accurately capture soil nutrient variations but require more samples and higher sampling costs. Larger grid sizes are more cost-effective but often fail to capture spatial variability within the field. For a new field or when no field history is known, 1.0-acre grid sampling provides a baseline of nutrient variability. This baseline information and additional field data can be used to sample on a 2.5-acre grid, or eventually, a zone-based management system, which provides a good combination of accuracy and cost-effectiveness. For soil sampling to provide an accurate depiction of soil nutrient levels in the field, the grid size should not exceed 2.5 acres. Soil sampling grid size should be determined based on the data required for management decisions, and smaller grid sizes are not beneficial if you are not planning on managing at that level of precision (Virk et al., 2022).
Within a grid or a zone, there are also different techniques for selecting sampling points. These include selecting a systematic point such as the center, random points, or a stratified random point (Figure 3). The stratified random point places the point randomly within grid cells whereas the completely random points can be randomly placed anywhere within the grid or zone.
Consistently using the same pattern and sampling in the same areas (most practical with GPS) over time will result in better tracking of changes in soil properties. 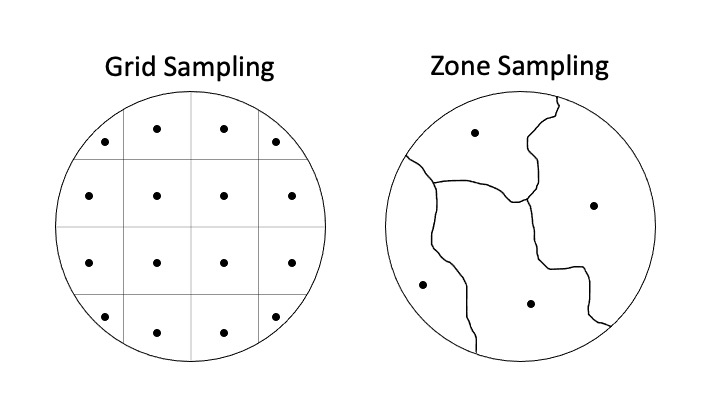
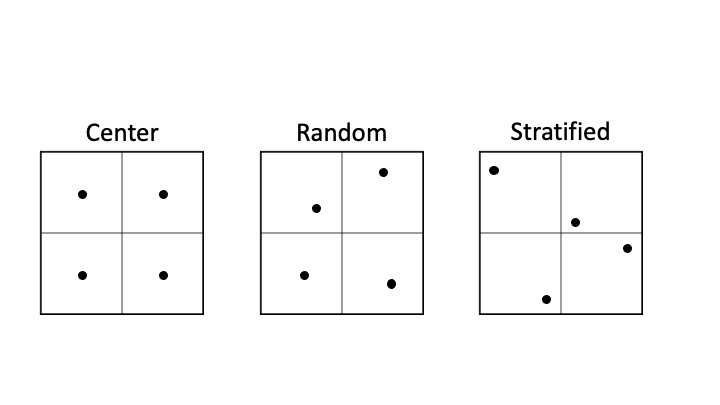
Figure 3. Examples of Three Common Sampling Patterns With Various Methods for Selecting Sampling Points
Here are considerations to make when deciding which pattern to use:
- What is the smallest area you are willing to manage? If you are willing to apply fertilizer or amendments at variable rates across a single field, then you will want to identify soil conditions in each management area or zone. If you will apply a single rate across the entire field, then it is more important to represent the average conditions across the entire field. The crux of this idea is to sample according to how you will fertilize. Spatial information about soil properties is generally not worth the investment if you are not planning to manage with variable-rate fertilization.
- Are there problem areas within the field, and what is causing them? If the answer is yes, then sample and treat those areas separately if you can. This can include salinity, irrigation, nutrient, drainage, and other issues. Treating these areas as separate zones will save sampling costs compared to grid sampling and will aid in creating tailored management plans for each zone.
- Are you willing to use GPS to locate sampling points? If the answer is no, then you will be restricted in your pattern, and it will likely include a random sampling across a field or patterned after your knowledge of the field and any areas that perform differently. If you or your crop advisor are willing to use GPS, then another suite of sampling patterns is available.
- How will you create a sampling plan or grid? Sampling plans or grids can be created by printing field maps and manually marking approximate sampling points, or they can be created with software programs that mark GPS coordinates of sampling points so the same area can be sampled year after year. Using the latter is preferred because it allows for better tracking of soil property change over time and provides consistency. Free tools are available to help create GPS sampling points. One tool is Soil Test Pro (https://soiltestpro.com/). This and other tools allow you to select your field, a sampling plan, and then provides GPS coordinates that can be uploaded to a phone, a handheld GPS unit, and even an applicator. Many crop advising companies also have their own proprietary software that creates georeferenced sampling grids and application maps.
Sampling Intensity
Once the sampling pattern is selected, be sure to collect several individual subsamples (at least three to five) within a small circular area (roughly 10-foot radius) and then composite the samples into a single sample for each point (Franzen, 2018; see Figure 4).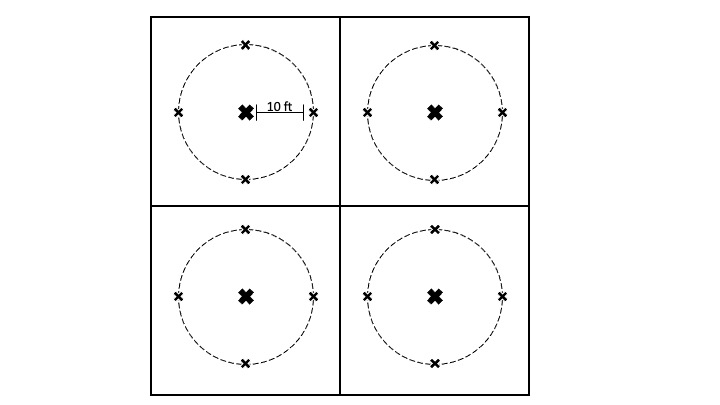
Sampling Depth
Like most other properties, sampling depth is dependent on the soil property of interest (Table 1). Recommended sampling depths for the same test can vary by state or analytical lab, depending on agronomic, cultural, and analytical preferences.
- Chemical tests -Soil nitrogen is generally tested in the top 1 or 2 feet of soil, depending on the test and time of year. Other soil macronutrients and micronutrients are generally tested in 4-, 6-, 8-, or 12-inch-deep samples. In Utah and most other western states, most macronutrients and micronutrients have been calibrated to 12-inch-deep soil samples. The most important factor when determining the depth of samples is to ensure that your depth matches the depth that your analytical lab or crop advisor has used to calibrate their fertilizer or amendment applications.
- Biological tests - Most biological tests have been calibrated to 4-, 6-, or 8-inch-deep samples. In most cases, it follows the common depths used for routine fertility testing. The Midwest commonly uses the 6-inch depth, while eastern states generally use 4- or 8-inch sampling depths. Western states’ methods are still under development, but a 6-inch sampling depth for most biological properties is most common.
- Physical tests - Sampling depths for these properties can be quite variable, but generally, the deeper, the better for this category. Measurements used in soil health test packages, such as aggregate stability and bulk density, are generally conducted in the top 6 or 8 inches of soil. Deeper samples that measure many properties are most often only collected for research but can provide important details about the soil profile that influence crop production.
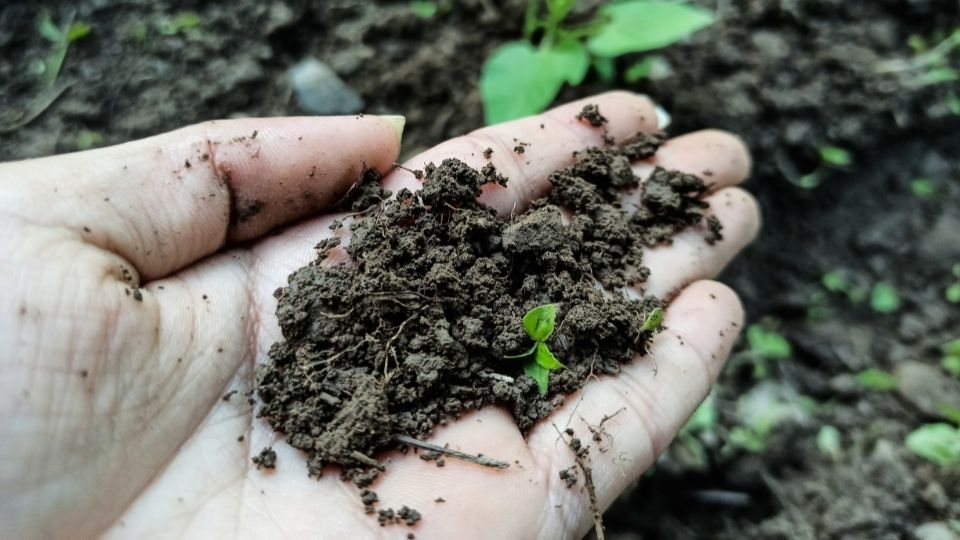
Soil Quantity
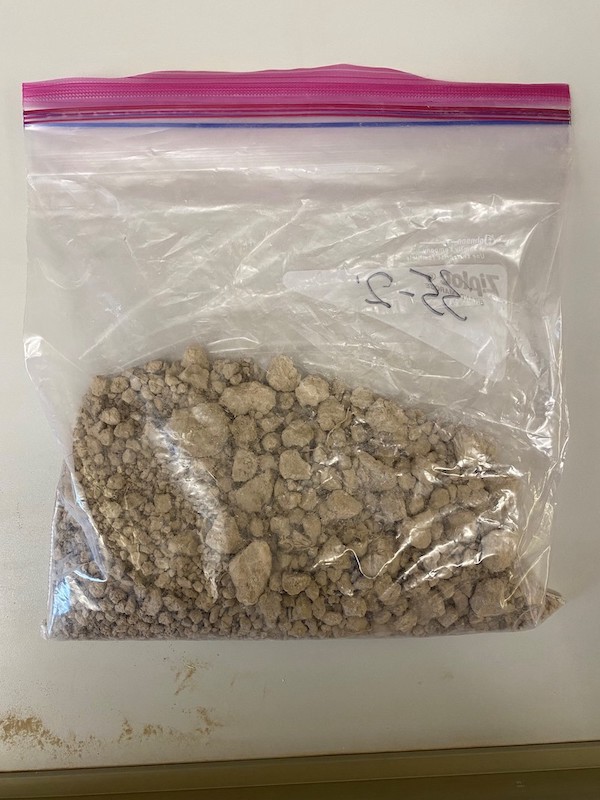
The general guideline for the quantity of soil that should be collected in a sample is to collect a little more than you need so there is adequate soil to conduct all desired analyses. Most routine chemical tests require 1–2 cups of soil (Figure 5). Biological and physical tests can require larger quantities. Soil health packages that include a variety of chemical, biological, and physical properties often require at least 4 cups of soil. Be sure to identify the desired tests and required sample size from your analytical lab before you sample to ensure that you meet or slightly exceed the sample volume required.
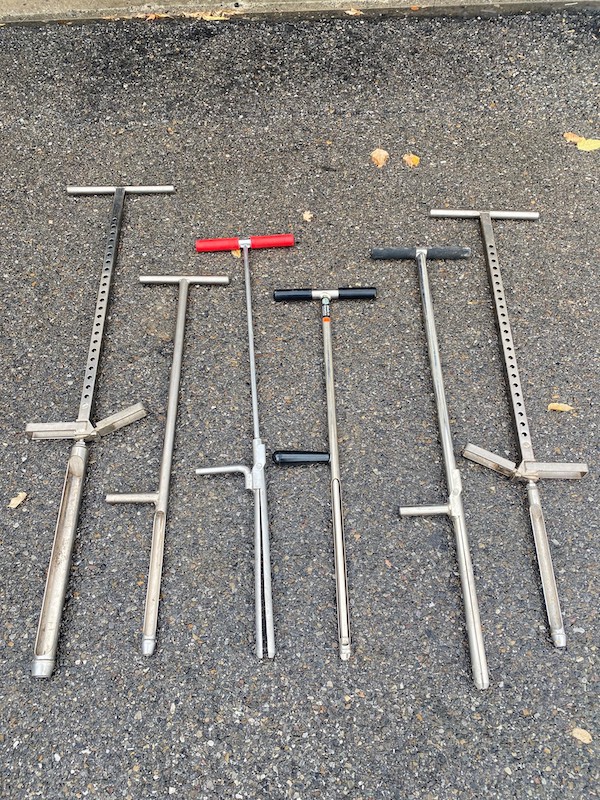
Equipment
The most common and recommended tool used for soil sampling is a soil probe (Figure 6). Shovels/spades are generally not recommended because they can contain contaminants from other uses and do not control depth as well as probes. In some cases, spades can be used carefully for soil health sampling. The advantage of soil probes is that they disturb less area, can be quicker than a shovel, and it is easier to control sampling depths. The major disadvantage is the soil probe cost ($75 to over $500 depending on quality and features). All sampling tools should be free of rust. Most county extension offices in Utah have soil probes that can be borrowed if needed. Many commercial soil probes exist, and most are suitable. Consider which type of soil you will be sampling when selecting a probe, as some are more suited to clayey, rocky, or sandy soils. Also compare price, durability, user ease, diameter, tip type (wet or dry soils), and other factors when selecting a probe.
Handling
It takes much effort to collect soil samples, so ensure that you carefully follow sampling and handling procedures to receive a correct and representative analysis. Some key components of sampling handling are:
- Lubricants - Some soils can be extremely difficult to sample, and soils often get stuck in sampling tubes. WD-40 and other lubricants (without vegetable oil) can aid in sample removal from soil probes but should only be used if necessary. Lubricants can be used in most cases unless you are conducting some biological tests because the lubricant can influence soil biology. Be sure to review guidelines from analytical labs before using lubricants.
- Sample packaging - Most soil samples can be stored in heavy-duty plastic Ziplock-type or paper bags. Avoid cloth bags. Many analytical labs provide sampling bags that are generally paper bags lined with plastic to prevent bag damage from wet soils. Be aware that some biological tests have specific requirements for the type of bag and whether to leave air in the bag.
- Temperature - Sample temperature between the time it is extracted in the field and reaches the analytical lab is critical for many soil tests. For most analyses, they either need to be dried as soon as possible or kept cool or frozen prior to analysis.
- Nitrogen - Soil samples collected for nitrogen analysis should be sent immediately to a lab, or if that’s not possible, they should be air or oven-dried (less than 100 °F) as soon as possible after sampling. If drying is not possible shortly after sampling, keep samples cool until drying or shipping can occur. The key is immediate cooling or rapid drying to prevent nitrogen transformations.
- Other macronutrients, micronutrients, and chemical tests - The procedures for these tests are the same as nitrogen but cooling samples is not as large of a concern.
- Biological tests - Some biological tests require special temperature handling, and some can be treated like routine chemical tests. For example, CO2-C respiration (including the Haney test, Sol-vita, or 4-day respiration) is conducted on dry soil to treat samples like macronutrient samples. Others, like PLFA, require that samples are cooled with ice during shipment or soil DNA sequencing requires a deep freeze of samples with dry ice and immediate delivery to labs. Be sure to check with your analytical lab for specifics for each test.
- Physical tests - Physical tests often require no special handling. Samples should be dried or sent to a lab as soon as possible.
Where to Send a Sample for Analysis?
When selecting a laboratory to conduct your soil analyses, it is important to compare these and other factors:
- Analysis and shipping costs
- Turnaround time to obtain results
- Quality of analytical methods
- Certifications (type and most recent)
- Quality of the soil test interpretations
- Possible conflicts of interest if laboratories are connected to commercial sales
- Basis of recommendations (optimization or maximizing yield)
When selecting a laboratory, ensure the lab participates in a third-party data quality assurance program. Most soil testing labs that regularly handle agricultural and horticultural analyses participate in either the North American Proficiency Testing Program (NAPT) operated by the Soil Science Society of America (SSSA), or the Agricultural Laboratory Proficiency Program (ALP), a private lab certification provider. Both programs provide a list of participating labs that one can search to see if the lab they are considering is an active participant. These programs compare periodic lab performance on blind check samples to other soil testing labs and help the lab ensure they are providing accurate analytical results. Remember, however, that where analytical results should be reasonably objective and comparable between labs within expected analytical method error, fertilizer and amendment recommendations are somewhat subjective and are based on typical needs of the crops and soils in the area the lab operates, and the intent of the recommendation (effect a maximum productivity result, an economically optimal result, a soil fertility or heath building result, etc.). Recommendations must be evaluated against their intent when comparing one lab to another.
A few other things to be aware of when selecting a lab and interpreting results are suspect soil values and interpretations. If a soil analysis looks suspect (for example, extremely different than previous results), be sure to talk with the lab about the results. Most will double-check the results and re-run a test if needed to ensure that your results are accurate. Further, carefully consider the interpretations/recommendations attached to the soil test report. It is wise to compare the recommendations to other sources to ensure that you are making the best fertilizer and amendment investments.
References
Agricultural Laboratory Proficiency Program (ALP). (n.d.). ALP: Improving the quality of laboratory analysis. https://www.alpprogram.net/home/
Atoloye, I. (2020). Soil health, phosphorus and carbon dynamics in response to a one-time compost application and cover crops in organic dryland winter wheat [Doctoral dissertation, Utah State University]. USU Digital Commons. https://digitalcommons.usu.edu/etd/7991/
Crookston, B., & Yost, M. (2021, May). New article highlights variation in soil health indicators over space and time. Soil Health Partnership. https://www.soilhealthpartnership.org/blog-story/new-article-highlights-variation-soil-health-indicators-over-space-time/
eKonomics News Team. (n.d.). How to use soil sampling to improve nutrient levels and crop yield. Nutrien Ag Solutions. https://nutrien-ekonomics.com/news/how-to-use-soil-sampling-to-improve-nutrient-levels-and-crop-yield/
Franzen, D. (2018). Precision agriculture basics - zone sampling vs grid sampling [Video]. YouTube. https://www.youtube.com/watch?v=wlXYIfx8C00&list=PLHCAIed9eN7xkAEm7426em3zclx5yU4eg&index=31
Franzen, D. (2018, June). Soil variability and fertility management. Precision Agriculture Basics. http://psssoil4213.okstate.edu/lecture/chapter-1-introduction-1/precisionagbasics-6.pdf
Geist, L. (2017, November). Inexpensive soil tests can save farmers thousands [Fact sheet]. University of Missouri Extension. https://extension.missouri.edu/news/inexpensive-soil-tests-can-save-farmers-thousands-3222#:~:text=COLUMBIA%2C%20Mo.%20%E2%80%93%20Soil%20tests%20can%20save%20farmers,applying%20too%20much%20fertilizer%20to%20fields%2C%20Nathan%20said.
North American Proficiency Testing (NAPT). (n.d.). Soil Science Society of America. https://www.naptprogram.org/
Soil Science Society of America (SSSA). (n.d.). https://www.soils.org/
Stott, D. E. (2019). Recommended soil health indicators and associated laboratory procedures [Soil Health Technical Note No. 450-03]. Natural Resources Conservation Service, U.S. Department of Agriculture. https://directives.sc.egov.usda.gov/OpenNonWebContent.aspx?content=44475.wba
Utah Soil Health Partnership. (2021). Brad Crookston: Soil health [Video]. YouTube. https://www.youtube.com/watch?v=5JGnfTThrBs
Utah State University Analytical Laboratories. (n.d.). Agriculture and construction soil tests. https://www.usu.edu/analytical-laboratories/tests/ag-construction-soil-testing
Virk, S., Tucker, M., & Harris, G. (2022, November). Precision soil sampling: Grid size efficacy vs. cost considerations [Fact sheet]. University of Georgia Extension. https://site.extension.uga.edu/precisionag/2022/11/precision-soil-sampling-grid-size-efficacy-vs-cost-considerations/
Yost, M., Cardon, G., Crookston, B., Reeve, J., & Creech, E. (2019, March). Measuring and building soil health [Fact sheet]. Utah State University Extension. https://digitalcommons.usu.edu/cgi/viewcontent.cgi?article=2977&context=extension_curall
March 2023
Utah State University Extension
Peer-reviewed fact sheet
Authors
Matt Yost, Grant Cardon, Megan Baker, Jody Gale, Earl Creech, Mike Pace, Kalen Taylor, Cody Zesiger, Tiffany Evans, and Rhonda Miller
Related Research

2015 Costs and Returns for Flood Irrigated Alfalfa, Box Elder County
Enterprise budgets are the building blocks of a farm or ranch. They represent estimates of income and expenses for a specific period of time using a set of production practices and inputs for that enterprise.

2015 Costs and Returns for Irrigated Soft White Wheat, Box Elder County
Enterprise budgets are the building blocks of a farm or ranch. They represent estimates of income and expenses for a specific period of time using a set of production practices and inputs for that enterprise.

2019 Costs and Returns for Irrigated Safflower, Northern Utah
Enterprise budgets are the building blocks of a farm or ranch. They represent estimates of income and expenses for a specific period of time using a set of production practices and inputs for that enterprise. This research contains sample costs and return

2022 Costs and Returns for Non-irrigated Flax in Utah
Enterprise budgets are created to help a grower to understand all the costs and returns associated with producing a crop and are usually expressed on a per-unit basis, such as per acre.
4R’s of Irrigation Management
The research community and fertilizer industry have developed and utilized a framework termed “4R nutrient management” to help improve fertilizer stewardship. For decades, national and international organizations and institutes such as The Fertilizer Inst

50 Common Questions About Field Crops
Utah State University (USU) Extension strives to provide research-based information and knowledge to help agricultural producers. Producers often have questions about several aspects of field crop production. This article is not comprehensive of all ques
Accurate Irrigation Water Flow Measurement in Pipes
Accurate flow measurement is important to irrigation water management and water rights accounting and protection. Accurate flow measurement is essential in ensuring equitable water distribution to water rights holders and shareholders within irrigation co

Adopting Organic Wheat: Grower Motivations and Concerns
A recent study of wheat producers in the western United States found that wheat growers were actually transitioning out of organic production due to concerns about pest control and profitability. This fact sheet provides an overview of the study results b

Agricultural Irrigated Land and Irrigation Water Use in Utah
This article is a summary of several estimates of the extent of agricultural irrigation in Utah and some associated trends.

Agricultural Producers’ Motivations and Challenges With Improving Soil Health in Utah
This study examines Utah agricultural producers' motivations and challenges in adopting soil health practices. It highlights the lack of localized resources and transferable knowledge as barriers, while emphasizing producers' desire to gain insights, enha

Agriculture Water Use and Economic Value in the Great Salt Lake Basin
This fact sheet provides information about the following topics in the context of the Great Salt Lake and its basin: Great Salt Lake facts, Human effects on the size of the lake, Changes to population and land use, Agricultural water use, Agriculture and

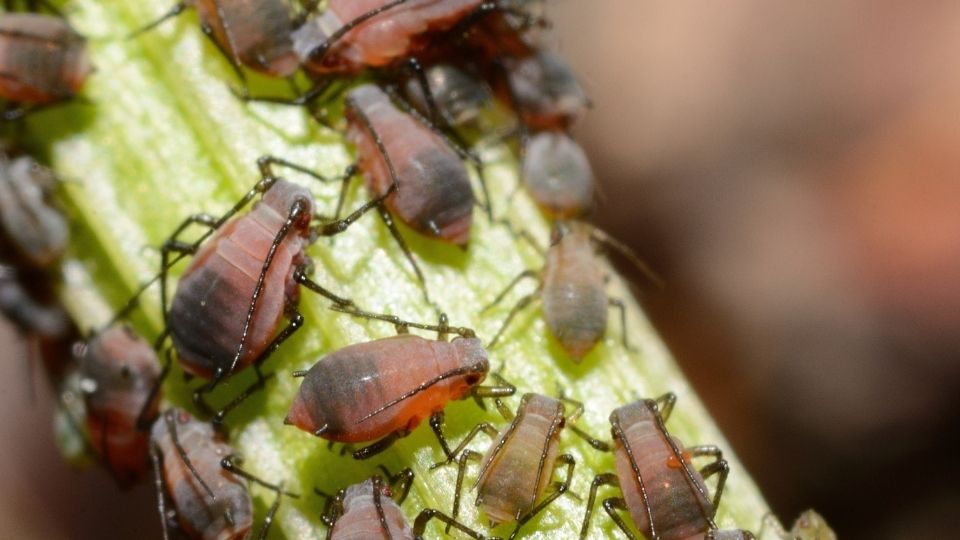
Aphids in Alfalfa
Aphids belong in the order Hemiptera and family Aphididae. Aphids are common insects in field and forage crops, with at least six kinds in Utah alfalfa. Aphids can be distinguished from other insects in alfalfa with a hand lens. In general, aphids are sof
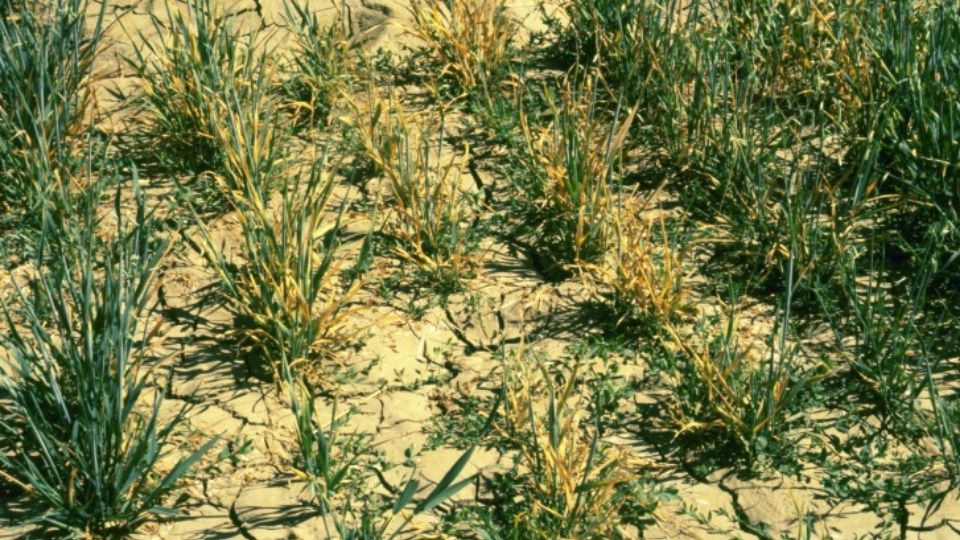
Barley yellow dwarf virus (BYDV)
Barley yellow dwarf virus (BYDV) is found worldwide. It infects small grains like barley, wheat, oats and rice as well as many wild grass species. There are two strains of the barley yellow dwarf virus: BYDV-MAV and BYDV-PAV.

Boom Sprayer Calibration for Pesticide Applications
To protect your investment in agricultural pesticides, a boom sprayer should be calibrated at the start of the season and whenever application conditions change. Also, sprayer output should be periodically checked throughout the season to assure proper ap
Buying and Selling Corn Silage or Other High Moisture Feeds: Value the Feed not the Water
Alfalfa is the most important crop in Utah, both in terms of acreage and revenue. Although often overlooked, one of the most critical decisions made in alfalfa production is determining which variety to plant. This report summarizes dry matter (DM) yields
Characteristics of Organic Wheat Growers
A recent study was conducted with wheat growers in the western U.S. which found notable differences in the grower and farm characteristics that influence organic adoption, including older age and the lack of importance of gender and farming experience. Th
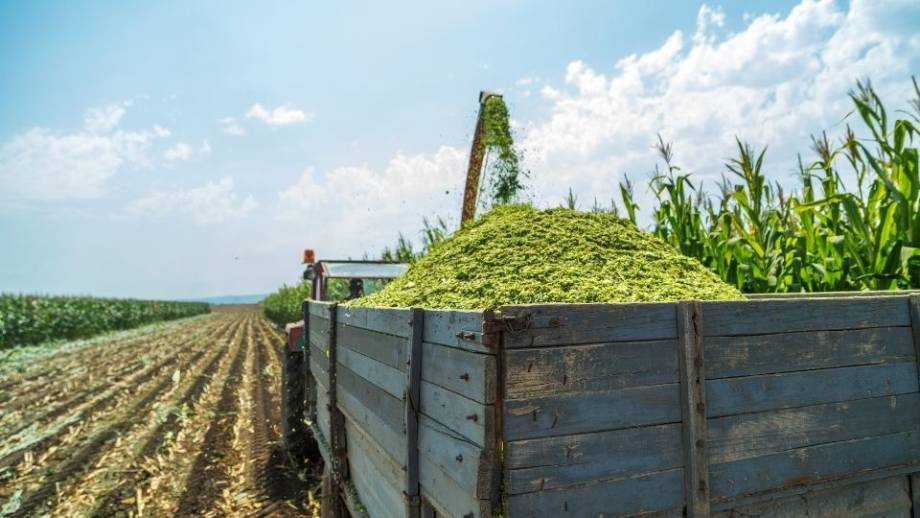
Chopping and Storing Quality Corn Silage
Properly harvested and stored, corn silage is extremely palatable, superior to other forages in energy content, a great fiber source, and relatively consistent in quality. The high palatability of corn silage encourages feed intake which contributes to hi

Comparison of Three Traps Used for Pocket Gopher Management (Thomomys Bottae) in Alfalfa Fields
Valley pocket gophers (Thomomys bottae) are a common agricultural pest in many areas of Utah, Nevada and California. Pocket gophers predominantly eat roots, although they will pull vegetation into their burrows, and eat plants immediately adjacent to thei
Considerations for Crop Rotation from Alfalfa to Corn
The importance of rotating out of a declining alfalfa stand is well established. As the alfalfa stand ages, forage yield and quality decline, while weed, insect, and disease pressures increase.

Corn Earworm
In Utah, there are typically three generations of corn earworm (CEW) each year. The first generation of adults either come from overwintering pupae (southern and central Utah) or migrate into northern Utah. The adult moth is tannish brown with a 1 1/2 inc
Corn Silage Variety Performance
This report summarizes on-farm performance of irrigated silage corn hybrids at Benson (Cache County) in 2006. The site is at 4439 ft elevation and has a long-term average of 2800 corn growing degree days (50/86° F) per year. Hybrids were seeded with a six
Costs and Returns for Non-Irrigated Safflower
Enterprise budgets are the building blocks of a farm or ranch. They represent estimates of income and expenses for a specific period of time using a set of production practices and inputs for that enterprise. Tables in this research is intended to be a gu

Costs and Returns for Roundup Ready™ Grain Corn
Enterprise budgets are the building blocks of a farm or ranch. They represent estimates of income and expenses for a specific period of time using a set of production practices and inputs for that enterprise. This research contains sample costs and return
Costs and Returns for Roundup Ready™ Silage Corn
Enterprise budgets are the building blocks of a farm or ranch. They represent estimates of income and expenses for a specific period of time using a set of production practices and inputs for that enterprise. This research contains sample costs and return
County-Level View of Irrigation Trends in Utah and the West
As water demand and scarcity increase simultaneously over the coming decades, water managers and growers will need to optimize water use on their irrigated lands. These challenges have been especially noticeable as the Western U.S.faces a prolonged “megad

Cover Crops for Utah
The purpose of this fact sheet is to provide the current state of knowledge on cover crop management for Utah based on USU research and local grower experience.

Crop Advisor Approaches to Soil Health Advising and Opportunities for Improvement
The report highlights that crop advisors in Utah and Idaho are increasingly addressing soil health, though barriers like cost, lack of localized information, and disagreements about soil health practices persist. Advisors from the NRCS are the most active

Crop Revenue Coverage 2007 Commodity Insurance Fact Sheet
Crop Revenue Coverage(CRC), provides revenue protection against a yield loss, a price decline, or a combination of both. CRC is available for these crop and counties Beaver, Box Elder, Cache, Carbon, Davis, Duchesne, Emery, Garfield, Iron, Juab, Millard,
Defense Against Drought
Utah’s climate can often be harsh and unpredictable. As the nation’s second driest state, Utah is commonly subject to droughts. Extensive statewide droughts have often lasted 5 to 6 years. It is imperative that farmers are well prepared to defend against
Deficit Irrigation of Pastures
Deficit irrigation is any irrigation level that does not meet the crop’s full evapotranspiration (ET) demand, meaning evaporation from plant and soil surface and transpiration through plant growth.
Diagnostic Testing for Nitrogen Soil Fertility
Environmental concerns over nitrate contamination of ground water, and the desire of land managers to increase the efficiency of their fertilizer investment, can both be satisfied more completely through diagnostic testing for nitrogen (N) soil fertility.
Downy Mildew of Alfalfa
Downy mildew is an obligate parasite. Even though they look like fungi they are not. They belong to the Oomycota and are more closely related to algae than true fungi. The most common alfalfa downy mildew species in the USA is Peronospora trifoliorum. In
Drought Tolerance Guide for Alfalfa in Utah
Crop variety selection is one of the most important choices on the farm. Crop genetics determine a significant portion of the yield potential and resource use efficiency. Crop types and genetics that use water more efficiently will become increasingly imp
Drought Tolerance Guide for Corn in Utah
Crop variety selection is one of the most important choices on the farm. Crop genetics determine a significant portion of the yield potential and resource use efficiency. Crop types and genetics that use water more efficiently will become increasingly imp
Drought Tolerance Guide for Small Grains in Utah
Crop variety selection is one of the most important choices on the farm. Crop genetics determine a significant portion of the yield potential and resource use efficiency.
Dwarf Bunt in Winter Wheat
The disease first appeared in Utah in the early 1930s in Cache County near the city of Paradise. The disease was soon found in Box Elder County near Hansel Valley. The outbreak of dwarf bunt became so severe that it affected other crops, such as barley.

Easy Calibration for Backpack and Canister (Handheld) Sprayers
If sprayers are not properly calibrated, it can result in over or under-application of chemicals, causing damage, reduced pest control, and potential safety concerns. Making the effort to properly mix chemicals and calibrate sprayers can save money and in
Easy Calibration for Boom Sprayers
Making the effort to properly mix chemicals and calibrate sprayers can save money and headaches in the long run. This fact sheet provides simple guidelines for calibrating boom sprayers.

Economic Feasibility of Solar Photovoltaic Irrigation Systems
The Great Basin is primarily located in Nevada, western Utah, and small sections of southern Oregon and Idaho. The Great Basin is noted for its arid conditions and high percentage of publically owned land. The potential for solar energy generation in the
Energy Conservation with Irrigation Water Management
Irrigators in Utah experienced rapidly increasing energy costs from the mid 1970s to the late 1980s. These costs remain relatively high. Those who are pumping from deep wells are particularly interested in ways to cut back on energy use without doing away

Evapotranspiration and Precipitation Data for Calculating Irrigation Water Requirements in Utah
In this fact sheet, we calculated average reference evapotranspiration and precipitation data for multiple locations in Utah, USA. To accomplish this, we collected the data from the Utah Climate Center and compiled it to show an average of 20 years of dat
Fertigation Facts
The purpose of this fact sheet is to provide general information on forms of fertigation for primary plant nutrient, fertigation timing, and fertigation economics.
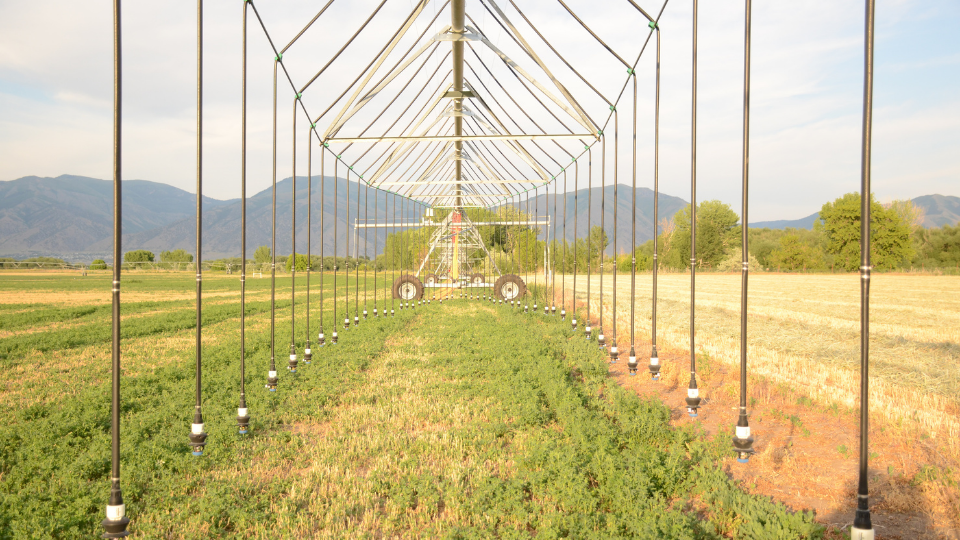
Grass Pasture Response to Water and Nitrogen
The objective of this project is to study the response of pasture grass varieties to weather, irrigation, and fertility in a field experimental plot at a high elevation. The water variable is accomplished with a line source sprinkler irrigation system. Tw
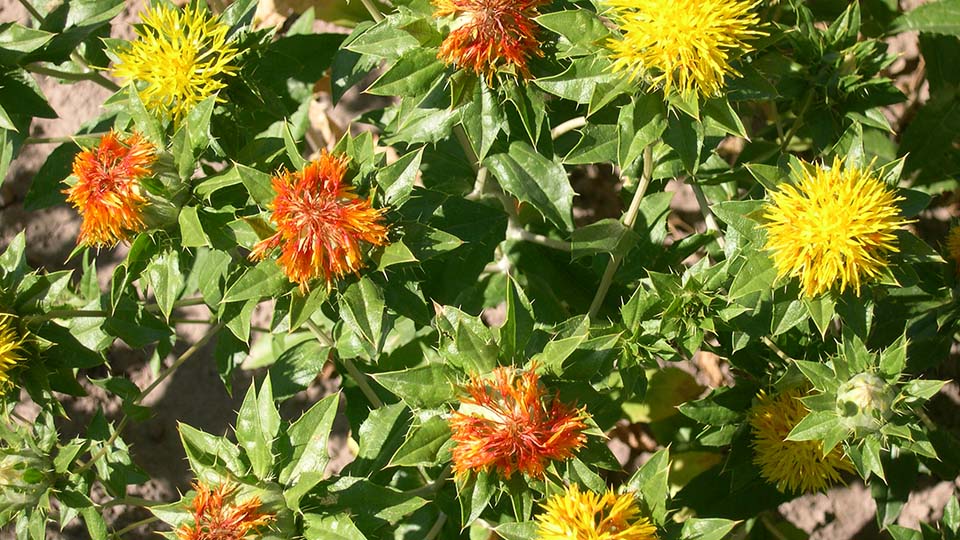
Growing Safflower in Utah
Northern Utah growers produced approximately 23 million pounds of safflower second only to California in U.S. production.
Guide to Irrigation Sprinkler Packages for Pivots and Laterals
Guide to Irrigation Sprinkler Packages for Pivots and Laterals
Guide to Pivot Track Management
Center pivot irrigation systems are the most popular form of irrigation in the western United States. A significant problem with center pivots is wheel track rutting. Deep wheel tracks can cause overirrigation because the pivot moves slower than intended
How Good is Your Water Measurement?
Accurate water measurement is essential to maintaining equity of water delivery within an irrigation company or water districts. Good management of our scarce water resource is dependent upon quantifying supplies and uses with accurate measurement techniq