So, You’re Going on a Trail Ride
Introduction
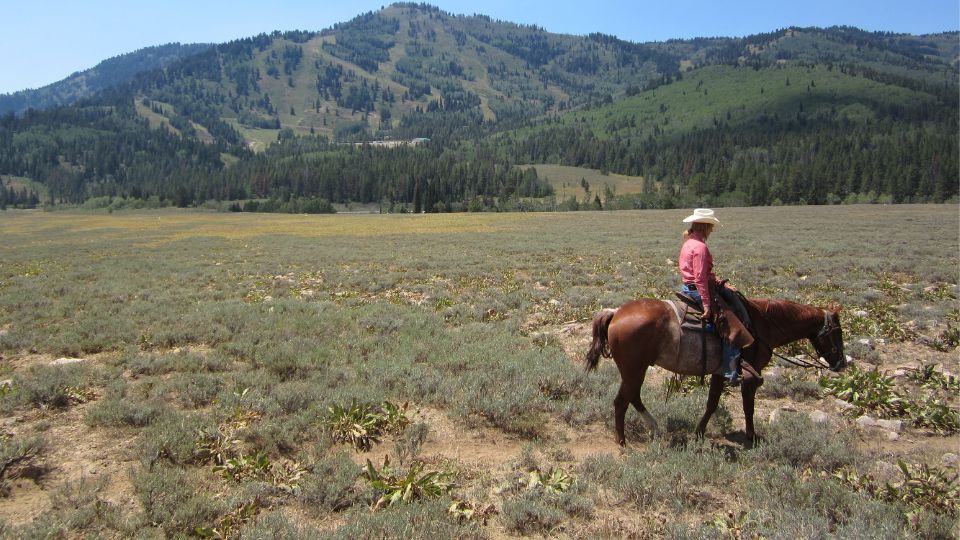
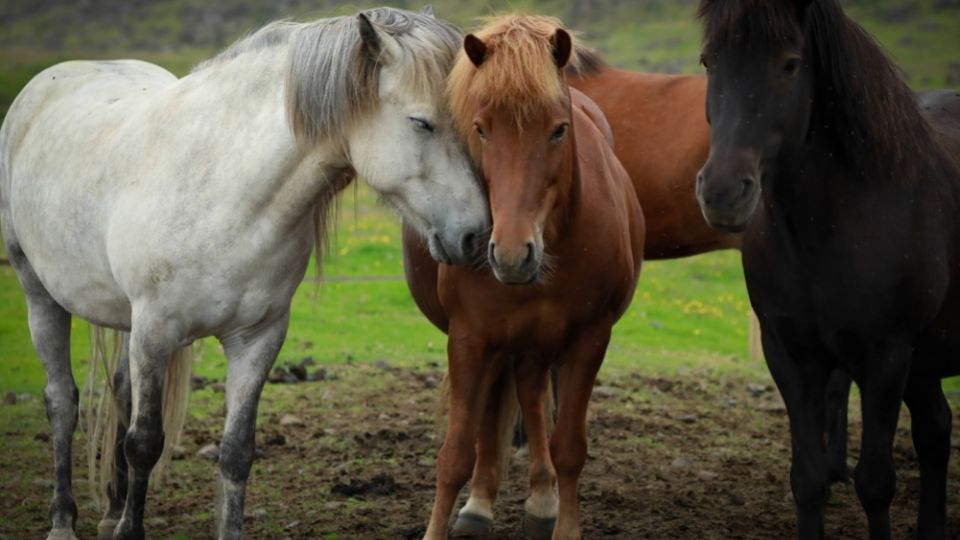
Horse trail rides are unique and enriching experiences for people of all ages. These serene journeys through nature provide an opportunity to connect with horses, appreciate their gentle nature, and develop a deeper understanding of their role in our lives. Equine activities provide an opportunity for individuals to partner with horses in a shared experience. Even though the time together may be short in duration, this connection, the human-animal bond, has been found to be therapeutic (Marchand et al., 2021). Additionally, horse trail rides can be a magical way to experience the wonders of the natural world around us, providing a means for people unable to hike an opportunity to get out and explore Utah’s beautiful outdoors. Horse trail rides offer animals and riders a chance to experience the therapeutic benefits of these interactions. Whether for leisure, education, or therapy, horse trail rides are a valuable and multifaceted activity that can bring joy and enlightenment to all who participate.
While many may think that a horse trail ride is a passive experience, we must consider the physical demands it places on both the rider and the horse. Personal safety, preparedness, and knowing what to expect are keys to keeping the rider and horse safe. This fact sheet shares information about preparing for a trail ride, what to expect during and after a trail ride, and how to prevent injury for both rider and horse.
Before a Trail Ride: Safe Clothing and Preparation
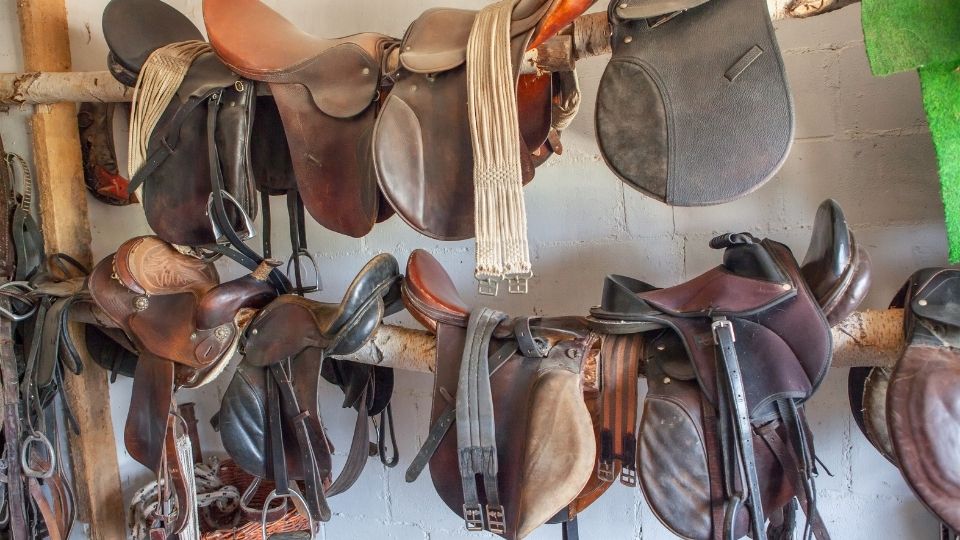
When preparing for a trail ride, one of the quickest items you can mark off your checklist is ensuring that you have proper equipment and clothing. See Appendices A and B for helpful preparation checklists for trail ride participants and facilitators. If you are participating in an organized ride where the horses and tack are provided, all you need to worry about is your personal wear. That includes proper footwear, clothing, headgear, and any additional support wear that you may need.
Footwear
While the ideal footwear for horseback riding is a western riding boot, other options will work just as well for your trail riding experience. The key components for safe footwear include closed toes, sturdy materials, and correct fit. Some good examples include tennis shoes or lightweight hiking boots. Avoid shoes like sandals, boots with “chunky” soles, or slipper-type shoes that lack full coverage/support. If shoes are poor fitting or have overly thick soles, there is a higher risk of getting your foot stuck in the stirrup. In an emergency where you may need to dismount quickly, this can lead to a scary incident. Open-toed shoes pose a risk of serious injury to your foot if a horse steps on it while you are standing on the ground. On a trail ride, you may also experience riding through tall grass or brush, which can injure feet not completely covered. The best footwear for riding offers solid support and a slight heel. The slight heel helps to protect your foot from sliding all the way through the stirrup, causing the rider to get stuck in an emergency. Figures 1–7 show examples of bad, better, and best options for footwear.
| Bad Poor fitting, non-covering, open-toed, thick soles (platform-type shoes). |
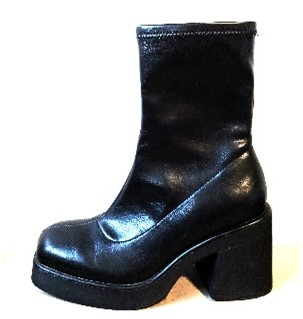
Figure 1. Thick-Soled Boot 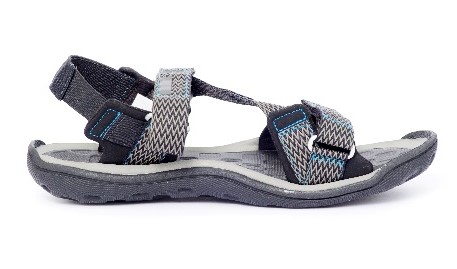
Figure 2. Open-Toed Sandal |
| Better Thinner soles, supportive materials, close-toed. |
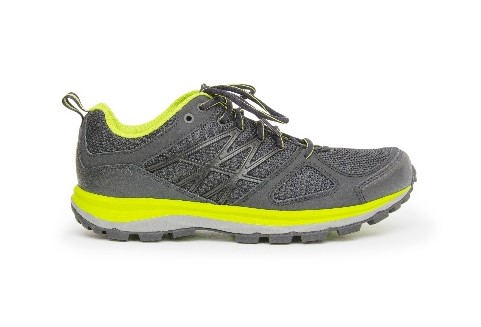
Figure 3. Athletic Shoe 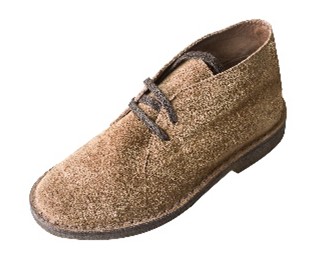
Figure 2. Casual, Closed-Toed Shoe |
| Best Lace-up, slight heel, ankle support, or western boot. |
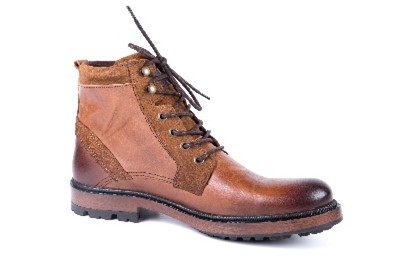
Figure 5. Lace-up Boot 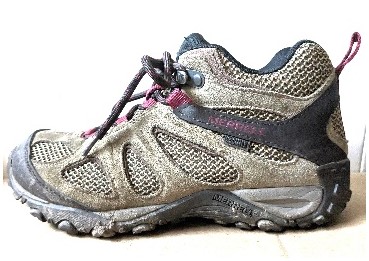
Figure 6. Hiking Boot 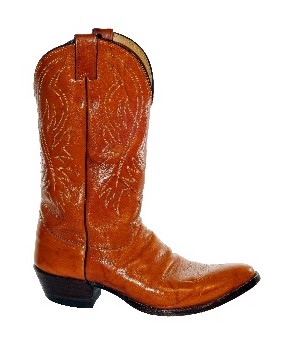
Figure 7. Western Boot |
Pants
When selecting appropriate clothing for a trail ride, pants should be made of sturdy material and well-fitted without extra adornments, pockets, or decorations (e.g., decorative bling, pocket loops). They should also be full length. When trail riding, it is common to ride in areas with trees or brush that can easily snag on clothing. Loose-fitting and thin material can pose a risk of injury or getting stuck. The best material option for pants is denim, canvas, or heavy cotton. Try to avoid riding in items such as shorts, leggings, or silky materials. Jeans with additional adornments, chains, or decorative holes or fraying can also pose a risk for exposure, discomfort, or injury from passing trees.
Headwear
Hats are also a great addition to your trail ride to help with sun exposure. Ball caps, visors, or other hats with a brim are helpful to avoid a nasty sunburn. Remember, cowboys don’t just wear their hats for looks.
Safety Gear – Helmets
We highly recommended that horseback riders wear a helmet certified by the American Standard for Testing (ASTM) or Safety Equipment Institute (SEI). These are different from bicycle or motorcycle helmets. “Studies have shown that a properly fitted and certified helmet can drastically reduce the incidence of serious injury and harm to horseback riders” (Hadfield et al., 2023). If you are attending an organized trail ride, contact the host to see if helmets will be provided for those who wish to use them. If you are attending a Utah State University (USU) Extension-sponsored ride, youth under age 18 are required to wear a helmet during the ride. Typically, helmets are provided but optional for those over age 18.
Additional Support
If you have any forms of joint support that you would typically wear for athletic activities, like braces or cuffs, we recommended that you wear them, especially for your knees or ankles. While trail riding may not seem like it requires high rates of exertion, it is still a form of exercise that may leave sensitive joints feeling sore or unstable when in the saddle. If you need to wear one of these devices, we suggest checking with the instructor or facilitator before participating.
You might also benefit from wearing compression garments, which are shown to increase blood flow to help reduce swelling, inflammation, and muscle fatigue (University of Pittsburg Medical Center [UPMC], 2016). Compression socks, shorts, and leggings support blood flow in the lower body and can help reduce muscle fatigue and alleviate soreness and potential joint pain after riding.
Stretching Before Mounting a Horse
Riding a horse is a full-body workout for both new and experienced riders and is shown to increase muscle mass and improve physical fitness and balance, especially in new riders (Sung et al., 2015). Muscles in the legs and core are engaged the most when riding on a horse because they play a major role in maintaining balance and controlling movement (Abel, n.d.; Shields, 2020). You can strengthen and stretch these muscles through a variety of movements, but this article focuses on stretching. Table 1 shows the general muscle groups, their function in riding, and examples of stretches to do before and after a ride to prevent and manage soreness. Appendix C includes a sample full body stretch routine video and guide with pictures you can follow.
Table 1
Muscle Groups, Their Function in Riding, and Example Stretches
| Muscle group | Function in riding | Example stretches |
|---|---|---|
| Scapular stabilizer muscle group (shoulder blades) | Used in maintaining proper posture without rounding the shoulders. Also engaged when physical strength is needed to handle a “spirited” horse. | Backward and forward shoulder rolls; cross-body shoulder stretch; shoulder gators; pendulum stretch; scapular squeezes; YTWs |
| Back and spinal muscle groups |
Group of muscles that provide spinal support, rotation, and side flexion to help stay in the saddle and not slide off. | Torso rotation stretch (standing or sitting); alternating knee to chest (standing or sitting); YTWs; child’s pose. |
| Chest muscle group | Aids proper posture by working with the scapular muscles. Prevents slouching or rounded shoulders, which can lead to poor posture and back pain. |
Behind-the-back stretch/chest opener; bent arm wall stretch; wall angels/floor slides (standing or lying down); behind-the-head stretch/chest opener. |
| Abdominal muscle group |
Provides core stability and balance in the saddle, which helps coordinate the hips, pelvis, and lower back to move with the horse’s movements rather than being rigid. Rigidity inhibits shock absorption, leading to back pain. This muscle group also plays a role in regulating breathing. | Cobra stretch to child’s pose; backward bend (standing, kneeling, or using a ball); overhead stretch with side bend. |
| Hip abductors (outer thigh) and adductors (inner thigh) muscle groups | Abductors stabilize the hips and pelvis to properly position the legs when riding. Adductors help absorb the horse’s movements, allowing the rider to move with their gait. Too much tension/squeezing in the adductors can create asymmetry and cause soreness in the legs and hips. | Crossed-leg rotation (sitting or lying down); hurdle steps (standing or sitting); butterfly stretch; lateral hip openers; forward lunge. |
| Hip extensors (includes glutes and hamstrings) |
Helps to drive the forward momentum of the horse and aids in proper riding technique. When underdeveloped or tight, it can lead to back pain. |
Straight-leg hamstring stretch (standing, sitting, or lying down); figure-four stretch (sitting or lying down); alternating knee to chest stretch (lying down). |
Sources: Abel (n.d.); Editorial Staff (2018, June 5); Shields (2020); Stretches are from Medical News Today (https://www.medicalnewstoday.com/) and Nike Training Club (https://www.nike.com/ntc-app).
During the Trail Ride: Best Practices for a Safe and Comfortable Experience
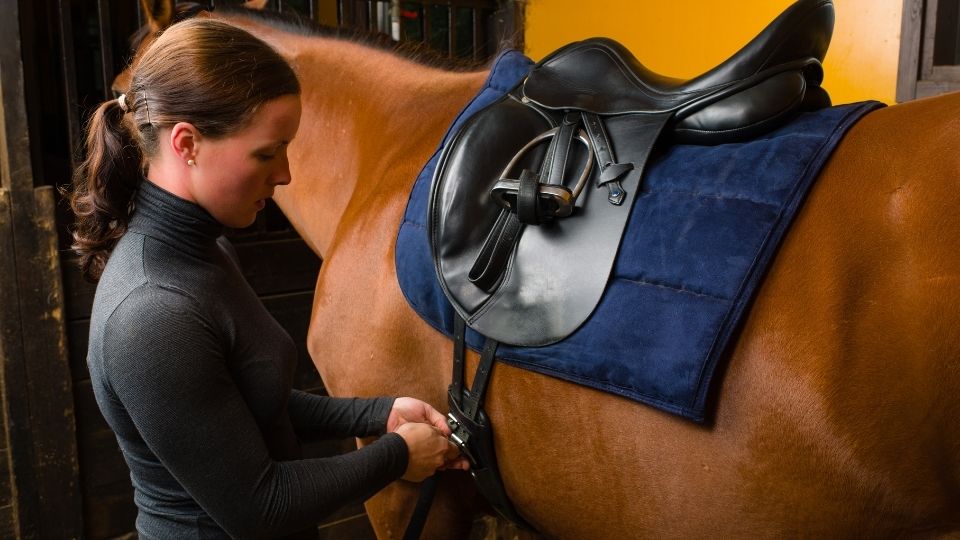
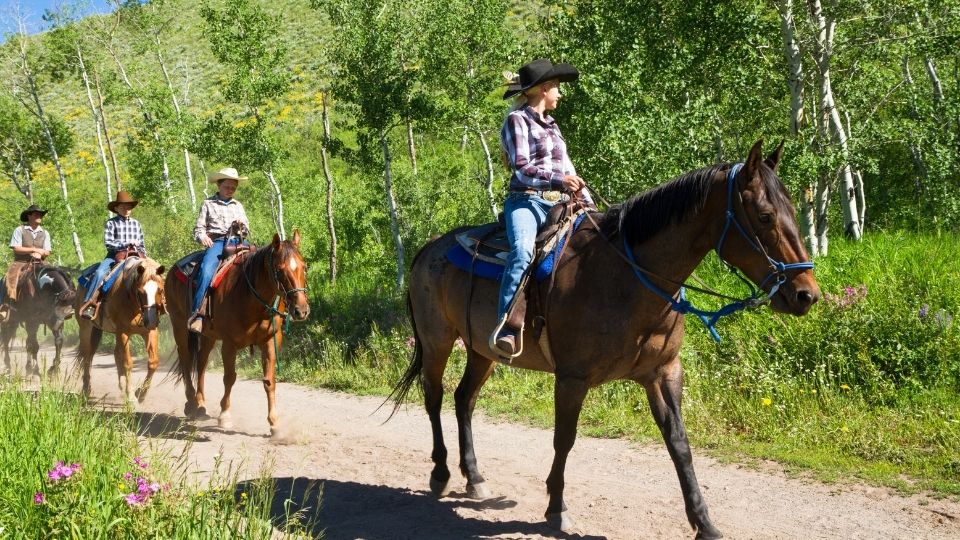
If participating in an organized trail ride, you will most likely be riding in a western-style saddle. Correct stirrup length, posture, and rein hold are not only safety points but also come into play for your comfort both during and after the ride.
Stirrup Length
Stirrup length affects your ability to balance and feel secure in the saddle and the amount of pressure put on your knees and ankles during the ride. In general, if the stirrups are too long, you may experience soreness in your hips and extra pressure in your seat. If the stirrups are too short, you will feel additional pressure in your knees and ankles. The appropriate stirrup length should result in a slight bend in your knee and a very slight drop in your ankle when you have the ball of your foot in the stirrup. An easy way to check this length is to “stand” in your stirrups; when doing so, you should be able to fit a hand’s width between yourself and the saddle. Ensure that your stirrup length is even on each side so that you are balanced in the saddle. When positioned properly, your lower leg should serve as a shock absorber during your ride.
Posture
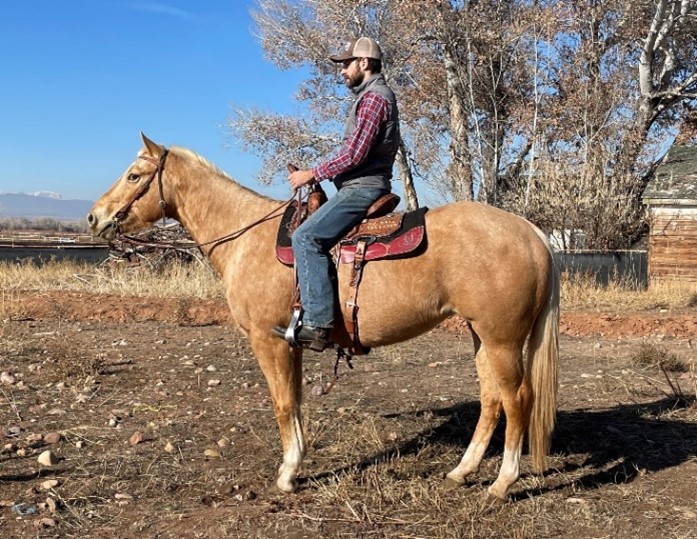
When seated in the saddle, you should be sitting upright with a general line from your shoulder to your hip to your heel (Figure 8). This helps to ensure that you have a solid balance and center of gravity when riding and are, therefore, better able to adapt to the horse’s movements and the terrain you are traveling. Keep your lower body relaxed so you are free to move your hips, knees, and ankles along with the horse. As a general rule of thumb, when riding in the hills, you should tilt your upper body slightly forward when going uphill and slightly backward when going downhill. This helps to keep the horse balanced and allows for safer steep terrain navigation. This movement is as simple as a slight opening and closing of the angle of your pelvis.
Rein Hold
Proper rein hold is important for both the safety and control of your horse. Your hands should grip around the rein in a relaxed fashion, spanning from your pinky to your index finger. Never wrap the reins around your hand or wrist nor place them over the saddle horn because they can get caught and lead to injury. Your reins should be long enough to give the horse’s mouth relief when in your hand but short enough that a small tug on them can cue the horse to stop.
While posture is important for a safe and comfortable ride, the most important part is not forgetting to look up and enjoy the scenery around you! Many first-time riders tend to focus their eyes too much on their horse, which leads to a hunched posture and a very narrow view. Horses tend to go where you point them, so look up and ahead to the trail, and your horse will carry you steady along the way. Once you have found your proper posture, sit back, relax, and enjoy the ride.
Staying Relaxed in the Saddle
No matter the skill level, some tension is expected when riding a horse because it takes control to sit on and direct a horse effectively. Inexperienced riders tend to tighten their muscles, thinking that this will help them stay on the horse, but it’s actually working against them because it doesn’t allow them to move with the horse and can cause asymmetrical posture (Goodnight, 2019; Shields, 2020). Rather, they might feel like they are bouncing and having difficulty staying upright. Inexperienced riders might squeeze their legs, grip the reins, and look down at the horse instead of looking forward, which can lead to leaning and hunching down. All these behaviors can cause several issues for both rider and horse. Some horses increase their speed when they feel their sides squeezed, and constant squeezing tenses the rider’s inner thighs, hips, lower back, and glutes; gripping the reins tenses the forearms, shoulders, neck, and upper back; and leaning forward or hunching gets the rider off balance, which stresses the back, hips, shoulders, and neck. All this tension and poor riding posture also stress the horse’s back.
It takes experience and practice to ride a horse comfortably without tensing your muscles, which might take a while to build if your main horse-riding experience involves sporadic trail rides. However, there are a few techniques you can try to decrease your chance of being tense in the moment. Practicing “active relaxation” engages the mind and body to reduce stress.
Active Relaxation
- Control your breathing using a 4 x 4 count by inhaling slowly in through the nose and into your belly for 4 seconds and exhaling slowly out through the mouth for 4 seconds. Use a 2 x 2 count if 4 seconds is too long.
- Do a mental body scan to see where you feel tense and move those areas to loosen up.
- Are you holding the reins too tightly? Do a few hand squeezes to help loosen your grip (make sure to always keep one hand on the reins).
- Are you looking down at the horse? Look straight ahead and around you. Notice the landscape and other riders.
- Do you feel tension in your shoulders and neck? Drop your shoulders away from your ears and roll them backward a few times. This will also improve your posture by bringing your chest up and straightening your back.
- If you feel nervous in general, start a conversation with someone who is riding near you. Feel present in the moment and take in the sights, sounds, and smells. Try saying aloud everything you see.
After a Trail Ride: Managing Soreness and Pain
When the trail ride is over, it’s normal to have trouble standing when you get off the horse—your legs might feel weak and wobbly, and it may take a few seconds to recover (try wiggling your toes and slowly swinging your legs forward and back before you get off). If you are nervous about this happening, don’t be afraid to ask for help as you dismount.
You will also discover muscles you never knew you had! Your muscles might feel sore, weak, or stiff about 24–48 hours after the activity, which may last for three to seven days (Kaminsky, 2022). This delayed onset muscle soreness (DOMS) happens to everyone, even those who are physically fit. While complete rest (e.g., sitting, lying down) has its benefits, we recommended doing some activity to help alleviate soreness and repair muscles faster over the next few days. A few strategies are listed with examples in Table 2. If you feel a sharp stabbing pain, notice abnormal swelling, or the level of pain doesn’t improve after a few days, talk to a medical professional to check if you have a more serious injury.
Table 2
Delayed Onset Muscle Soreness (DOMS) Management Strategies , Their Importance, and Examples
| Management strategy | Importance | Examples |
|---|---|---|
| Consume protein, carbohydrates, fluids, and electrolytes. | Proteins and carbs together after physical activity help replenish nutrients and aids in muscle repair. Electrolytes are needed for proper muscle contraction, and fluids help prevent dehydration. | Peanut butter and jelly sandwich; smoothie with fruits, veggies, and protein supplement or low-fat milk; egg or turkey wrap; low-fat chocolate milk; low-fat yogurt with fruit. |
| Use massage. | Helps increase blood flow to muscles and break down scar tissue buildup, which can tighten muscles over time and impact flexibility and movement. | Myofascial release (e.g., foam roller, roller ball, massage stick); relaxation massage; self-massage. Avoid deep tissue massages and massage guns immediately after, which might worsen the soreness. |
| Engage in active recovery. |
Helps increase blood flow and reduce inflammation through low-intensity activity of the affected muscle groups. | Stretching (see Appendix C); leisurely walking, swimming, or cycling; lifting light weights (50%–60% of normal) or using stretch bands. |
| Use hot and cold therapies |
Heat wraps help increase tissue flexibility and blood flow. Cold therapy reduces inflammation and numbs pain receptors. | Heat wraps; cold wraps. Can apply heat therapy immediately after activity and cold therapy 24 hours after to help reduce muscle damage. Cold therapy can help reduce pain at both timeframes. |
| Wear compression garments. |
Helps increase blood flow and reduces muscle fatigue and soreness. Recommended to use during and after an activity. | Graduated compression garments include tights, shorts, socks, calf sleeves, and shirts. |
| Take over-the-counter medications | Helps reduce inflammation and pain. | Medications containing ibuprofen; acetaminophen; gels containing NSAIDs. Check with your doctor or a pharmacist to ensure you don’t have side effects or allergies. |
| Use cold water immersion |
May help reduce swelling and alleviate pain, but most studies were done with athletes and physically active adults. | Immersing in water between 50 °F and 59 °F for 10–15 minutes. |
Sources: Ames (2023); David (2022); Kaminsky (2022); Machado (2016); Mohr (2019); Petrofsky et al. (2015); UPMC (2016); and Zambon (2021).
Conclusion
Embarking on a horse trail ride is not just a recreational activity; it is a holistic experience that fosters a profound connection between humans and horses while providing therapeutic benefits. Adequate preparation, including selecting appropriate clothing, exercising safe riding practices, and engaging in pre-ride stretches to enhance rider fitness, allows participants to fully appreciate the experience. In essence, horse trail rides serve not only as a gateway to nature’s wonders but also as a gateway to a deeper connection with oneself and the magnificent animals that accompany us on these journeys. As riders venture into Utah’s beautiful outdoors, the multifaceted benefits of horse trail rides, including physical fitness, mental well-being, and the strengthening of the human-animal bond, unfold, making each excursion a truly enriching experience for all participants.
References
-
Abel, C. (n.d.). Muscles used for horseback riding: Complete guide. Equine Helper, Wild Wire Media, LLC. https://equinehelper.com/muscles-used-for-horseback-riding/
-
Ames, H. (2023). What is delayed-onset muscle soreness (DOMS)? Medical News Today, Healthline Media. https://www.medicalnewstoday.com/articles/delayed-onset-muscle-soreness#prevention
-
David, L. (2022). How to use massage for post-workout recovery. VeryWell Fit, Dotdash Media, Inc. https://www.verywellfit.com/massage-after-exercise-may-speed-muscle-recovery-3436572
-
Editorial Staff. (2018, June 5). These 7 muscle groups can make or break your riding performance [Web log post]. Noëlle Floyd. https://www.noellefloyd.com/blogs/sport/these-7-muscle-groups-can-make-or-break-your-riding-performance?_pos=1&_sid=6cf5b8a95&_ss=r
-
Goodnight, J. (2019). Body position for horseback riding. American Quarter Horse Association. https://www.aqha.com/-/horseback-riding-basics-positi-1#:~:text=When%20you%27re%20sitting%20on,all%20sports%20that%20require%20balance
-
Hadfield, J., Hendrickson, M., & Utah 4-H State Western Horse Council. (2023). Western horse rule book. Utah State University Extension 4-H. https://extension.usu.edu/saltlake/files/2023-StateHorseRulebook.pdf
-
Kaminsky, J. (2022). Muscle soreness & DOMS: How to prevent & treat sore muscles. National Academy of Sports Medicine (NASM). https://blog.nasm.org/doms-muscle-sorenes
-
Machado, A. F., Ferreira, P. H., Micheletti, J. K., de Almeida, A. C., Lemes, Í. R., Vanderlei, F. M., Netto Junior, J. & Pastre, C. M. (2016). Can water temperature and immersion time influence the effect of cold water immersion on muscle soreness? A systematic review and meta-analysis. Sports Medicine, 46(4), 503–514. doi: 10.1007/s40279-015-0431-7. PMID: 26581833; PMCID: PMC4802003.
-
Marchand, W. R., Andersen, S. J., Smith, J. E., Hoopes, K. H., & Carlson, J. K. (2021). Equine-Assisted activities and therapies for veterans with posttraumatic stress disorder: Current state, challenges and future directions. Chronic Stress, 5. https://doi.org/10.1177/2470547021991556
-
Mohr, C. R. (2019). Timing your pre- and post-workout nutrition. Academy of Nutrition and Dietetics. https://www.eatright.org/fitness/physical-activity/exercise-nutrition/timing-your-pre-and-post-workout-nutrition
-
Petrofsky, J. S., Khowailed, I. A., Lee, H., Berk, L., Bains, G. S., Akerkar, S., Shah, J., Al-Dabbak, F., & Laymon, M. S. (2015). Cold vs. heat after exercise—is there a clear winner for muscle soreness? Journal of Strength and Conditioning Research, 29(11), 3245–3252. doi: 10.1519/JSC.0000000000001127. PMID: 26502272.
-
Shields, E. (2020). Rider anatomy lessons: Muscle form and function. Physio Equine Solutions. https://physioequinesolutions.com/2020/09/17/rider-anatomy-lessons-muscle-form-and-function/
-
Sung, B. J., Jeon, S. Y., Lim, S. R., Lee, K. E., & Jee, H. (2015). Equestrian expertise affecting physical fitness, body compositions, lactate, heart rate and calorie consumption of elite horse riding players. Journal of Exercise Rehabilitation, 11(3), 175–181. doi: 10.12965/jer.150209. PMID: 26171385; PMCID: PMC4492429.
-
University of Pittsburg Medical Center (UPMC) (2016). Benefits of compression gear. UPMC HealthBeat. https://share.upmc.com/2016/01/benefits-of-compression-gear/
-
Zambon, V. (2021). What to know about active recovery. Medical News Today, Healthline Media. https://www.medicalnewstoday.com/articles/active-recovery#definition
Published December 2023
Utah State University Extension
Peer-reviewed fact sheet
Appendices
Access the following appendices by clicking the PDF button and downloading the fact sheet. Scan the QR code to access a follow-along full body stretch routine video.
- Appendix A, Pre-Trail Ride Checklist - Participants
- Appendix B, Pre-Trail Ride Checklist - Facilitators
- Appendix C - Full-Body Stretches

Authors
Gabriela Murza, Katelyn Barsnick, and Karl Hoopes

Gabriela Murza
Professional Practice Extension Assistant Professor | Health and Wellness | HEART Initiative | Utah County
Home and Community Department

Karl Hoopes
Equine Specialist
ADVS Dept
Related Research
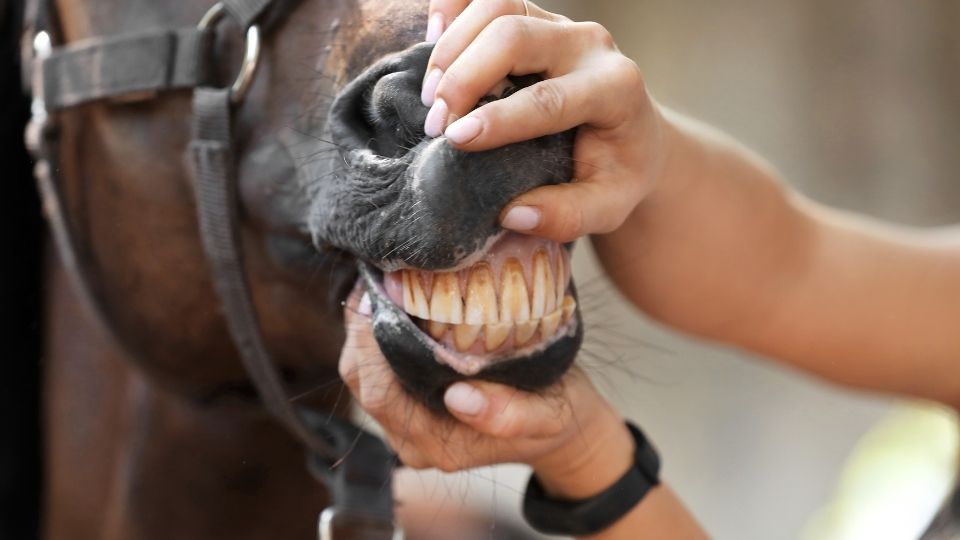
Aging Horses by Their Teeth
Being able to pinpoint age within a fairly narrow range can be of use to owners of unregistered horses or horses whose age is unknown for any reason. Many health and nutrition management decisions are directly related to age and dental wear, making it eve
Biosecurity at Equine Events: Event Committee Guidelines
Equine events have the potential for the perfect storm of equine disease spread. Horse’s immune systems are stressed by travel and competition, horses are comingled in close quarters, and various bacteria and viruses are brought from different locations.
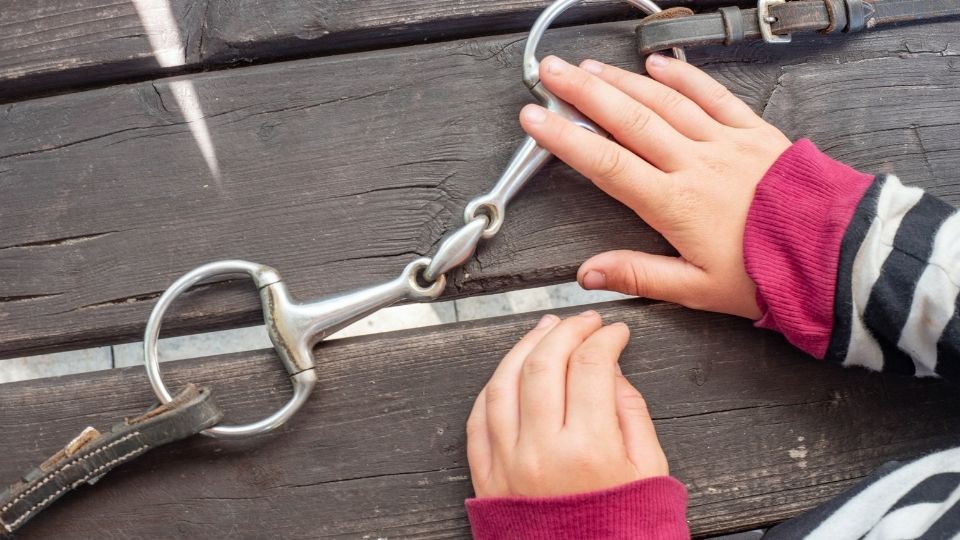
Bitting the Horse: Snaffles
As horses are introduced to carrying a saddle and rider, they are also introduced to carrying a bit. The horse’s teeth should be evaluated prior to bitting. Points and hooks should be filed and wolf teeth should be removed. Wolf teeth are small, shallowro
Buying Your First Horse
Buying a horse can be quite a task for the first time horse buyer. It is very beneficial for the buyer to have some horse experience prior to ownership, perhaps by working at a stable or by taking riding lessons. Prior experience with horse management and
Caring for Horses in Cold Weather
During dark winter months, we often start to worry about our horses being outside in the cold. How do they stay warm? Horses adapt very well to colder weather. During the fall months, as temperatures cool gradually, horses begin to add additional fat and
Daily Horse Observations for Horse Owners
When responsible for a horse, an owner must be very observant. Knowing what is normal and what is not for each individual horse can alert the owner or caretaker to a problem before it becomes a big issue. Owners that have a routine, which can be followed
Equine Dental Care
Just as people visit the dentist on a regular basis to maintain proper dental health, horses also require regular dental care. Horses should have at least annual dental check-ups to maintain proper alignment and remove points and hooks.
Equine First Aid Information Flipbook
The USU Extension Equine First Aid Information flipbook was developed for horse owners to keep important contact and first aid information together in one place. Users are encouraged to download the PDF, cut out the individual pages, and bind together wit
Equine Immunity, Vaccination Guidelines, and Recommendations
Animals are constantly exposed to disease pathogens. Vaccines are used as a tool to minimize the effect infectious diseases have on the animals through selectively manipulating the immune system. Vaccines have the ability to stimulate a more specific acti
Equine Navicular Syndrome
Equine navicular syndrome greatly affects the horse industry by accounting for up to one-third of all chronic forelimb lamenesses. While the exact cause and development of this disease are still widely controversial, there are noticeable and significant c
Equine Nutrition: Concentrates
Concentrates (grain) should be considered only as supplements to good quality hay. In general, a mature horse does not require the energy that would be provided by concentrate type feeds (grains/sweet feeds, pelleted feed, etc.) unless the horse is used f
Equine Nutrition: Forages
The following section on digestion will help horse owners understand the importance of feeding quality forages to insure proper feeding and care of their horses.
Equine Piroplasmosis
Equine Piroplasmosis (EP) is a tick-borne disease also referred to as babesiosis or theileriosis. This disease can affect horses, donkeys, mules, and zebras. Theileria equi and Babesia caballi are the causative parasitic agents of this disease which is sp
Foal Hoof Care: When and How Often to Trim?
There are many steps that need to be taken at foaling time and shortly thereafter to optimize mare and foal health, vigor, and longevity.

Helmets, Heads, and Health for Horse Enthusiasts
Accidents are likely when rider/horse partnerships are not equal or the horse reacts unexpectedly.
Horse Safety: “It’s Just Good Sense”
Utahns experience a significantly higher rate of horse related injuries than our counterparts in other western states. In Utah horses account for 58% of all documented agricultural injuries, and tend to produce more serious injuries than other causes. Hor
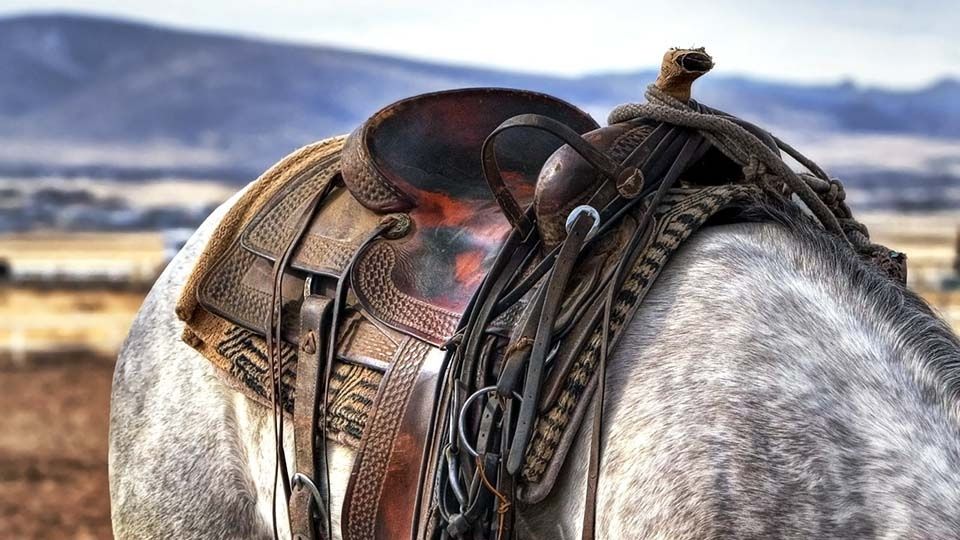
Inspecting and Buying a New or Used Saddle
Whether purchasing a new or used saddle, several aspects should be evaluated. To determine if the saddle is sturdy and well-made some aspects to check to include the leather, stitching, metal fittings, and tree.
Intrastate and Interstate Travel Requirements for Horses
Life and traveling with horses on public roads can be exciting. For first-time horse owners, many laws and requirements can be perplexing, confusing, and frustrating. However, when understood, it is easy to see that these laws and requirements are designe

Managing Equine Metabolic Syndrome
Equine metabolic syndrome (EMS) is a relatively new disease that we are still learning about. There are many things to investigate when dealing with a new disease: causes, predispositions, symptoms, secondary issues, treatments, and prevention. Because ch

Poisonous Plants and Equine
Poisonous plants can be found in almost all plant communities. Like most other species of livestock, equine/horses will not usually choose to consume weeds or poisonous plants when quality forages are available.

Preventing and Managing Gastric Ulcer Syndrome
Current industry trends regarding equine management practices largely contribute to the development of equine gastric ulcer syndrome (EGUS). Research on effective medical management exists; however, we lack studies on the efficacy of equine-welfare-minded
Proper Basic Hoof Care
Equine hoof care is too often “out of sight, out of mind.” However, horse owners must realize that for maximum horse health and longevity, through hoof and leg soundness, regular hoof care is a must. This publication addresses the needs and procedures for

Requisitos para el Viaje de Caballos Dentro del Estado de Utah y de un Estado a otro
Vivir y viajar con caballos en caminos/carreteras públicas puede ser emocionante. Para quienes son dueños de caballos por primera vez, muchas leyes y requerimientos pueden ser desconcertantes, confusos, y frustrantes. Sin embargo, luego de entender, es fá
Selecting a Saddle to Fit the Rider
So you have the brand new horse, now you need to find a saddle. Finding the proper saddle that fits the rider is very important. A correctly fitting saddle will aid the rider in maintaining a proper position in the saddle, ideal leg position and will be c
So, You’re Going on a Trail Ride
Horse trail rides are unique and enriching experiences for people of all ages. These serene journeys through nature provide an opportunity to connect with horses, appreciate their gentle nature, and develop a deeper understanding of their role in our live
Time to Say Goodbye (Equine Euthanasia)
As hard as it is to say goodbye, many horse owners eventually have to make the decision to euthanize their horse. This choice is often the result of a carefully thought out decision made after a long and productive life of a good friend. However, sometime
Trail Ride First Aid for Horses
Horses can be a wonderful way to experience the beautiful land in which we live. They can be willing partners as they carry us to explore the surrounding hills, valleys, rivers, mountains, and country side. Horses are strong and powerful animals but, they
Utah Brand Inspections for Horses
Owning a horse can be an exciting endeavor. Horse-related activities have proven to be beneficial both for physical and mental health.
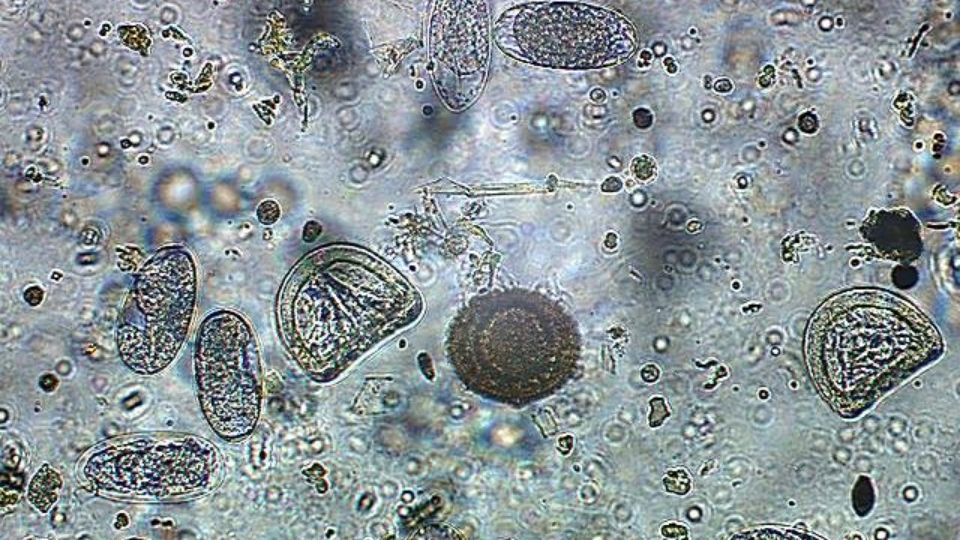
Fecal Egg Count Tests Improve Deworming Programs
Management of internal parasites is an important aspect of horse health care, as parasites can harm the horse. These parasites include Ascarids, Strongyles, tape worms and bots.