How to Preserve Venison
Did You Know?
The flavor and texture of the final venison product is affected by how the meat is handled following harvest. Venison may be preserved according to directions for preserving beef, pork, or mutton. Venison jerky is a nutritious, convenient meat product you can make safely at home.
Field Handling
Avoid harvesting any animal that appears unhealthy. Use care when field dressing wild game. Wear plastic gloves, and use a plastic bag to tie over bung before evisceration. Contaminating the carcass is one of the most common errors hunters make. Refrigerate the skinned carcass as soon as possible for best quality (usually within 3 to 4 hours if the air temperature is above 45oF).
Selection and Preparation
Use only meat from healthy, disease-free animals (healthy in general appearance and not displaying any abnormal actions), and protect the meat from dirt and flies. Aging and butchering can be done at home or by a qualified butcher.
General Cleanliness
Make sure all surfaces and utensils that will touch the meat are clean. Use a detergent and warm water solution to remove all visible signs of soils. Re-clean and sanitize surfaces and utensils after working with meat to prevent cross contamination of raw meats with other foods.
Food Safety Note
Always wash cutting boards, utensils, and counters with hot soapy water before and after any contact with raw meat or juices. To make a sanitizing solution, use 1 teaspoon of household chlorine bleach per quart of water or use a commercial kitchen disinfectant.
Aging
Age the carcass by hanging in a clean, cool, dry place with a near constant temperature, preferably 34 to 36°F. Excess moisture will increase the development of mold. Walk-in coolers are best for aging. Aging, when the temperature is correct, has been found to give a better flavored, more tender meat. In addition to making the meat more palatable, proper aging gives the meat a firmer “set” so that the carcass has better cutting quality, and is easier to handle and wrap for storage in the freezer. Aging is not required when making sausage. After aging, the carcass is typically processed into manageable cuts and wrapped. Generally one carcass yields only 20 to 25 percent boneless meat in the form of steaks, roasts, and ground trim. Wrapped venison cuts should be kept chilled at 40°F or lower to prevent spoilage.
Freezing
Freezing preserves the natural, fresh qualities of venison better than any other method of preservation. Freezing may tenderize meat slightly, but it will not make tough venison tender. For best quality use aged meat (1 week @ 35°F). Prepare venison cuts for cooking, removing all bone and excess fat. Package in family-size or individual servings. Keep venison cold while being cut and wrapped. Pack using one of the following methods, then seal, label, and freeze.
Large Cuts
Wrap cuts individually in freezer paper, film or foil.
Steak or Chops
Wrap individually in freezer paper, film or foil with a double layer of moisture/vapor-proof material placed between each piece of meat to make separation for cooking easier.
Ground Venison
Pack in family-size servings and wrap as large pieces.
Note: For short storage periods, venison may be frozen in plastic freezer bags. Seal, label and freeze.
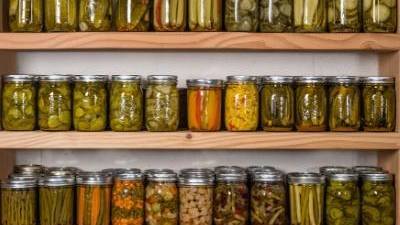
Canning
Venison is a low-acid food and when canned, it must be processed in a pressure canner for safety. Salt adds flavor, but is not necessary for preservation. Venison can be packed either raw or cooked (raw pack or hot pack). Hot pack is preferred. Raw pack is faster, but when finished processing, the jars are often partially filled with liquid leaving some of the meat uncovered. Raw packing also leaves some air in the jar resulting in meat darkening during storage. Hot pack takes longer, but you can: (a) fit more meat into the jar, (b) remove more air from jars, and (c) have less liquid loss, all leading to better quality.
Canning Strips, Cubes or Chunks of Venison
Procedure
Choose fresh, high-quality, chilled meat. Remove all fat (fat from venison has a very strong “game” flavor). Any fat left on the venison may also affect lid sealing. Remove all bones, gristle and bruised spots. Cut trimmed venison into strips, cubes or chunks.
Hot Pack
Precook venison until at least rare by roasting, stewing or browning in a small amount of fat. Add 1 teaspoon of salt per quart to the jar, if desired. Fill jars with pieces and add boiling broth, meat drippings, water, or tomato juice (recommended for venison as it helps cover “game” taste), leaving a 1 inch headspace.
Raw Pack
Add 1 teaspoon of salt per quart jar, if desired. Fill jars with raw meat pieces, leaving a 1 inch headspace. Do not add liquid. Adjust lids and process (see Table 1 on page 3).
Canning Ground or Chopped Venison
Choose fresh, high-quality, chilled meat. If desired, add 1 part high-quality pork or beef fat to 3 or 4 parts venison before grinding. Grind and shape chopped meat into patties or meatballs or cut cased sausage into 3 to 4 inch links. Cook until lightly browned. (Note: Ground meat may also be sautéed without shaping.) Discard any free fat and fill jars. Add boiling venison broth, tomato juice, or water, leaving a 1-inch headspace. If desired, add 1 teaspoon of salt per quart. Adjust lids and process (see Table 1).
| Table 1. Recommended process time for (a) strips, cubes, or chunks of meat and (b) ground or chopped meats in a dial-gauge pressure canner. | ||||||
|---|---|---|---|---|---|---|
| Pressure (PSI) at Altitude of | ||||||
| Pack | Jar size | Time | 0-2000 feet | 2001-4000 feet | 4001-6000 feet | 6000+feet |
| Hot or Raw | Pints | 75 min | 11 lbs | 12 lbs | 13 lbs | 14 lbs |
| Hot or Raw | Quarts | 90 min | 11 lbs | 12 lbs | 13 lbs | 14 lbs |
| Recommended process time for (a) strips, cubes, or chunks of meat and (b) ground or chopped meats in a weighted-gauge pressure canner. | ||||
|---|---|---|---|---|
| Pack | Jar | Time | 0-1000 feet | Above 1000 feet |
| Hot or Raw | Pints | 75 min | 10 lbs | 15 lbs |
| Hot or Raw | Quarts | 90 min | 10lbs | 15lbs |
Helpful Hints
Have dial gauges checked annually. Don’t be creative in home canning ̶ follow instructions exactly! A common complaint is that liquid siphons out of jars during processing. This can be because of (a) too much liquid added, and not enough headspace, or (b) too much variation in temperature when the pressure canner cools down too fast or when pressure is not held steady. To avoid this problem when processing, turn burner down from high to medium when it reaches about 8 lbs pressure. By the time it reaches the correct pressure it is easier to keep the canner temperature constant.
After allowing pressure to drop to zero, remove jars from canner and place on cooling racks. When jars have sealed and are cool, remove rings and store in a cool, dark place. Never leave processed jars in pressure canner overnight. “Flat sour” spoilage can occur and ruin the flavor of the food. As canned venison is used from the food storage shelf, boil meat for 10 to 15 minutes before using as an extra safety precaution if desired. (Check jars for signs of spoilage such as bulging lids, spurting or bad odor and discard contents. Realize that botulinum toxin does not always have an odor.)
Sausage
Sausage is an excellent preparation method for game meats like venison. Game meats can often have a very strong “wild” flavor that can be masked with spices used in sausage making.
Basic Fresh Game Sausage
For every 3 pounds of game meat add 1 to 2 pounds of pork fat (or beef fat). Do not use game fat trimmings. Grind meat (while very cold) in a grinder, first using the course blade. Add salt (start with 1 Tbsp per 4 pounds of meat) and spices such as nutmeg, coriander, black pepper, anise, etc., to taste. Mix by hand and grind a second time using a fine blade. Form sausage into patties, meatballs, or stuff into casings. Keep fresh sausage refrigerated or frozen. Cook sausage to 165°F before eating.
Venison Country Sausage Recipe
Mix 2:1 venison to pork fat. Grind as described above. Add the following for each 5 pounds of meat: 1 tsp celery salt, 1/4 tsp red or cayenne pepper, 1 tsp black pepper, 1/2 tsp onion powder, 1 tsp salt, 1 tsp sage and 1 tsp garlic powder. Omit any spices you do not like.
Drying
Venison Jerky
Jerky is made by drying thin strips of lean meat to about one-fourth its original weight. Sun drying is not recommended due to poor temperature control and potential for contamination from animals, insects, dust and bacteria. Outbreaks of illness and recent university studies have indicated that traditional jerky processes do not adequately destroy foodborne illness bacteria, Salmonella and Escherichia coli O157:H7. Several newer, research- tested recipes were created to make jerky drying safer. The following jerky preparation methods were developed separately by Colorado State University and Utah State University.
Basic Meat Preparation
Use lean meats such as round, flank and chuck steak, rump roast, brisket and cross rib. Highly marbled and fatty cuts do not work as well. Remove any thick connective tissue and gristle from meat. Trim off visible fat with a sharp knife. Fat becomes rancid quickly and causes the development of off-flavors during drying or storage. Freeze meat in moisture-proof paper or plastic wrap until firm but not solid.
Slice the meat on a clean cutting board, while still slightly frozen, into long thin strips, approximately 1⁄4 inch thick, 1 to 1 1⁄2 inches wide and 4 to 10 inches long. If chewy jerky is preferred, slice with the grain; slice across the grain for a more tender, brittle jerky. Lay the strips out in a single layer on a clean and sanitized smooth surface (cutting board, counter top, or cookie sheet). Flatten the strips with a rolling pin so they are fairly uniform in thickness. Finish processing the jerky using one of the methods below.
Hot Cure Method
In this method heat from partial cooking kills illness causing bacteria on the meat. Create a brine of your favorite jerky marinade recipe. You may choose to use less water for a more concentrated marinade solution. If you use a powdered mix, reserve some for dry spicing later. Bring marinade to a simmering boil. Place a few pieces at a time into the hot marinade for 1 1⁄2 to 2 minutes. Remove slices with tongs and place them on a clean cookie sheet. Using only clean utensils spread reserved dry spice on both sides of heated jerky strips. Cover with plastic wrap and refrigerate overnight. The meat strips are ready for drying.
Vinegar-Marinade Method
In this method acid from vinegar is used to kill some or all of the illness causing bacteria. Ingredients per 2 pounds of lean meat slices:
Pre-treatment dip: 2 cups vinegar
Marinade:
- 1⁄4 cup soy sauce
- 1 tablespoon worcestershire sauce
- 1⁄4 teaspoon black pepper
- 1⁄4 teaspoon garlic powder
- 1⁄2 teaspoon onion powder
- 1 teaspoon hickory smoked salt
Directions: Place 2 cups vinegar in 9x11inch cake pan or plastic storage container. Add meat strips to container, making sure vinegar covers all strips; Let soak 10 minutes, stirring occasionally to ensure distribution of vinegar on strips.
Combine all marinade ingredients and place in a 1 gallon re-sealable plastic bag. Add lean meat slices to bag; seal bag and massage pieces to thoroughly distribute marinade over all meat strips. Refrigerate bag 1 to 24 hours. The meat strips are then ready for drying.
General Jerky Drying Procedure
Remove treated and marinated meat slices from the refrigerator. Place strips flat, without touching each other, on clean dehydrator trays, oven (wire) racks or other drying trays. Place trays in pre-heated dehydrator and dry at 145oF for 10 to 14 hours, or until slices are adequately dry. Oven drying can work if the oven can achieve a drying temperature close to 145oF.
Test for dryness. Properly dried jerky is chewy and leathery. It will be as brittle as a green stick, but won’t snap like a dry stick. To test for dryness, remove a strip of jerky from the oven or dehydrator. Let cool slightly, then bend the jerky; it should crack, but not break when bent.
Remove the strips from the drying racks to a clean surface. Pat off any beads of oil with absorbent paper toweling and let cool.
Storage. Place cooled jerky strips in an airtight plastic food bag or jar with a tight fitting lid. Pack jerky with the least possible amount of air trapped in the container. Too much air causes off-flavors and rancidity to develop. Label and date packages. Store containers of jerky in a cool, dry, dark place or the refrigerator or freezer.
Storage
Store fresh venison cuts in the refrigerator for 1 to 2 days. Roasts, steaks, chops, and venison stew meat may be stored frozen for 1 year, if well packaged. Frozen ground venison will retain quality for 6 to 9 months. Home canned venison will retain quality for 6 to 12 months in a warm place, like a garage or attic, and 12 to 36 months maintained in a cool place. Never allow canned foods to freeze. Properly dried jerky will keep for approximately 2 weeks in a sealed container at room temperature. Jerky will keep for 3 to 6 months in the refrigerator and up to 2 years in the freezer. Check occasionally to be sure no mold is forming.
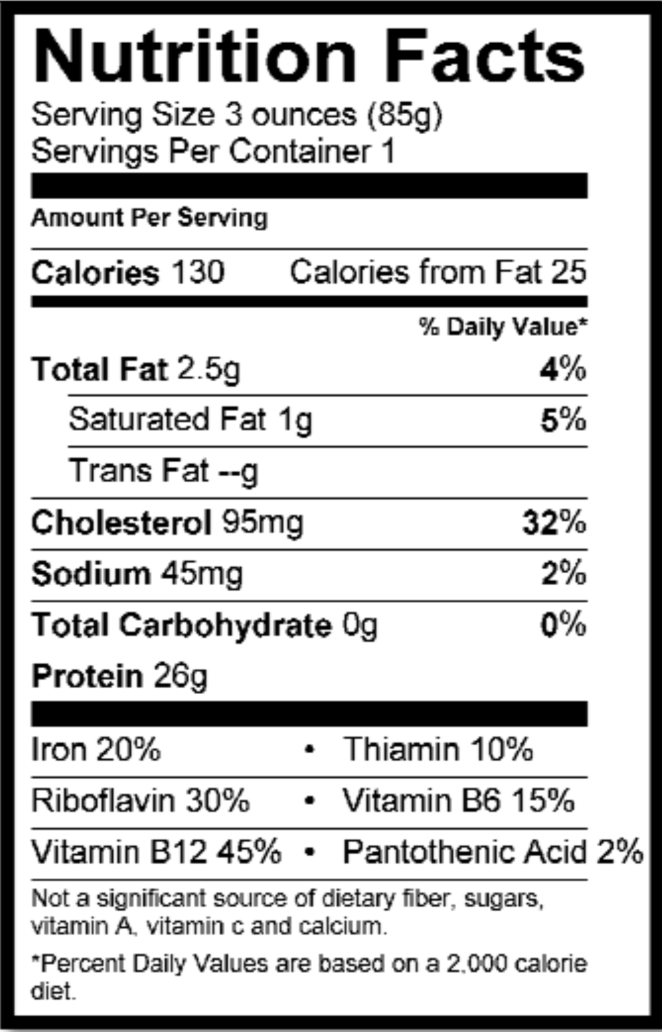
Nutrition Information
Venison is an excellent source of protein, iron and B vitamins, and is relatively low in fat.
Below is the nutritional information for beef to compare.
Venison
Beef

References
- Ball Blue Book of Preserving. 2005. Jarden Home Brands. Muncie, Indiana.
- Brennand, Charlotte. 1994. Home Drying of Food. (FN330) Utah State University Extension. Logan, Utah. http://extension.usu.edu/files/foodpubs/fn330.pdf
- Canning Meat, Poultry, and Game. Ohio State University Extension Fact Sheet. HYG-5330-97
- Complete Guide to Home Canning (Agriculture Information Bulletin No. 539). 1988. USDA & Extension Service. http://extension.usu. edu/files/foodpubs/cangui1.pdf
- Kendall, P., Ph.D., R.D., Food and Nutrition Series: Leathers and Jerkies, no. 9.311. Colorado State University Cooperative Extension food science and human nutrition specialist and professor, food science and human nutrition; Sofos, J., Ph.D., Colorado State University professor, animal sciences. Revised 3/03.
- Lauritzen, Georgia. 1982. Venison – Field Care and Cooking. Utah State University Extension, Logan, Utah. EC 305
- D. P. Cornforth, K. E. Allen, D. Whittier, B. A. Nummer, and M. N. Vasavada. 2006. Evaluation of High Humidity and Wet Marinade Methods for Pasteurization of Jerky. J. Food Science 72(7) C351-355.
- Section 5. Subsistence. Department of Defense 4145.19-R-1, 1979.
- USDA Food Composition Data http://www.nal.usda.gov/fnic/foodcomp/Data/index.html
Authors
Margie P. Memmott, M.S., USU Extension Agent; Brian A. Nummer, Ph.D., Food Safety Extension Specialist; Charlotte P. Brennand, Ph.D., Emeritus Food Safety Extension Specialist


Brian Nummer
Former Food Safety Specialist
Related Research
Avoiding Common Canning Mistakes
Avoid these ten potentially deadly canning mistakes, as well as other food-specific mistakes that you'll want to avoid. This will keep your food fresh, healthy, and safe to eat.
Buying a Home Freeze-Dryer: What to Know Before You Go
Freeze-dried foods are extremely popular among backpackers and culinary masters, and now freeze-dryers are available for home use. But is a home freeze-dryer the appliance for you? Here is some information designed to cut through the advertising hype and
Canning Bread and Cake is Unsafe
Since 2000, Extension has been warning consumers about canning cakes and breads. While this process has much appeal, it does not destroy the organism that causes botulism.
Canning Lemon Lime Curd
Learn how to the traditional British dessert of lemon curd. Canned, it has a shelf life of 3 to 4 months. If you don't mind the darkening that occurs, it can last up to 1 year.
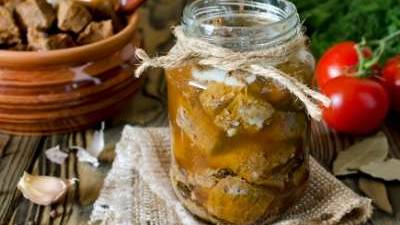
Canning Meats, Poultry, and Seafood
Follow specific proper canning guidelines for chicken, beef, seafood, and others. These guidelines will ensure your food is safe to eat.