Home Drying Foods
Browse pre-treatments for specific foods here.
Never pretreat more of the product than the dryer will accommodate at one time.
Blanching
Blanching is the process of heating vegetables and some fruits sufficiently to inactive enzymes. This precooking treatment also reduces the number of spoilage microorganisms on the product, preserves or sets the color, checks ripening processes, and coagulates some of the soluble constituents thereby saving the vitamin content. Further, it relaxes the walls of the tissue so that moisture escapes more readily, helps retard undesirable changes in flavor during storage, and assures satisfactory restoration of the product.
You may blanch with steam, hot water (scalding), or in a microwave oven. Steaming is preferable to scalding because some of the nutrients that are water-soluble can be lost in the blanching water. Steaming retains these nutrients to a greater degree. Microwave blanching will save time when small batches need to be blanched.
Steam Blanching
After fruit has been treated, place on trays one layer deep. Air circulation below as well as above fruit will speed up drying time.
- Use a kettle having a close-fitting lid and a wire basket or sieve so placed in the kettle that the steam will circulate freely around the vegetable. Water should not touch the product.
- Have the water boiling briskly before putting the prepared vegetable into the kettle. Be sure to have enough water so that you do not run out during the process.
- Place a layer of vegetables in the steamer not more than 2-1/2 inches deep.
- Steam the vegetables until each piece is heated through and thoroughly wilted.
- Test for doneness by removing a piece from the center of the steamer and pressing it. It should feel tender but not completely cooked. It is better to overcook than to undercook.
- Remove from steamer, and absorb surface moisture with clean dish towels or paper toweling. Spread on trays and place in a dryer.
Water Blanching or Scalding
When scalding, use the same method as above except have enough water in the kettle to cover the vegetables. Bring the water to a boil and gradually stir in the vegetables. Scalding requires less time than steaming, but is more destructive to nutrients. Test for doneness and process as for steaming.
Microwave Blanching
An alternative way of blanching small amounts of vegetables is to use a microwave oven. Microwave blanching may not be as effective as water blanching, but avoiding a hot pot of boiling water may be more important to you. Place the prepared vegetables in a covered casserole or a zipable plastic bag, add water if needed, and heat at 600-700 watts for the times provided in Drying Procedures or until inner part of product is hot but still firm. Time tables are based on about 4 cups of produce per batch. After blanching, the pieces should be hot throughout.
How to Blanch Vegetables in a Microwave Oven
- Choose good quality fresh vegetables before blanching. Wash them thoroughly in cold water. Trim and cut.
- If using plastic bags, line up enough microwave bags on the counter to accommodate amount of vegetables to be microwave-blanched. With the bags standing upright, fold back necks to form a cuff for easy filling.
- Fill quart bags with about 4 cups of vegetables and a small amount of water. Fill bags only to the bottom of the neck. Seal bags, leaving a 1-inch center vent for steam. Or put 4 cups of vegetable in a casserole, add water and cover.
- Microwave bags or casserole one at a time at HIGH according to times specified on chart. With an oven mitt, remove bag or casserole from oven. Stop the cooking action by dumping the produce immediately into ice water.
- Drain blanched vegetable, pat dry with paper toweling, and spread on drying rack.
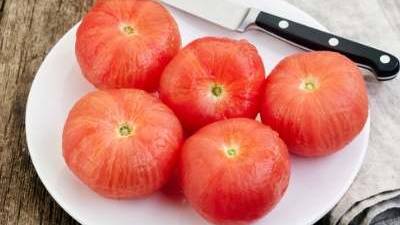
Crazing
Some fruits (such as prunes, plums, cranberries, blueberries, and grapes) have a natural protective wax coating. If they are to be dried whole, it is best if these fruits are pretreated by dipping them in boiling water for 15-60 seconds according to the size and toughness of the skin, and then immediately dip in cold water. This process crazes the wax coating on the skin and allows the moisture to escape, thus speeding the drying time of the fruit. Unlike blanching, it is not desirable to have the heat penetrate to the center of the product.
Sulfur Treatments
Browning of fruit can be effectively controlled by the use of sulfur or sodium bisulfite.
Sensitive persons with asthma should avoid the use of sulfur or bisulfite compounds.
It can cause some asthmatics to have an asthma attack.Eviscerate fish within 2 hours after they are caught. Keep cleaned fish on ice until ready to can.
Do not use a household oven to dry sulfited fruits. The sulphur fumes that form have an unpleasant odor and can be harmful to health.
Sulfuring
Sulfuring has the advantage of producing an excellent quality product. It may be difficult to find sulfur; try pharmacies and stores that sell wine or beer making supplies. Fruit treated with sulfur will maintain color, flavor, vitamins A and C, and sulfuring will discourage insect infestation during drying. The heat during drying and subsequent cooking dissipates the sulfur.
As fruit is peeled, cored or pitted, put it in a salt solution (4 Tbsp. of salt to a gallon of water) to prevent discoloration.
Remove from the saline solution, and (without rinsing) drain thoroughly, pat with a clean towel to remove surface moisture. The fruit is then ready for the sulfur treatment. Sulfuring should take place out of doors. Do not inhale the fumes.
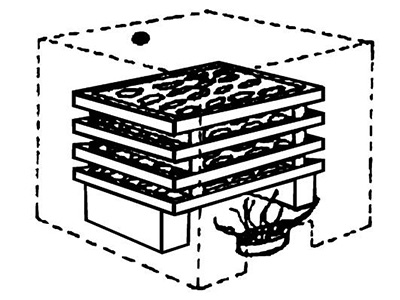
A sulfur box or compartment is necessary. This may be a large cardboard box, provided it is large enough to cover the drying trays and the container for the sulfur. It must be relatively air-tight. A small opening must be provided near the bottom of the compartment for ventilation. Another small opening is necessary near the top of the compartment on the opposite side from the bottom opening.
The box or compartment should be tall enough to adequately cover the stacked trays and allow approximately 6 inches above the top tray—allow 1 to 1½ inches on three sides of the stack. It should also be large enough so that the sulfuring dish can be placed below but to the side or front of the stacked trays—not directly below them (to avoid burning or melting the bottom tray). There should be no less than 3 inches of space between the metal can holding the sulfur and the stacks of trays, and between the can and the inside of the carton or covering.
- Place fruit on wooden trays having wooden slats or on the trays provided with a dehydrator, with the fruit not more than one layer deep. Sulfur corrodes metal, so it is important that wood or plastic trays be used. Place the fruit with the skin side down to prevent the loss of juices.
- Blocks of wood or bricks placed on the ground may be used to support the trays. The lowest tray should be about 6 to 8 inches from the ground.
- Stack the trays filled with fruit one on top of the other with blocks, wooden spools, bricks, or rocks between each one to allow for circulation between trays. They should be approximately 1½ inches apart.
- Place the sulfur pan on the ground in front of the trays. This pan should be a clean metal container such as a tin can, shallow, but deep enough to prevent overflow—1 inch higher than the layer of sulfur. A dish made from a double thickness of aluminum foil may be used. The burning time of the sulfur will vary with ventilation, shape of container, weather conditions and other factors.
Sulfur that is free from impurities will burn properly. Sublimed flowers of sulfur or U.S.P. grade sulfur meet the standard of purity required. Garden dusting sulfur is not suitable.
Weigh the prepared fruit before placing on trays. Generally, if you are using a cardboard box to cover the trays, you will need 1 to 2 teaspoons per pound of fruit. If you have constructed a more airtight sulfuring box from wood, you need no more than 1 teaspoon of sulfur per pound of fruit.
- Place the can of sulfur in front of the trays, on the ground near the lower opening of the box, and light the sulfur. A few drops of lighter fluid will facilitate lighting the sulfur. Sulfur burns best when powder is in a smooth layer not more than onehalf inch deep. The depth, not the total amount of sulfur, determines the rate of burning.
- Cover the stack of trays with the sulfuring box. Seal the bottom of the box by pushing dirt against the bottom edges. Leave the intake and exhaust holes open while the sulfur is still burning.
- Close the intake and exhaust holes and start counting sulfuring time after twothirds of the sulfur has burned. NOTE: Sulfur dioxide is created by combustion of the sulfur. The fumes must be given time to reach and penetrate the surfaces of the fruit on the stacked trays. See Table 2 for sulfuring times.
- When time is up, lift the box off, tilting it away from you so that fumes don't come up in your face. Start drying the fruit immediately.
Sulfuring
Purchase U.S.P. (food grade) or Reagent Grade sodium sulfite, sodium bisulfite or sodium metabisulfite at pharmacies or where wine-making supplies are sold. Do not use bisulfate or products of Practical Grade.
Prepare a solution using one of the following formulas:
- Sodium bisulfite: 1 tablespoon per gallon water (3/4 teaspoon/quart)
- Sodium sulfite: 2 tablespoons per gallon water (1½ teaspoons/quart)
- Sodium metabisulfite: 4 tablespoons per gallon water (2 tablespoons/quart)
Soak fruit 5 to 15 minutes depending on size. Drain; rinse lightly under tap water; spread on clean cloth or paper towels to remove excess moisture and dry
Ascorbic Acid
Pure crystalline ascorbic acid
Pure crystalline ascorbic acid is a good anti-oxidant, but sometimes difficult to find. It is available through drugstores or chemical companies. For apples, dissolve 2½ teaspoons of crystalline ascorbic acid in each cup of cold water. For peaches, apricots, and pears, dissolve 1 teaspoon of ascorbic acid in each cup of cold water. One cup of solution will treat about 5 quarts of cut fruit. As the fruit is prepared (peeled, diced, sliced, etc.), place it into a large (1 gal.) plastic bag. Add the ascorbic acid solution. Shake thoroughly so 9 that all parts of the fruit are coated with the ascorbic acid solution. Drain well.
Ascorbic acid powders
These contain ascorbic acid and are found in grocery stores for use on “fresh fruit.” They do not work as effectively as pure ascorbic acid. Follow the directions on the package.
Fruit juice dips
Soaking the fruits into a fruit juice naturally containing ascorbic acid will help keep the natural color and prevent further darkening. These will also add their flavor to the product. Soak the fruit pieces 3-5 minutes, remove and drain well. Only use the juice twice before replacing. (The juice can be consumed.) Possible juices include orange, grapefruit, lemon, lime, or pineapple juice.
Vitamin C tablets
Crush to a powder and mix 1 teaspoon of 500 mg vitamin C tablets with 1 quart of water. Vitamin C tablets contain carriers which do not dissolve as well as pure crystalline ascorbic acid and may result in harmless white particles floating on the solution. Soak the fruit in the solution for 3-5 minutes.
Other Treatments
Saline dip
Dip sliced fresh produce in salt water solution (4–6 Tbsp. salt to 1 gal. water) for 10 min.
Honey dip
Dissolve 1/2 cup sugar in 1½ cup boiling water. Add 1/2 cup honey. Makes 2½ cups. Dip fruit in small batches. Allow fruit to soak 3 to 5 minutes. Remove with slotted spoon and drain.
Honey lemon dip
Slightly heat and dissolve 1/2 cup of honey with the juice of one lemon in 1/2 cup of water. Dip the fruit, then spread on drying trays.
Hot syrup
Combine one cup each of corn syrup, sugar and water. Bring to boil. Add fruit. Simmer 10-15 minutes. Drain well. Place on trays sprayed with oil to avoid sticking of fruit. Lift fruit gently from pan to tray. Syrup dip will increase the drying time. Final product is like a candied fruit.
Authors
Charlotte P. Brennand
Related Research
Avoiding Common Canning Mistakes
Avoid these ten potentially deadly canning mistakes, as well as other food-specific mistakes that you'll want to avoid. This will keep your food fresh, healthy, and safe to eat.
Buying a Home Freeze-Dryer: What to Know Before You Go
Freeze-dried foods are extremely popular among backpackers and culinary masters, and now freeze-dryers are available for home use. But is a home freeze-dryer the appliance for you? Here is some information designed to cut through the advertising hype and

Canning Bread and Cake is Unsafe
Since 2000, Extension has been warning consumers about canning cakes and breads. While this process has much appeal, it does not destroy the organism that causes botulism.
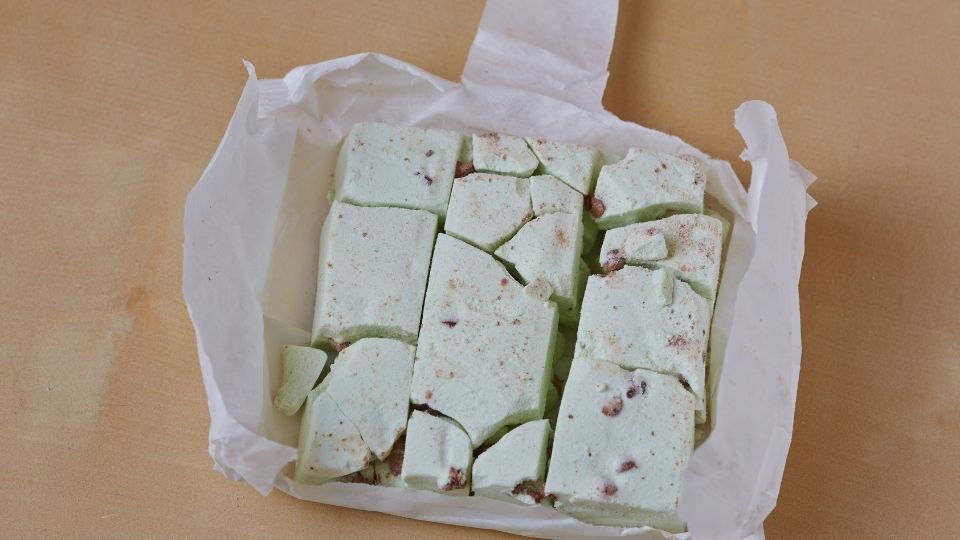
Canning Lemon Lime Curd
Learn how to the traditional British dessert of lemon curd. Canned, it has a shelf life of 3 to 4 months. If you don't mind the darkening that occurs, it can last up to 1 year.
Canning Meats, Poultry, and Seafood
Follow specific proper canning guidelines for chicken, beef, seafood, and others. These guidelines will ensure your food is safe to eat.