How to Preserve Chiles
Did You Know?
- Christopher Columbus brought chile back from the Americas to Europe.
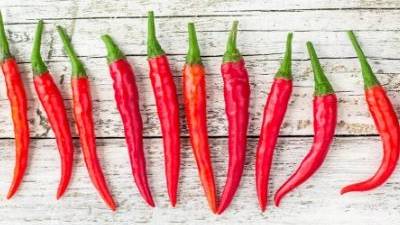
- Chile comes in many varieties: from 1/4 inch to 12 inches long, very mild to extremely hot, and in red, green, yellow or almost black.
- The heat is due to a compound called capasaicin which is especially high in the veins of chile. Neither heating nor freezing will decrease the heat of the chile but removal of the veins will.
The best way to preserve chile depends on how you plan to use it and your available storage space. Frozen or canned chile is best for chile rellenos and salsas. Stews can use frozen, canned or dried chile. Dried chile has minimal storage requirements and is light-weight for taking on camping trips. Pickled chiles can be used on a relish plate or as an ingredient in other dishes.
Selection and Preparation
Choose chile pods that are mature, heavy for their size, smooth and symmetrical, fresh, and crisp. Avoid misshapen pods, shriveled skin, mold, soft spots, and bruises.
Blistering
The tough outer skin should be removed from the chile, unless the chiles are going to be used finely chopped. Blistering the skin by one of the following methods makes removal easy. The skin may be removed immediately or after freezing.
Handling pungent chile can burn hands and eyes. Protect hands by wearing plastic gloves. Keep hands away from eyes while working with chile.
Wash and dry chile. With a knife, make a small slit in the side to allow steam to escape. Be sure heat source is very hot. Turn frequently to prevent scorching and insure even blistering.
Methods for blistering chile
- Oven or broiler method—Place chiles under a 400-450° F (205-232° C) broiler for 6 – 8 minutes until skin blisters so that it can be pulled away from the flesh. Turn chile once top side is blistered.
- Range top method—Place chiles on a hot electric or gas burner after covering burner with a layer of heavy wire mesh.
- Outdoor grill method—Place chiles on a charcoal grill about 5-6 inches above glowing coals.
Peeling after blistering
- Peel immediately method—Remove chile from heat and spread in a single layer to cool before peeling. For a more crisp product, dip chile into ice water as it is removed from heat. For a more thoroughly cooked chile, cover chiles with a damp cloth. This method is best when canning chile, making salsa or using chile right away.
- Frozen chile method—Removal of the skin is easier if the chile is frozen. Place blistered chiles in a single layer on a cookie sheet in the freezer. Once frozen, package and keep in the freezer until needed. Hold the frozen chile pod under cold water just long enough to thaw the outside portion and remove peel from frozen flesh of chile.
As the chile is peeled, slit along one side and remove seeds and veins. Stems may be left attached for chile rellenos.
Freezing
Chile does not require a pretreatment prior to freezing.
If chile is to be packed with the skins intact, freeze first on cookie sheets so they can be handled as individual chile pods. Pack whole unpeeled chiles in plastic bags or wrap in heavy aluminum foil or freezer wrap. Press down to remove all air and return to freezer.
Peeled chiles, whole or diced, can be packaged in plastic bags or rigid containers of glass, metal, or plastic. Leave 1/2" of head space. Seal.
Freeze chiles immediately after packing. Freeze at 0° F (-18° C) or below. Put no more food into the home freezer than will freeze within 24 hours. Usually this is about two or three pounds of food to each cubic foot of freezer capacity. For quickest freezing, place packages against freezing plates or coils and leave a little space between packages so air can circulate freely.
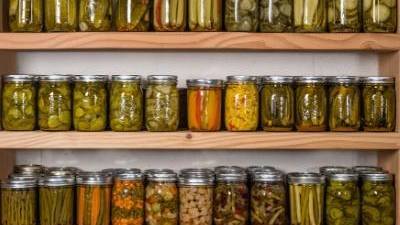
Canning
Canned chile peppers. Chiles may be canned whole or cut into smaller pieces. Peel and flatten chile into pint or half-pint canning jar. Add 1/2 teaspoon of salt to each pint jar, if desired. Fill jars loosely with peppers and add boiling water, leaving 1-inch headspace. Adjust lids and process. Altitude adjustments need to be made as shown on the following tables. Chiles MUST be processed in a pressure canner to be safe.
| Processing times at different altitudes for Chile Peppers in DIAL GAUGE and WEIGHTED GAUGE Pressure Canners | ||||||
|---|---|---|---|---|---|---|
| Dial Gauge Pressure Canner | Weighted Gauge Pressure Canner | |||||
| Process Time | 0-2,000 ft | 2,001-4,000 ft | 4,001- 6,000 ft | 6,001-8,000 ft | 0-1,000 ft | Above 1,000 ft |
| 35 min | 11 lb | 12 lb | 13 lb | 14 lb | 10 lb | 15 lb |
Pickled Jalapeno Peppers, 1 pint jar
- Jalapeno peppers (about 1 pound)
- 1 c. vinegar (5%)
- 1 tsp. salt, canning salt preferred
- 1/4 c. water
- 1 tsp. mixed pickling spice
Wash peppers and pack tightly into hot jar, leaving 1/2 inch head space. Combine vinegar, water, salt, and pickling spice; heat to boiling. Pour boiling mixture over peppers to 1/2 inch from jar top. Remove air bubbles. Wipe jar rims. Adjust lids. Process in boiling water canner as shown below.
Marinated Peppers, about 9 half-pint jars
Use any type of pepper (chile, bell, banana or jalapeno) or a combination of pepper types for desired hotness.
- 4 pounds firm peppers
- 1 c. olive or salad oil
- 1 c. bottled lemon juice
- 1/2 c. chopped onions
- 2 c. white vinegar (5%)
- 2 cloves garlic, quartered (optional)
- 1 tablespoons oregano leaves
- 2 tablespoons prepared horseradish (optional)
Select your favorite peppers. Peppers may be left whole or quartered. Peel tough-skinned chiles. Flatten small peppers. Fill pint or half-pint jars, leaving 1/2 inch headspace. Combine and heat other ingredients to boiling and simmer 10 minutes. Remove garlic. Pour hot pickling solution over peppers, leaving 1/2 inch headspace. Adjust lids and process in a boiling-water canner.
| Processing times at different altitudes for Pickled Jalapeno Peppers in a BOILING WATER Canner | |||
|---|---|---|---|
| Altitude | 0-1000 ft | 1.001-6,000 ft | Above 6,000 ft |
| Time | 10 min | 15 min | 20 min |
| Processing times at different altitudes for Marinated Peppers in a BOILING WATER Canner | |||
|---|---|---|---|
| Altitude | 0-1000 ft | 1.001-6,000 ft | Above 6,000 ft |
| Time | 15 min | 20 min | 25 min |
Note: pickled and marinated peppers can be safely canned in a boiling water bath.
Drying Chile Pods
Ripe chile pods can be dried to use later as a seasoning. To make a ristra, tie stems of chile pods onto a string and hang in a dry, well-ventilated location.
Chiles can also be dried in a dehydrator. Wash pods, slice into desired size pieces and place on dehydrator shelves. Dry until brittle. Transfer to plastic bags or glass jars for storage at room temperature.
Dried chile can be powdered in a blender, crumbed to smaller pieces or left intact.
Storing
Store fresh chile peppers in the refrigerator for up to 2–3 weeks. Frozen peppers that are packaged appropriately and held at 0°F or below are good for a year. Storage temperature has a major effect on canned peppers: at 40°F hold for up to 24 months, at 70°F. hold up to 12 months and if at 90°F don’t hold more than 6 months.
Nutrition Information
Chile peppers are known for being good sources of Vitamins A, C, E and folate. They are high in potassium and low in sodium if not processed with added salt.
| Calories | Iron mg | Potassium mg | Sodium mg | Vit. C mg | Vit. A IU | Folate mcg | Vit. E mg | |
|---|---|---|---|---|---|---|---|---|
| 1⁄2 c. raw green | 30 | 0.9 | 255 | 5.2 | 182 | 578 | 17.2 | 0.52 |
| 1⁄2 c. canned, green or red | 14 | 0.34 | 127 | 798 | 46 | 415 | 6.8 | 0.47 |
| 10 peppers, red sun dried | 16 | 0.3 | 94 | 5 | 2 | 1324 | 3 | NA |
| 1 tbsp chile powder | 24 | 1.1 | 144 | 76 | 5 | 2619 | 7.50 | 0.08 |
References
- USDA Food Composition Data. http://www.nal.usda.gov/fnic/foodcomp/Data/index.html .
- Bowes, Anna DePlanter, Church, Charles, Church, Helen Nichols, Pennington, Carmella Genene, & Pennington, Jean A. T. Bowes & Church’s Food Value of Portions Commonly Used. 1998. Lippincott-Raven Publishers. Philadelphia, Pennsylvania.
- Section 5. Subsistence. Department of Defense 4145.19-R-1, 197.
Authors
Charlotte Brennand - Food Preservation Specialist
Related Research
Avoiding Common Canning Mistakes
Avoid these ten potentially deadly canning mistakes, as well as other food-specific mistakes that you'll want to avoid. This will keep your food fresh, healthy, and safe to eat.