Row Covers
December 2020
Nick Volesky, Vegetable IPM Associate • Katie Wagner, Horticulture Extension Agent (Salt Lake County)
Quick Facts
- Row covers provide both frost protection and a form of mechanical control within integrated pest management.
- Row covers are generally made of spunbond or netted synthetic materials, such as polyethylene, polyester, or polypropylene.
- Support row covers by hoop structures or by laying directly over the tops of crops needing protection.
- For effectiveness, coordinate applying row covers with the targeted pest’s life cycle and the growth stage of the crop.
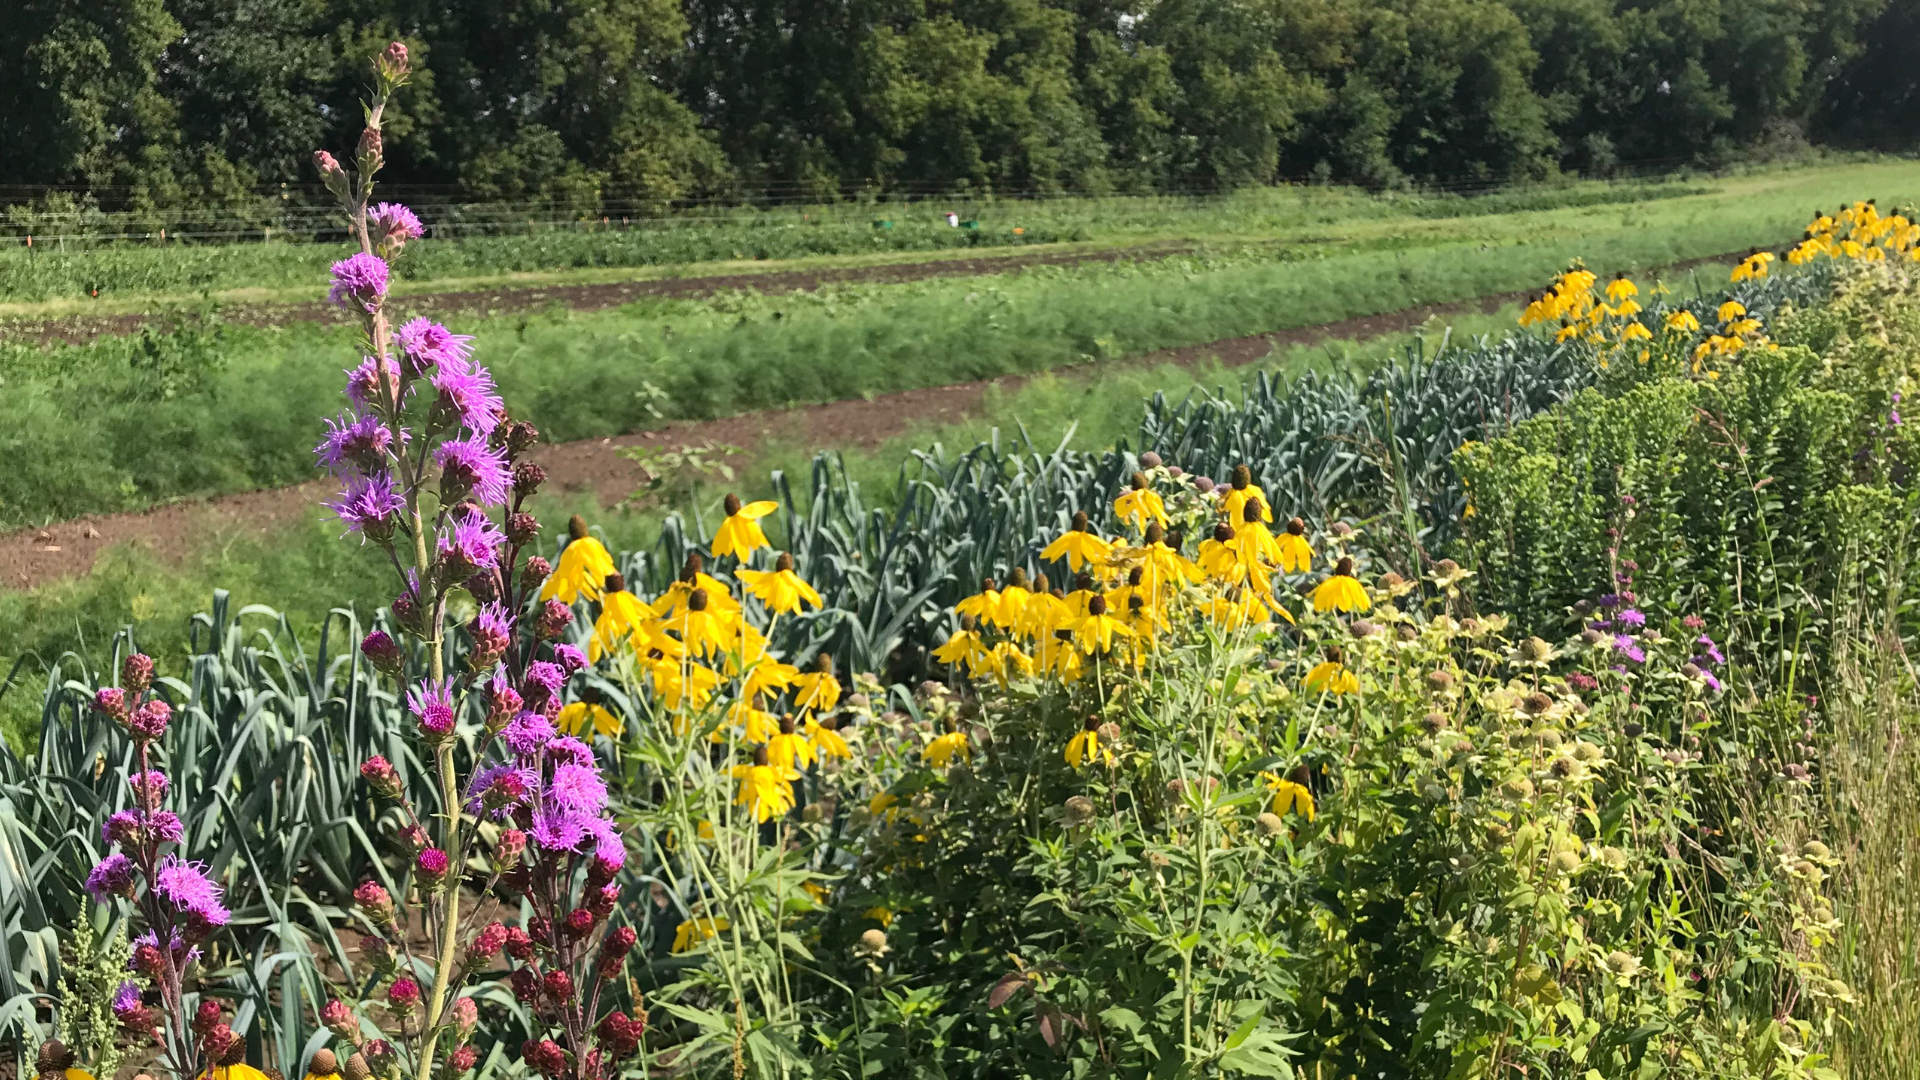
In agricultural use, a row cover is a transparent or semitransparent material that is used over crops (typically vegetables) for a variety of purposes (Fig. 1). As an integrated pest management tool, row covers act as a physical barrier that prevents the movement of pests such as insects (Table 2), birds, and mammals, to host plants. This form of management is popular in organic production to avoid chemical application. Row covers are also used to shield crops from environmental factors like cold or hot temperatures (Table 1), and wind. Commonly used methods of application include floating row covers, hoop-supported row covers (also called low tunnels), and plastic-covered trenches.
Materials
Row covers are generally made of polyester, polypropylene, or polyethylene (poly). Polyethylene may be clear or pigmented and either stretched across a trench or supported by hoops (Fig. 2). Row covers may be vented or unvented. Lightweight materials are effective as an insect barrier starting in late spring. Other fabrics that are heavier in weight are used to extend the growing season by protecting the crop from early or late frosts. All materials are fabric-like and generally spunbonded or nonwoven (Fig. 2). Both may be left to lay on the surface of the soil or can be supported by wire hoops (Fig. 3). A few common brands of the spunbond fabrics include Agribon® and Reemay®. Lightweight row covers tend to rip easily, and thus, have a short life span (up to a few months).
Woven materials include thicker fabric or a plastic mesh. For example, the Proteknet brand of mesh is available in six grades ranging in sizes from 0.85 mm2 to 0.85 mm x 1.4 mm. Select the mesh grade to ensure the target pest cannot pass through the material.
Plastic-covered trenches allow for early seeding and plant growth and provide some frost protection (Fig. 5). Polyethylene is generally stretched across a trench about 7 inches deep. Use a mechanical mulch layer attachment to lay the plastic and mound the soil along the edges of the bed to keep the plastic in place.
Row covers may be purchased online through garden supply and seed companies or at some selected garden centers. When selecting the support structure for row covers, consider whether it will be used for a single season or multiple uses. Options include 3/4-inch bendable PVC, metal hoops, or small wire hoops (Fig. 3).
Table 1. Row Covers Vary in Weight, Light Transmission, and Heat Retention
| Characteristics | Lightweight material | Mediumweightt material | Heavyweight material |
|---|---|---|---|
| Weight | 0.45 oz/yd2 | 0.50 – 0.55 oz/yd2 | 0.90 – 2.0 oz/yd2 |
| Light transmission | 90% | 85% | 30% – 50% |
| Frost protection | --- | 28°F | 24°F – 28°F |
Table 2. Insects Excluded From Various Insect Netting Mesh Opening Sizes
(Table adapted from Proteknet Insect Netting brochure)
| Species | 0.0138 in.² (0.35 mm²) | 0.0335 in.² (0.85 mm²) | 0.05 in. X 0.07 in. (1.2 mm X 1.9 mm) | 0.19 in. X 0.12 in. (5 mm X 3 mm) |
|---|---|---|---|---|
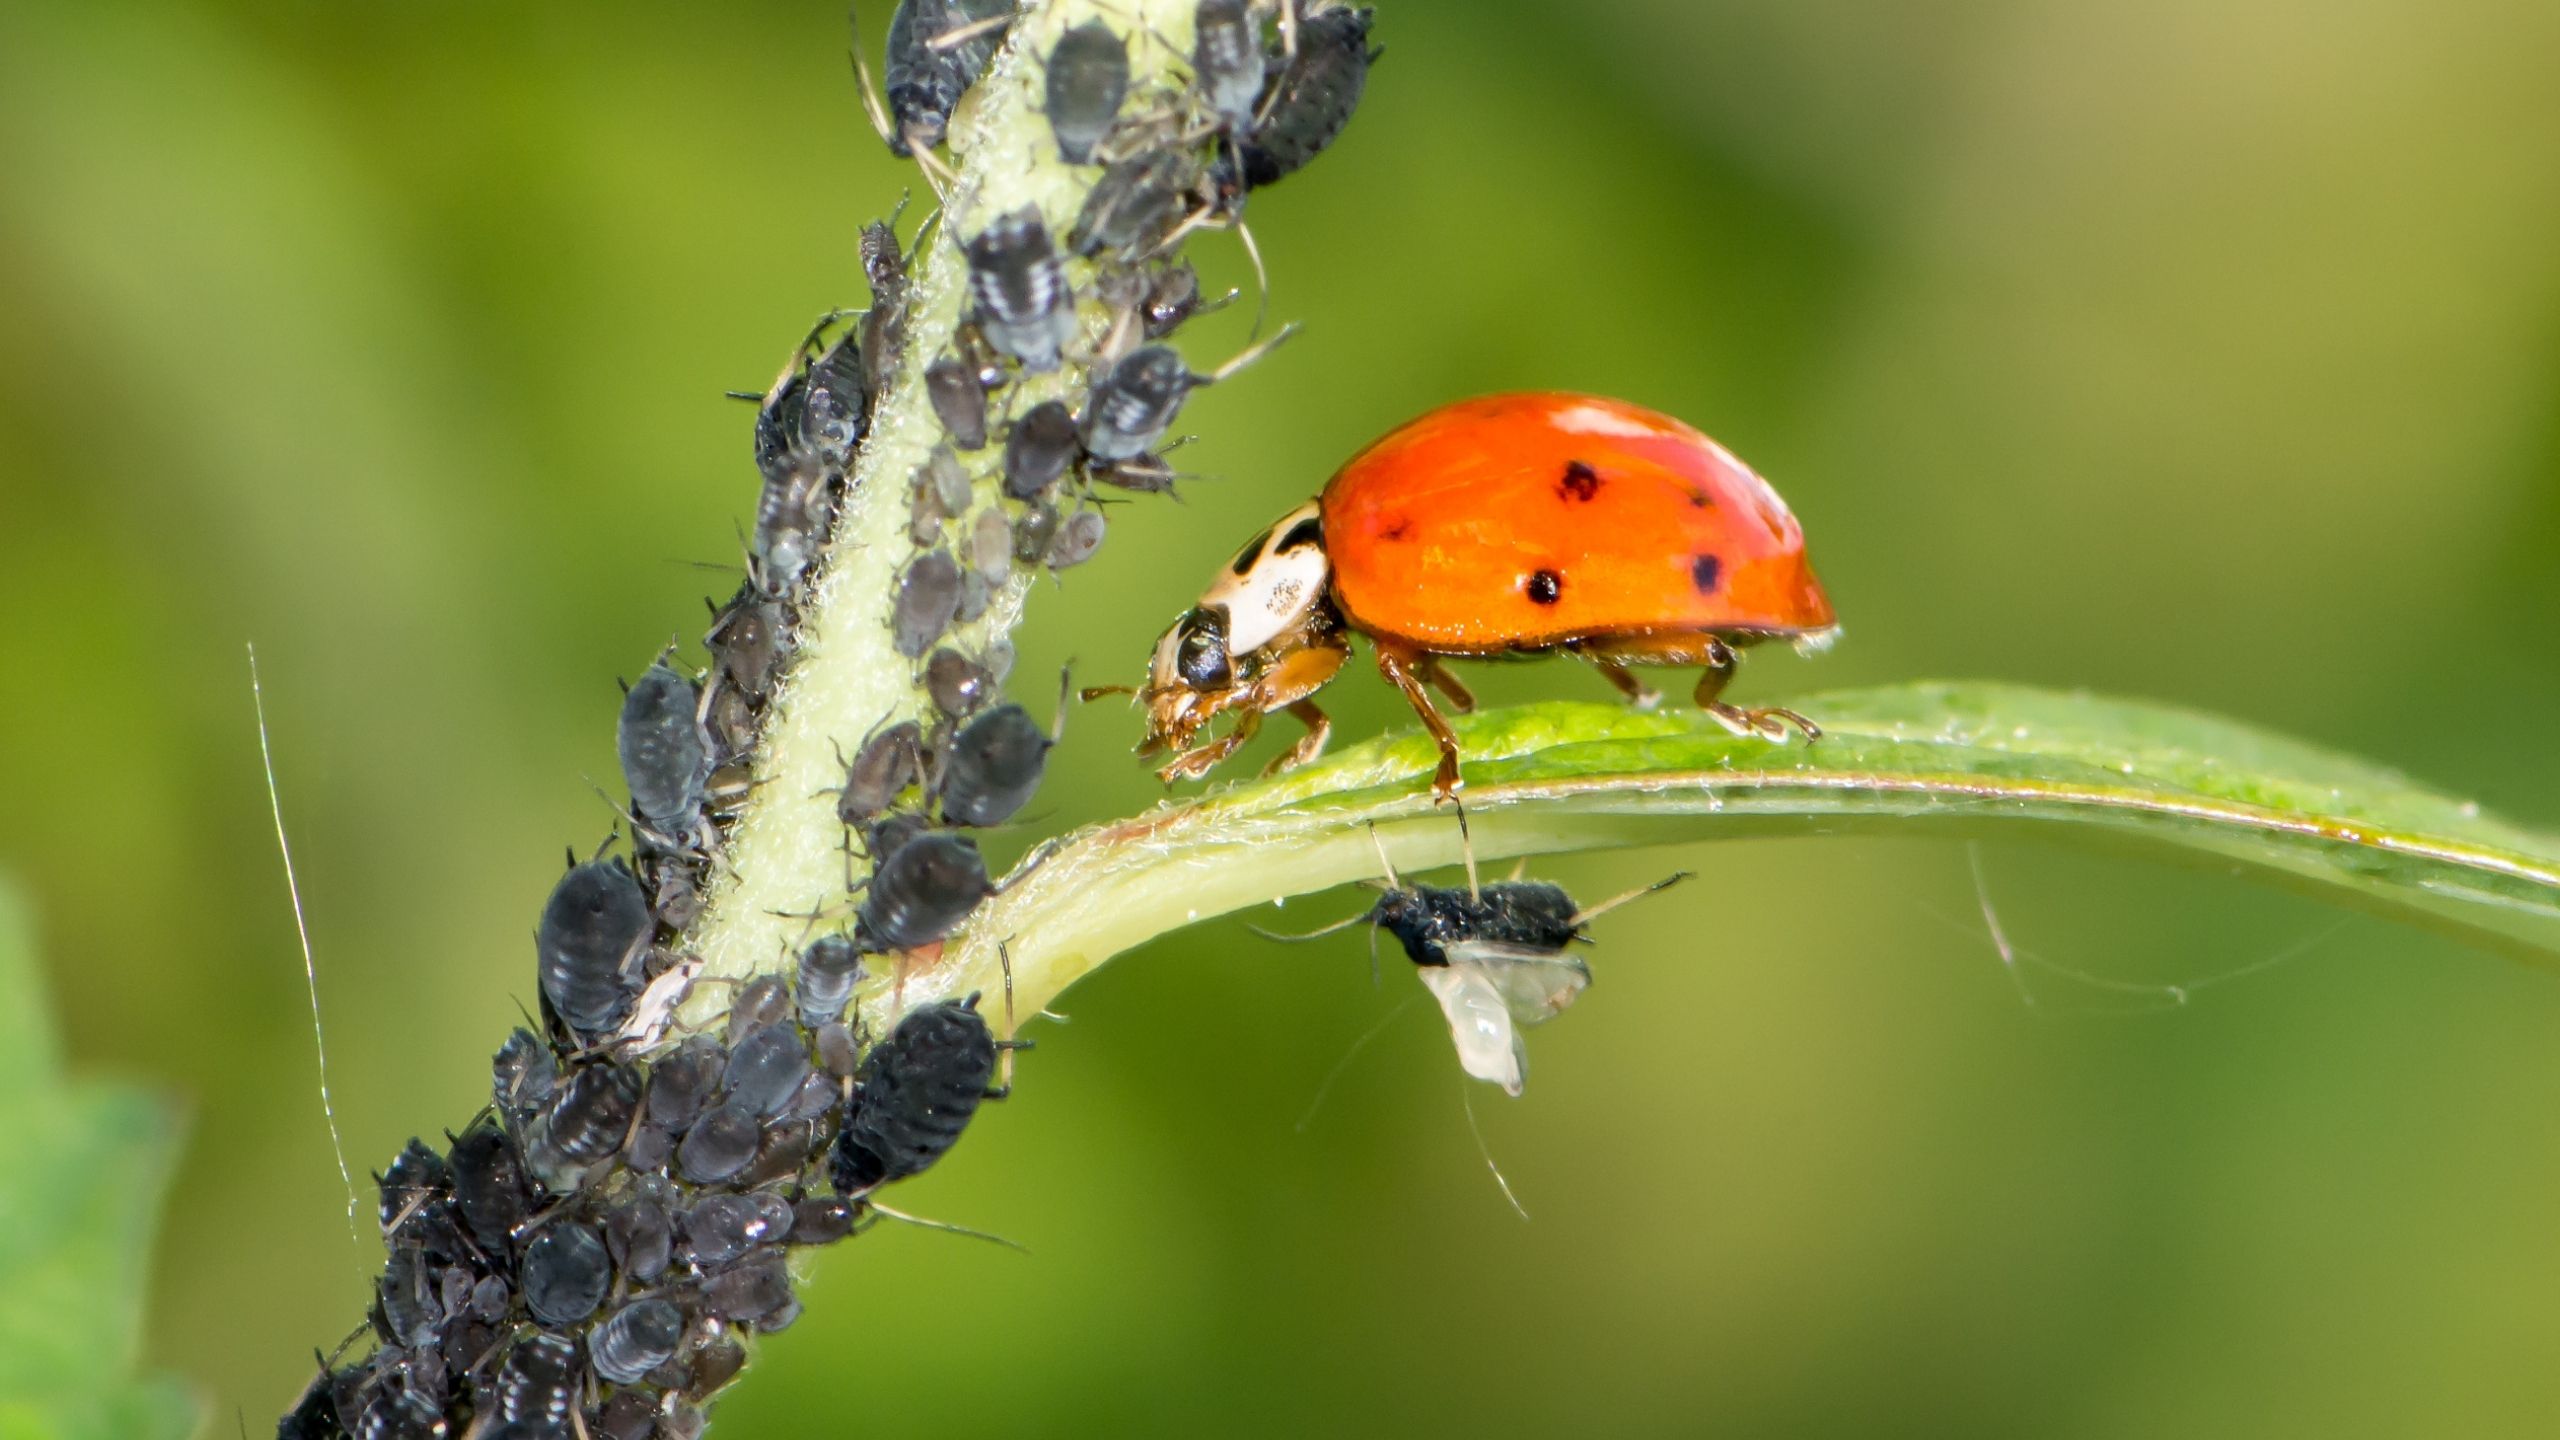
| Aphids | X | |||
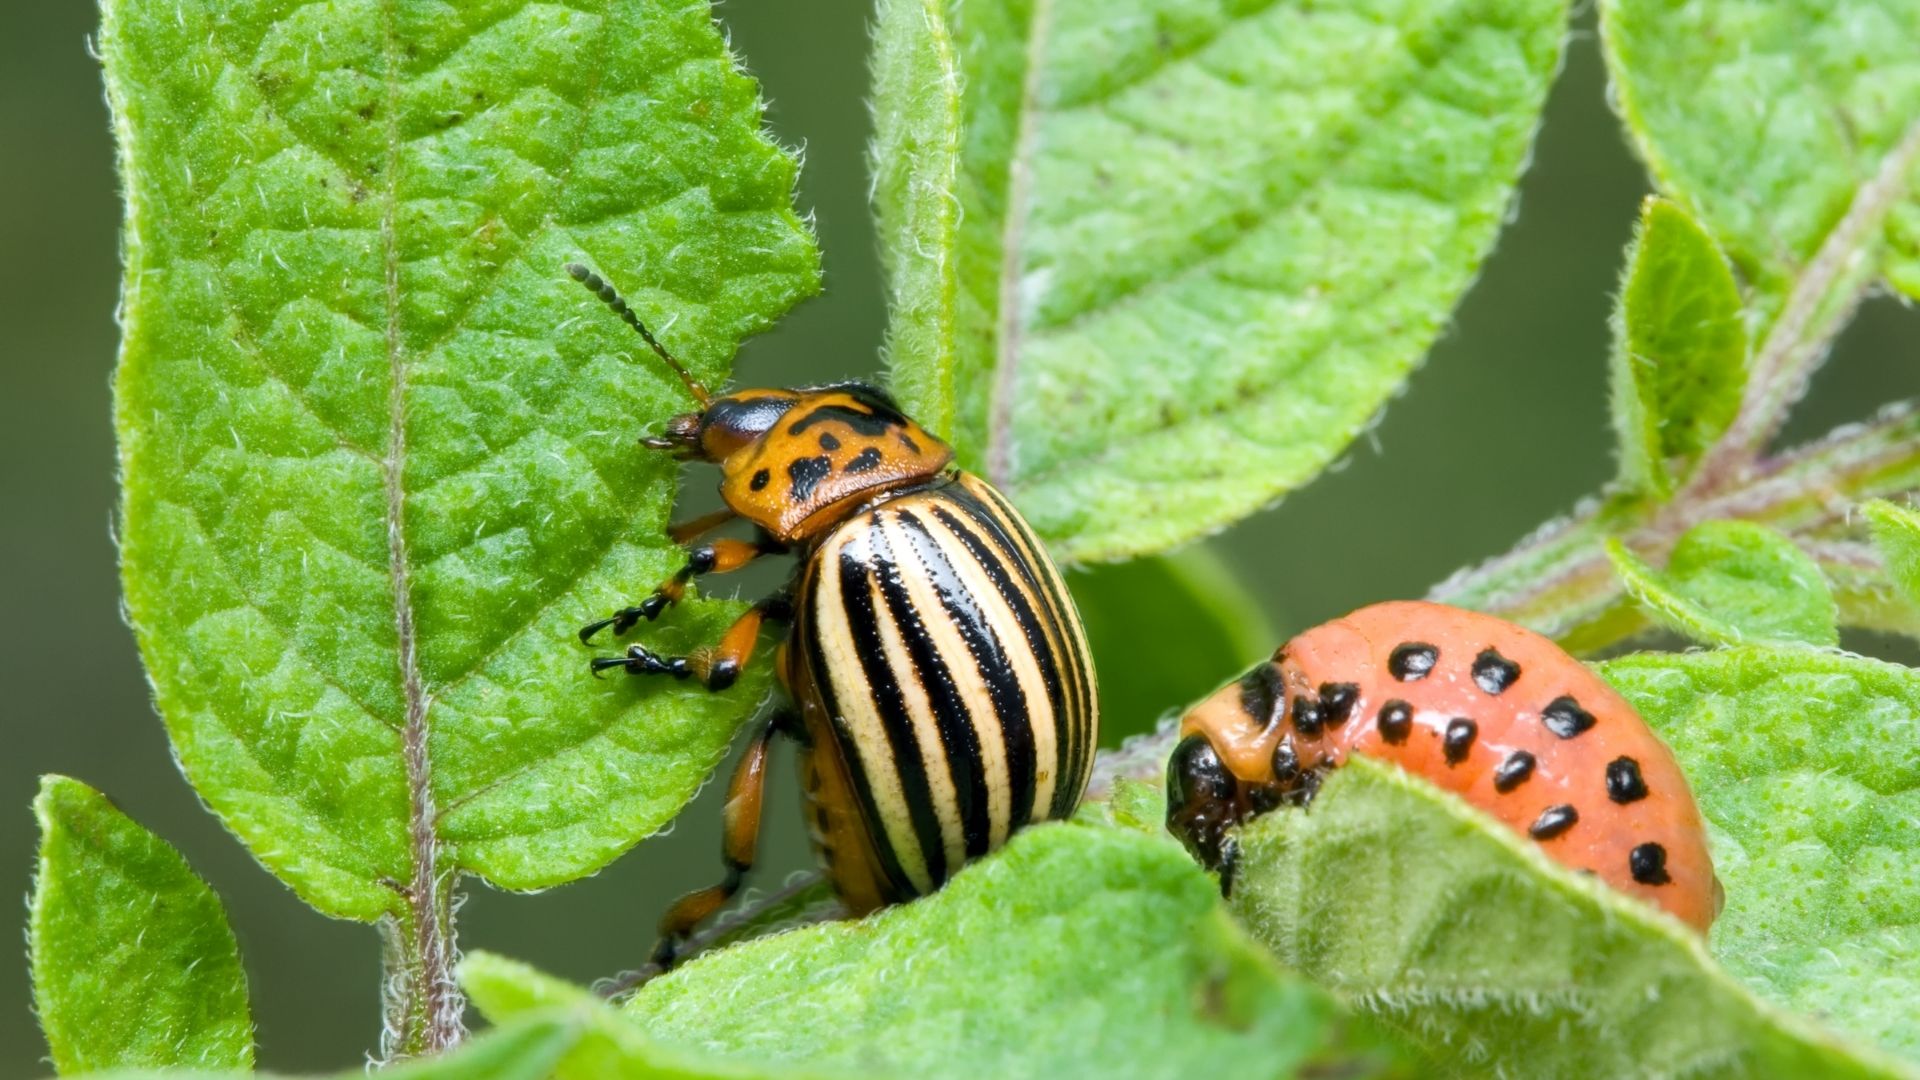
| Flea Beetles | X | |||
| Lacewings | X | X | X | |
| Ladybugs | X | X | X | |
| Leafhopper | X | X | ||
| Lygus bugs | X | X | X | |
| Moths | X | X | X | X |
| Root maggot flies | X | X | X | |
| Stink bugs | X | X | X | X |
| Spider mites | X | |||
| Squash bugs | X | X | X | X |
| Thrips | X | |||
| Whitefly | X |
Construction
When constructing row covers, first decide which crops to cover. Then, identify the purpose of the cover. For insect exclusion, be aware that timing is important. Understand when the pests can be most destructive to the crops and plan to leave the covers up for that duration of time. Also consider crop growth timing and size for the height of the row cover (Table 3).
Next, decide the length and width of row cover you will need. Remember, you will need enough row cover to reach and cover both ends of the row. The structure can be built over existing beds and rows with plastic mulch and drip line. First, install the PVC, metal, or wire hoops, then lay the cover over the frame and secure with binder clips (Fig. 6). Completely cover the crop on all sides. Cut row covers easily to size using scissors. Allow extra room for crop growth.
Finally, secure the row cover edges with soil, rocks, or other heavy objects (Fig. 7). Shovel soil or place large rocks every 3 feet or so along each side of the row cover to exclude insect pests and to keep the wind from lifting the cover. Landscape staples are available to help secure row covers along the edges; however, they have the potential to tear the row cover.
Pest Prevention
To effectively protect crops from insect pests, lay the row cover over the plants before pests are evident in the area (Fig. 8). It is critical to protect seedlings in early spring when most adult pests become active and again in late July and early August. Inspect seedlings prior to transplanting to ensure there are no insects in the soil or on the transplants. Also, rotate crops by family to avoid laying row covers over plants where eggs may have been laid the previous year. Regularly check under the row cover for pest problems. If pests are found, treat infested plants with an approved insecticide, or remove and discard the infested plant material.
Maintenance
Weeds grow quickly under row covers; therefore, weed barriers may be helpful. Another option is to occasionally pull back covers to hoe and hand-pull weeds. If not using drip irrigation, lift the row covers to allow watering. Deer and other animals can damage row covers, so it may be necessary to set up fences to keep them away from covered plants. Clean row covers may last longer since soil particles can abrade and tear these covers. Row covers can be hosed down with water to clean, but it is important to let them dry completely. Store row covers indoors in plastic bags or containers. Mice may nest in row covers if left in sheds, barns, or garages.
Constructing an A-Frame Row Cover
(Instructions from University of Maryland Extension)
For a raised bed: 3 feet wide x 8 feet long x 4 feet high
- Drive a 6-foot metal fence post 2 feet into the ground at either end of the raised bed and connect the posts with a piece of wire.
- Fasten pieces of wire from the top of each post to the corners of the raised bed to create the “A” and provide support for the row cover.
- Cut a 12-foot x 10-foot piece of row cover and drape it over the top wire and pull the excess fabric around to close off the ends.
- The top of the wire is 4 feet from the ground so you can drive plant support stakes next to each plant directly below the row cover. Secure the row cover with sod pins or boards.
- Alter dimensions and construction techniques to accommodate specific situations. Cut costs by reusing and recycling materials around your home. The useful life of PVC pipe and rebar is at least 10 years.
- Build a reusable frame from wood, PVC pipe, #9 wire, or other available materials to support floating row covers. This works well for single rows of tomato, pepper, and eggplant. Example: a 6-foot-wide roll can cover a 3-foot-wide plant bed, while providing enough room for seedlings to grow upright.

Fig. 1. Row covers, a mechanical control method for pest management, being used for commercial flower production in Salt Lake County, Utah. Image courtesy of Amanda Theobald, SLC Top Crops.
 Fig. 2. Materials used in row cover construction. Image courtesy of Dennis Hinkamp, Utah State University Extension.
 Fig. 3. Row cover constructed with metal hoops and insect netting.
Fig. 4. Spunbond material laid directly on crops for insect protection.

Fig. 5. Plastic-covered row trenches.

Fig. 6. Ensure length and height of row covers will accommodate plants for intended duration of their growth. Image courtesy of Dennis Hinkamp, Utah State University Extension.

Fig. 7. Secure row covers with heavy objects like bricks or sand bags. Image courtesy of Ranui Gardens.
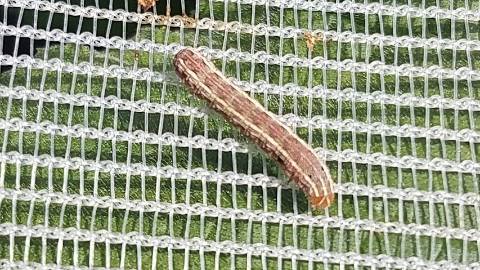
Fig. 8. Excluding an armyworm by using insect netting.

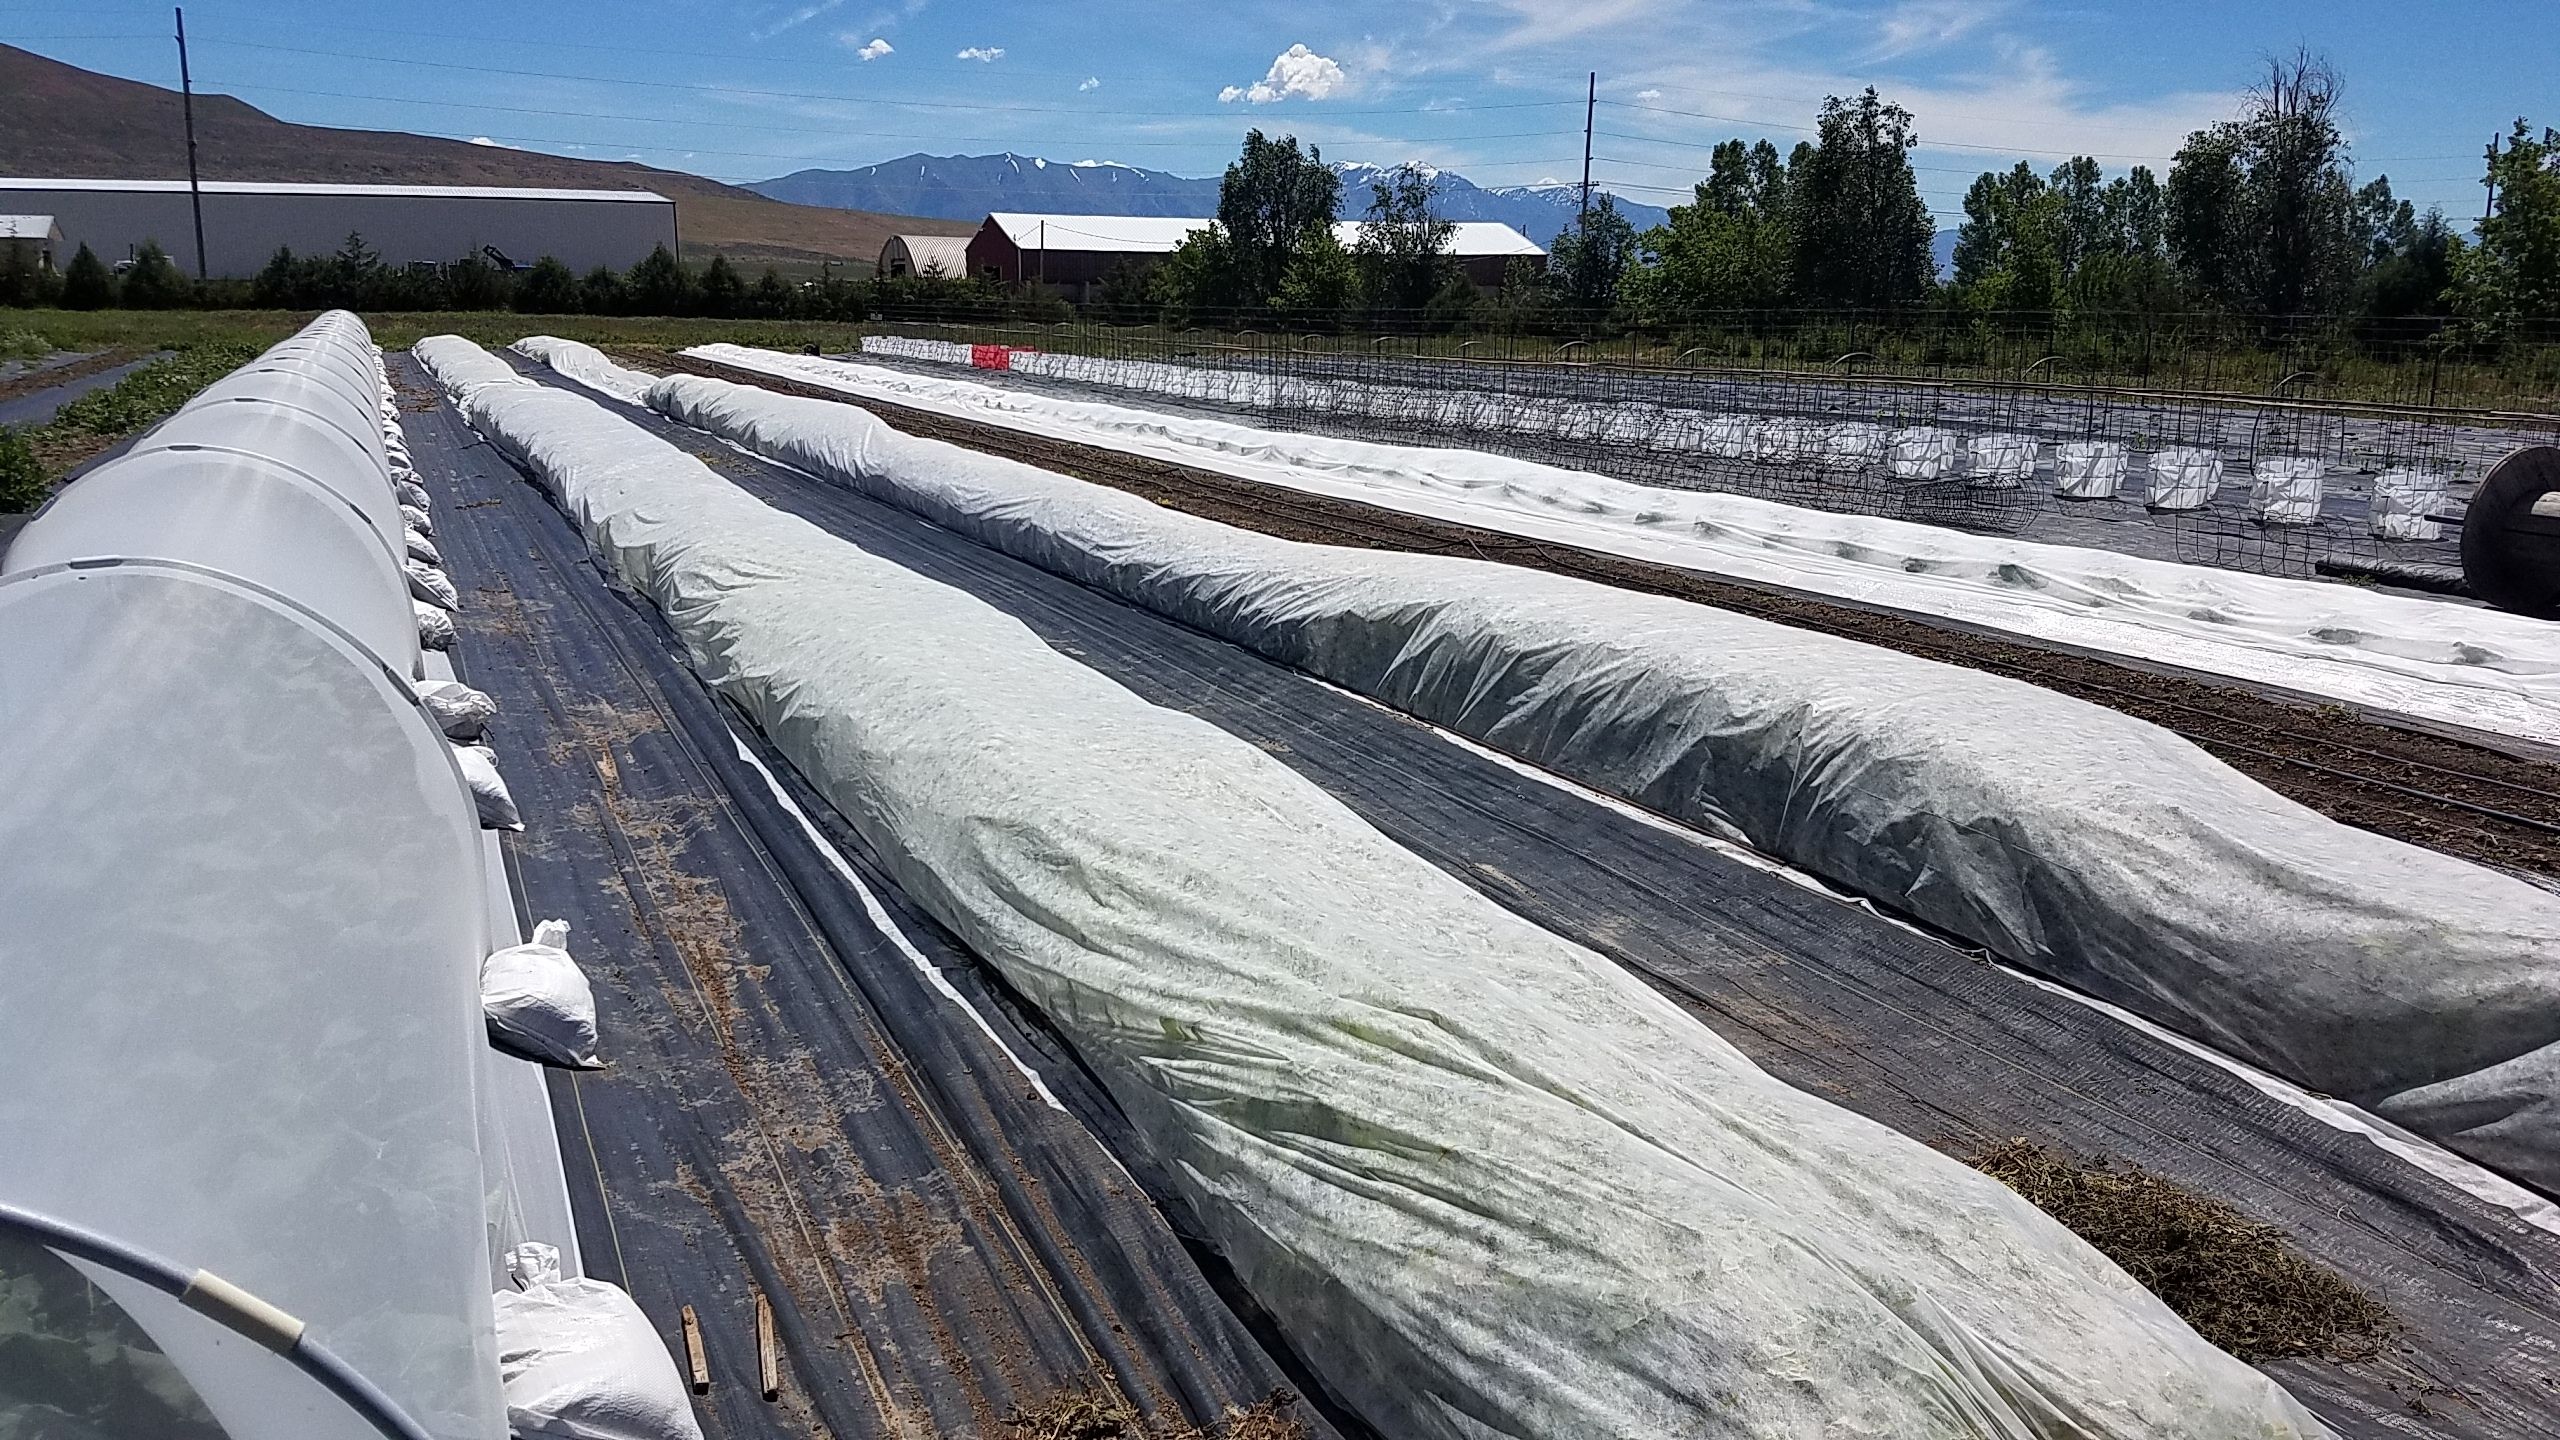
Fig. 9. Covers used for season extension in Weber County, Utah. Image courtesy of John Trimble, Foodscaping Utah.

Fig. 10. Covers used in kale production in Uintah County, Utah. Image courtesy of Mason Taggart, Heritage Family Gardens.

Fig. 11. PVC low tunnels used for commercial leafy green production in Cache County, Utah. Image courtesy of Penny Trinca, First Frost Farms.

Fig. 12. Row cover supported by wire hoops. Image courtesy of Ranui Gardens

Fig. 13. Row covers used for frost protection.

Fig. 14. Excluding an adult squash bug with insect netting.

Fig. 15. Row covers blown away by wind in Davis County, Utah. Image courtesy of Andrew Swain, Utah Agricultural Experiment Station.

Fig. 16. Setting up row covers in a commercial field in Summit County, Utah. Image courtesy of Ranui Gardens
Constructing a PVC Low Tunnel
(Instructions from University of Maryland Extension)
For a planting bed: 2 feet wide x 18 feet long (42 inches to top of hoops)
- Hammer ten, 2-foot-long pieces of 3/8-inch rebar, 10 inches into the ground along each side of the planting row.
- Drive the rebar 10-12 inches into the ground, leaving about 14 inches above ground, sliding the PVC down over the rebar. The five sets of rebar are there to support five PVC bows. To give the first and last plants a little extra room, add one foot to each end of the low tunnel. This gives a 5-foot space between the first and second bows and the fourth and fifth bows, and 4-foot spacing between the second and third, and third and fourth bows.
- Cut ten, 10-foot-long pieces of 1/2-inch PVC water pipe into 8-foot-long pieces and insert them over the rebar to make five bows.
- Connect the bows at the top with stretchy clothesline and along each side with some nylon twine.
- Drive one stake next to each tomato or pepper plant for support and cover the tops with duct tape to prevent tearing of the row cover. The stakes should be no more than 40 inches above ground level. Cut and drape a piece of 22-foot-long X 10-foot-wide row cover over the frame, and secure it to the ground with sod pins.
Advantages
- Frost protection. Heavier materials (spunbonded polypropylene) provide better frost protection but will exclude more light. Use row covers on sensitive crops in the fall for late frost protection (Fig. 13).
- Early yields. Row covers can create a “greenhouse effect” which warms the air surrounding the plant and the soil temperatures. When combined with black plastic mulch, many crops may mature earlier than other growing practices.
- Increased yields. Vegetables that tend to respond well to row covers include cole crops, leafy greens, tomatoes, peppers, eggplant, and peas.
- Pest control. Row covers exclude insect pests (Fig. 14). This leads to less insecticide use and fewer insect vectored diseases. Row covers protect plants from birds.
- Water conservation. Less irrigation may be required under row covers since water collects as condensation on the inside of the cover and returns to the soil. Less crusting occurs since wind movement and water evaporation are reduced. However, overall water use may increase since crop growth is earlier and greater and occurs over a longer period of time.
Disadvantages
- Cost. Row cover costs depend on the crop, row spacing, and row cover material. The costs for the additional labor may be significant.
- Wind. Depending on location and construction of the row covers, wind may cause tears in the material or lift and carry away row covers (Fig. 15).
- Pests. Even though row covers are used to exclude insects, any insects that manage to enter the covered area can reproduce rapidly in the protected enviornment. Weeds may also grow well, therefore row covers should be pulled back often for hand weeding.
- Labor. Row covers require more labor earlier in the season than traditional production methods (Fig. 16)-- especially when removed to weed, apply pesticides, or allow for pollination
Sources for Row Cover Materials
- Row Covers and Accessories (Johnny’s Selected Seeds)
- Row Covers for Growers (Harris Seeds)
- Floating Row Covers (Arbico Organics)
- Garden Fabric (Row Covers) (Gardener’s Supply Company)
- Row Covers & Frost Blankets (Grower's Supply)
Table 3. Row Cover Recommendations for Various Vegetables
(Information adapted from University of Maryland Extension)
| Crop | When to Cover | When to Remove | Pests Prevented |
|---|---|---|---|
| Tomato Pepper Eggplant |
|
|
|
| Summer squash Winter squash Cucumber Pumpkin Watermelon Muskmelons Cantaloupe |
|
|
|
| Lettuce |
|
|
|
| Spinach | |||
| Arugula Radish Broccoli Cabbage Cauliflower | |||
| Carrot | |||
| Snap Beans | |||
| Mustards Kales Collards |
|
|
|
| Swiss Chard Beets | |||
| Potato | |||
| Pole Beans |
References and Further Reading
- Daughtry, M., & Gaster, R. (2020, May 12). Row covers for garden defense. North Carolina State University Extension. https://lee.ces.ncsu.edu/2020/05/row-covers-for-garden-defense/
- Mahrr. S. (2010, March 26). Floating row covers. University of Wisconsin Extension Master Gardener Program. https://wimastergardener.org/article/floating-row-cover/
- Nair, A. (2014 ,January 27). Lettuce season extension with row covers. Iowa State University Extension. https://www.youtube.com/watch?time_continue=1&v=WELQ2Bbn4k8&feature=emb_logo
- Parker, J., Miles, C., Murray., T., & Snyder, W. (2012). How to install a floating row cover. Washington State University Extension. https://s3.wp.wsu.edu/uploads/sites/2071/2014/04/Install-a-Floating-Row-Cover-FS089E.pdf
- Toscano, K. (2013 ,May 22). Constructing row covers. Oklahoma State University Extension. https://www.youtube.com/watch?v=vI_BNPqyv4E
- Traunfeldd, J. (2014). Floating row cover: An organic gardening tool that improves plant growth and excludes pests. University of Maryland Extension. https://extension.umd.edu/hgic/topics/floating-row-cover
- Trimble, J., & Volesky, N. (2020, June 11). Mechanical control: Row covers. Foodscapingg Utah and Utah State University Extension. https://www.facebook.com/247917008631142/videos/1563699230456124
- Volesky, N. (2019, July). Your guide to row cover installation. Utah Pests Quarterly. Utah State University Extension. https://utahpests.usu.edu/files/up-newsletter/2019/UtahPestsNews-summer19-2.pdf
- Volesky, N. (2020, June 5). How to make row covers to protect your plants from pests. Utah State University Extension. https:// www.youtube.com/watch?v=LS2HWl3VnY4
- Walker, S., & Dickerson, G. (2019, October). Row cover vegetable production techniques. New Mexico State University Extension. https://aces.nmsu.edu/pubs/_h//H251/welcome.html
Image Credits
1 Amanda Theobald, SLC Top Crops
2, 6 Dennis Hinkamp, Utah State University Extension
3, 4, 8, 14 Nick Volesky, Utah State University Extension
5, 13 Utah State University Extension
7, 12, 16 Ranui Gardens 9 John Trimble, Foodscapingg Utah
10 Mason Taggart, Heritage Family Gardens
11 Penny Trincaa, First Frost Farms
15 Andrew Swain, Utah Agricultural Experiment Station
Related Research
What Is Biochar and How Is It Used?
Biochar is a charcoal-like product that contains no petroleum. It is made by heating biomass such as herbaceous or woody crop residues, non-salvageable timber and slash, or animal manure, in a contained system. There are many potential uses for biocha
General Concepts of Biological Control
“Balance of Nature.” Virtually all pest populations are affected by natural enemies to some extent. In many cases, natural enemies are the primary regulating force of the pest populations.

Using Degree Days to Time Treatments for Insect Pests
Degree days (often referred to as “growing degree days”) are accurate because insects have a predictable development pattern based on heat accumulation. Insects are exothermic (“cold-blooded”) and their body temperature and growth are affected by their su

Important Components of a Successful Pest Management Program
The lowest population density of a pest that will cause economic damage; or the amount of pest injury which will justify the cost of control.

Pest Management Decision-Making: The Economic-Injury Level Concept
Pest managers cannot afford to take a pest management action without knowing if it is economically sound. Treating a pest needlessly is not conducive to making a profit. Other values such as aesthetics of the management situation (pertinent to landscapes
The Integrated Pest Management (IPM) Concept
The term Pest Management came about in the early 1960’s, which then evolved into Integrated Pest Management (IPM). However, many aspects of IPM have been practiced since plants were first cultivated by humans.
Integrated Pest and Pollinator Management
An inextricable link exists between humans and pollinators, with benefits that include ecosystem health and function and human food security. Bees, butterflies, moths, wasps, flies, and beetles are responsible for most of the world’s pollination servic
Row Covers
Row covers on Utah farms. As an integrated pest management tool, row covers act as a physical barrier that prevents the movement of pests such as insects, birds, and mammals, to host plants.