Building a Basemap
Creating a base map is one of the first steps in creating a successful landscape design. The base map is a drawing that graphically and proportionally displays the existing conditions of a site. Essentially it shows what is currently on the property, where it is, and what size it is.
Getting Started
Before beginning to prepare a base map, it can be helpful to gather any existing information you might have. This can come from several sources including: a plot plan obtained from your city or county, information that was attached to the property deed, a plan obtained from the property developer or previous owner, or online satellite imaging.
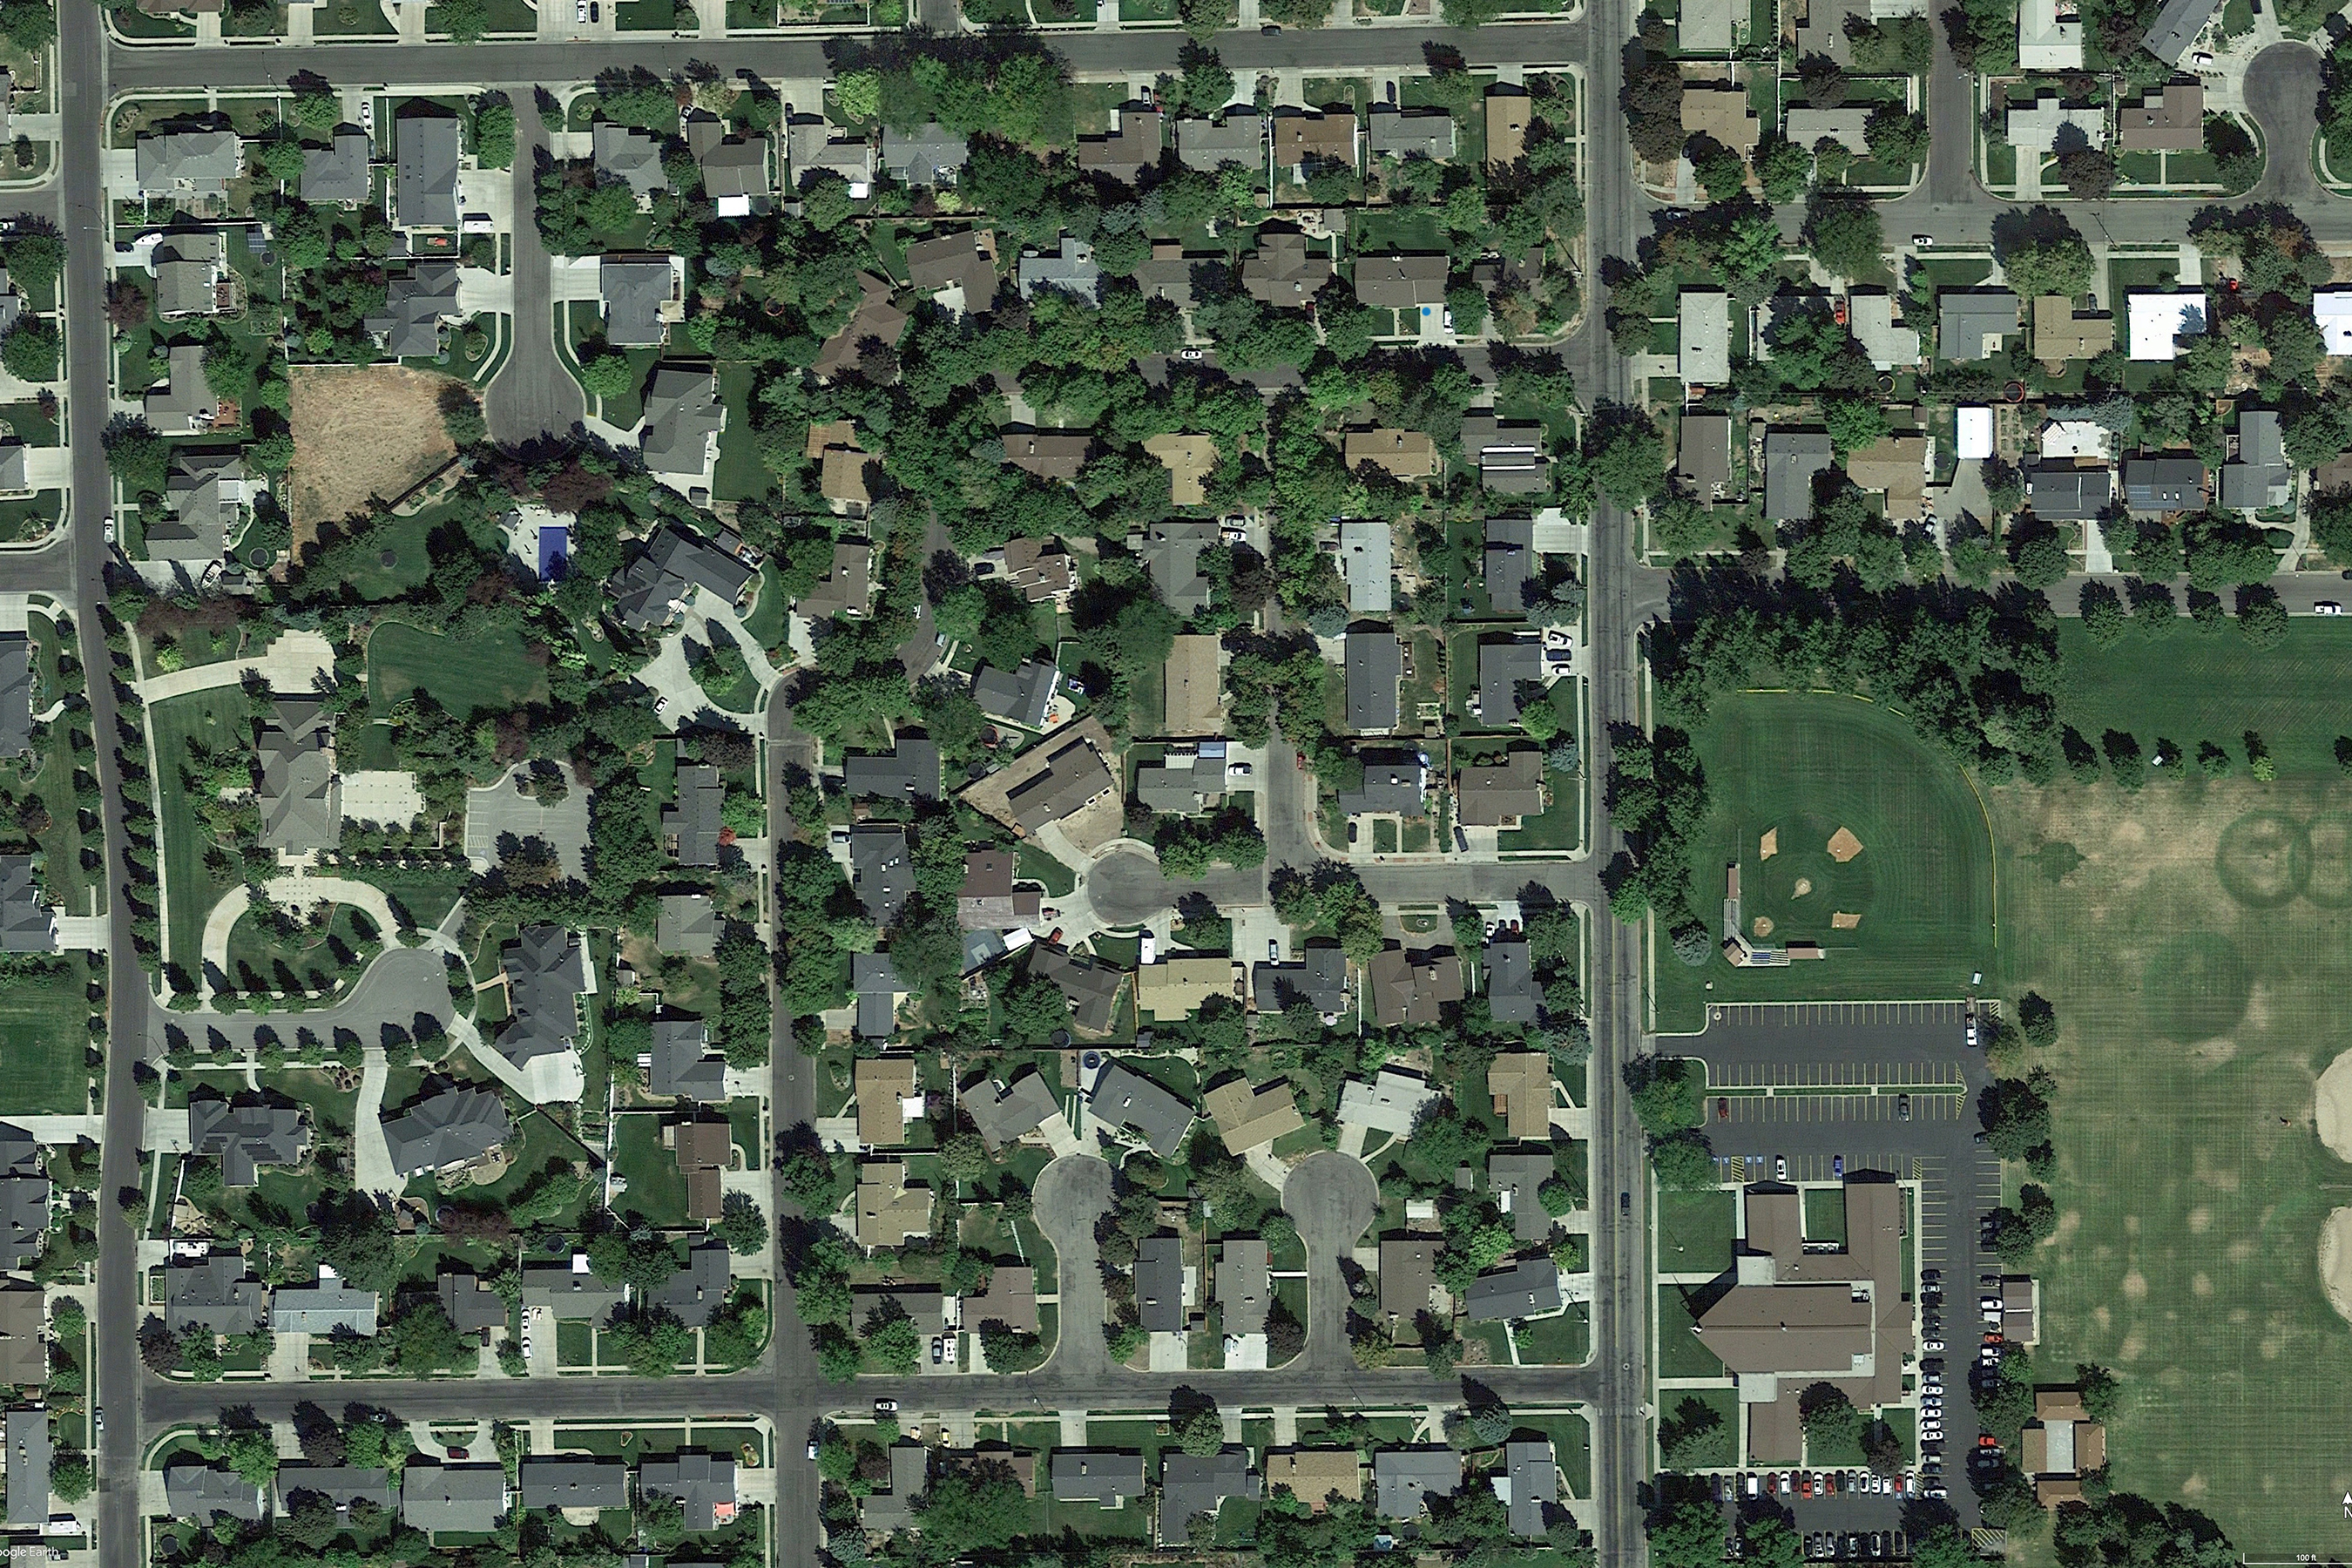
Satellite Imagery from Google Earth
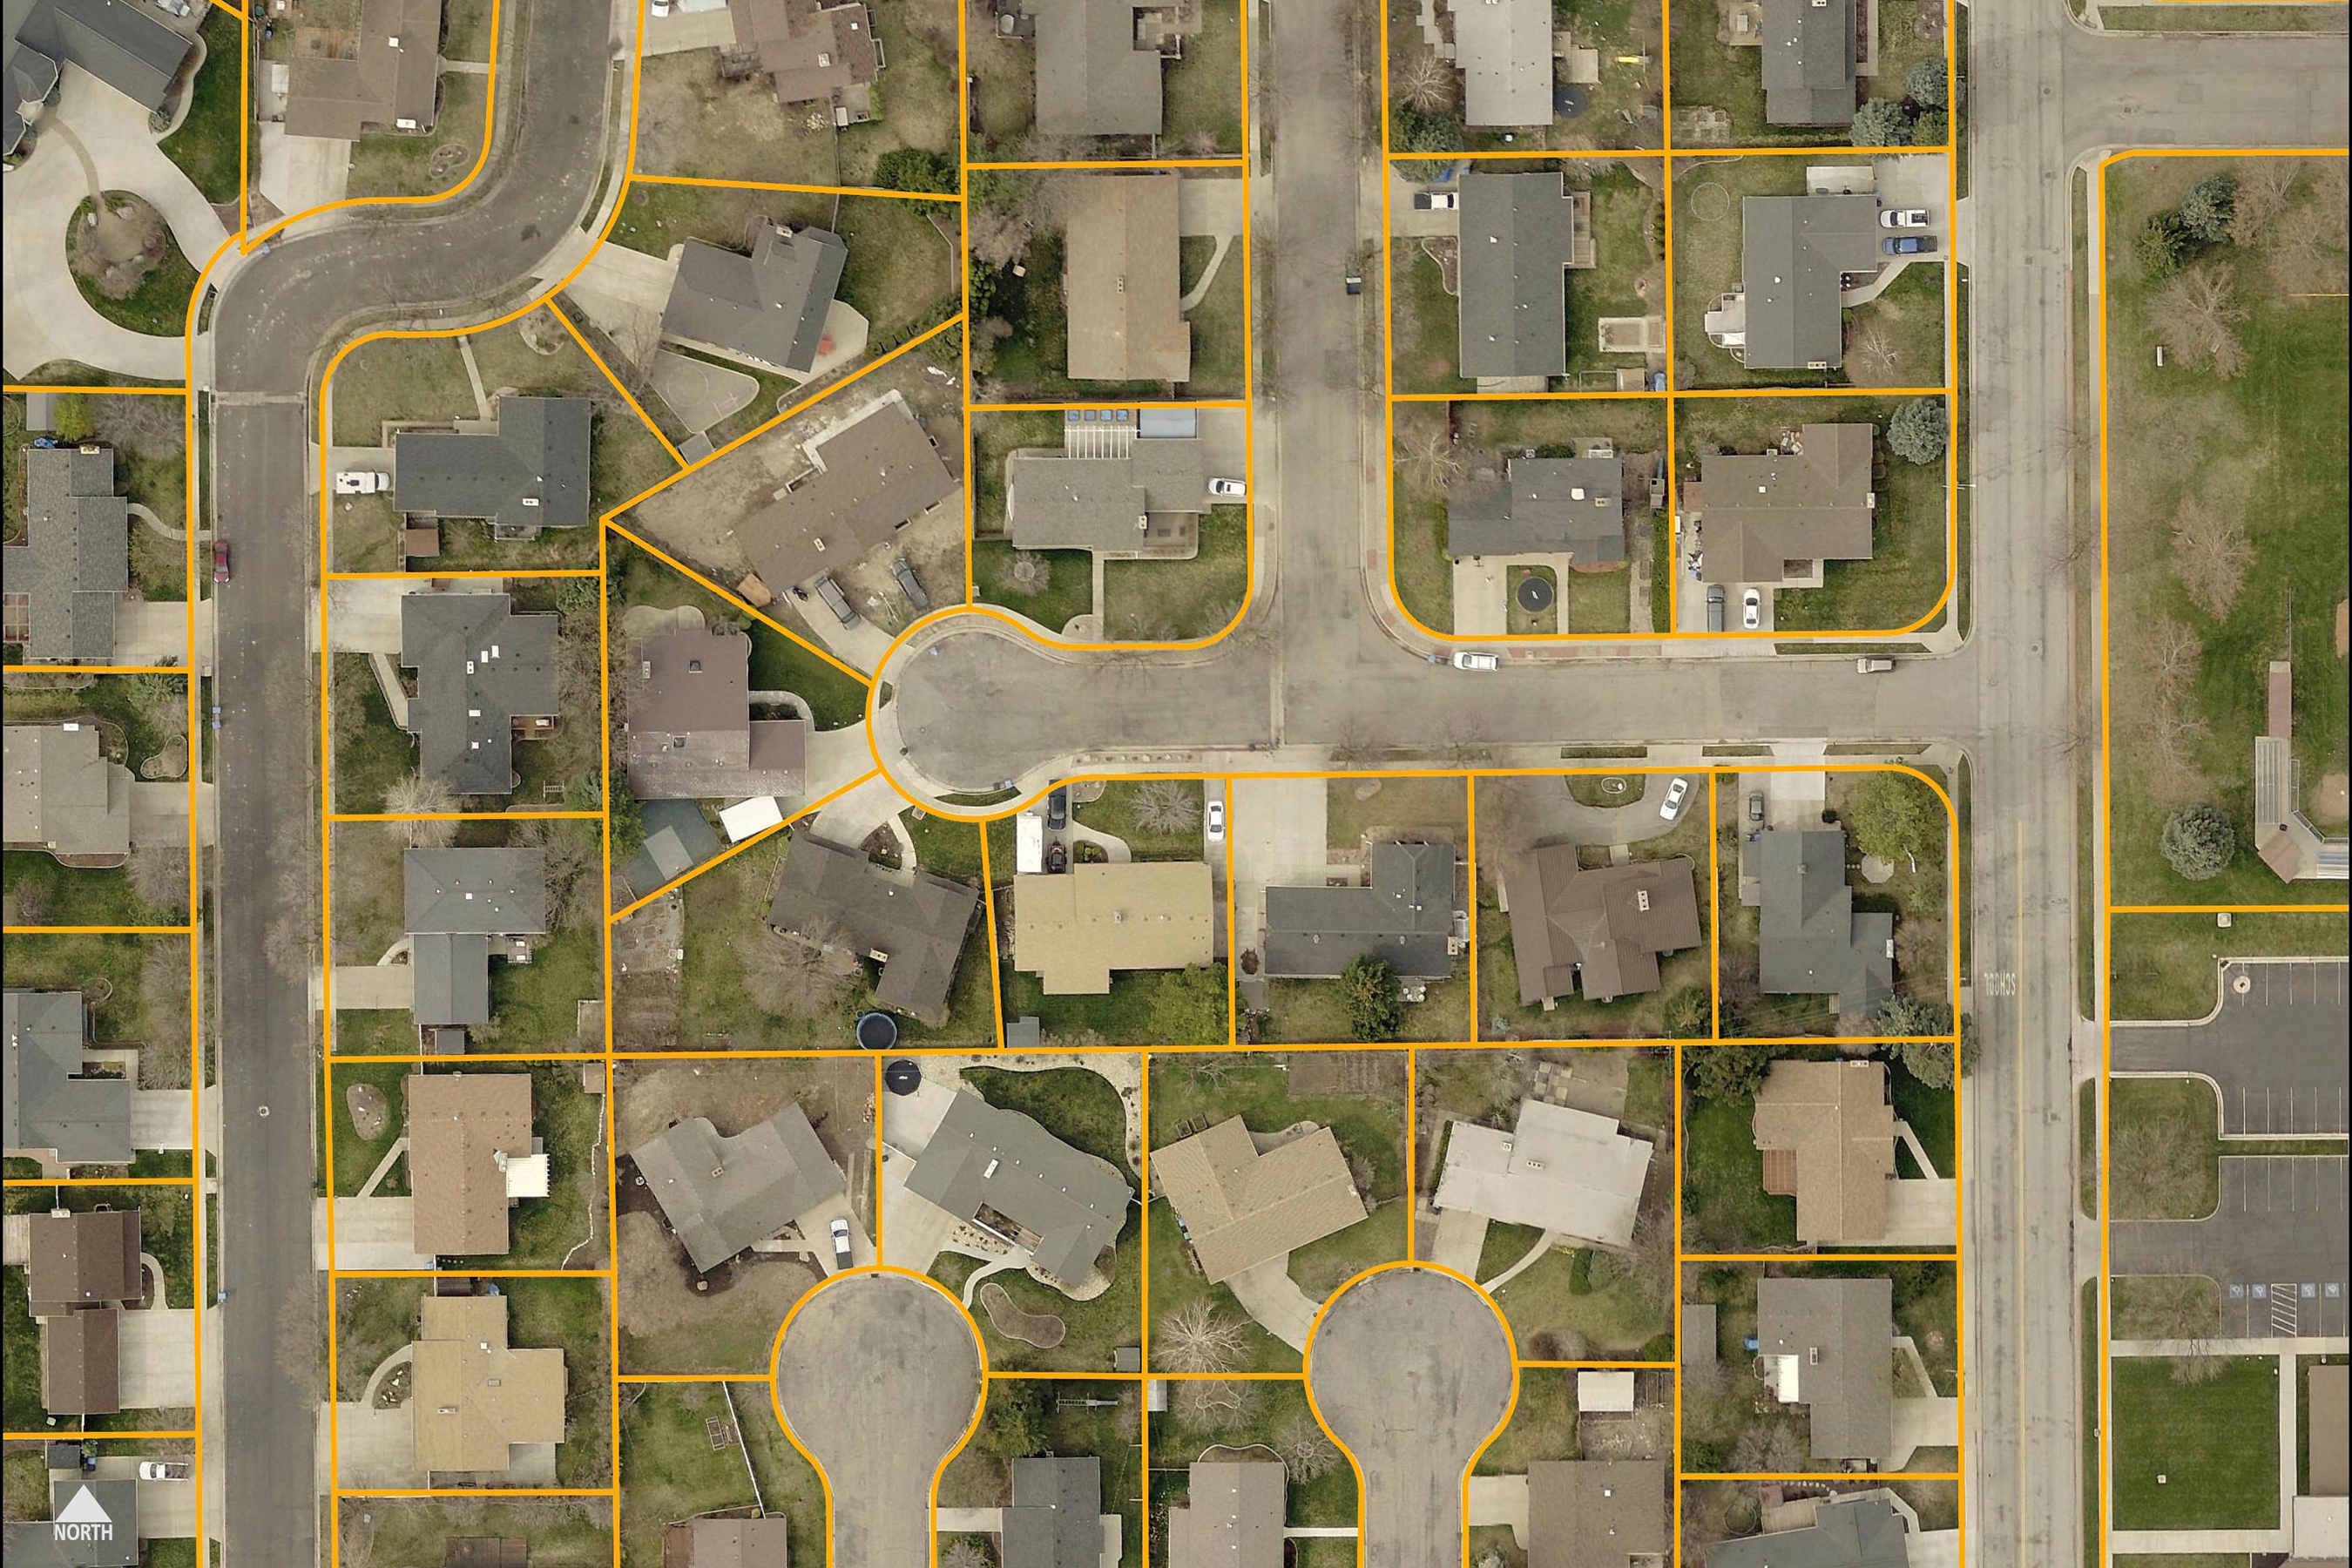
County Parcel Map
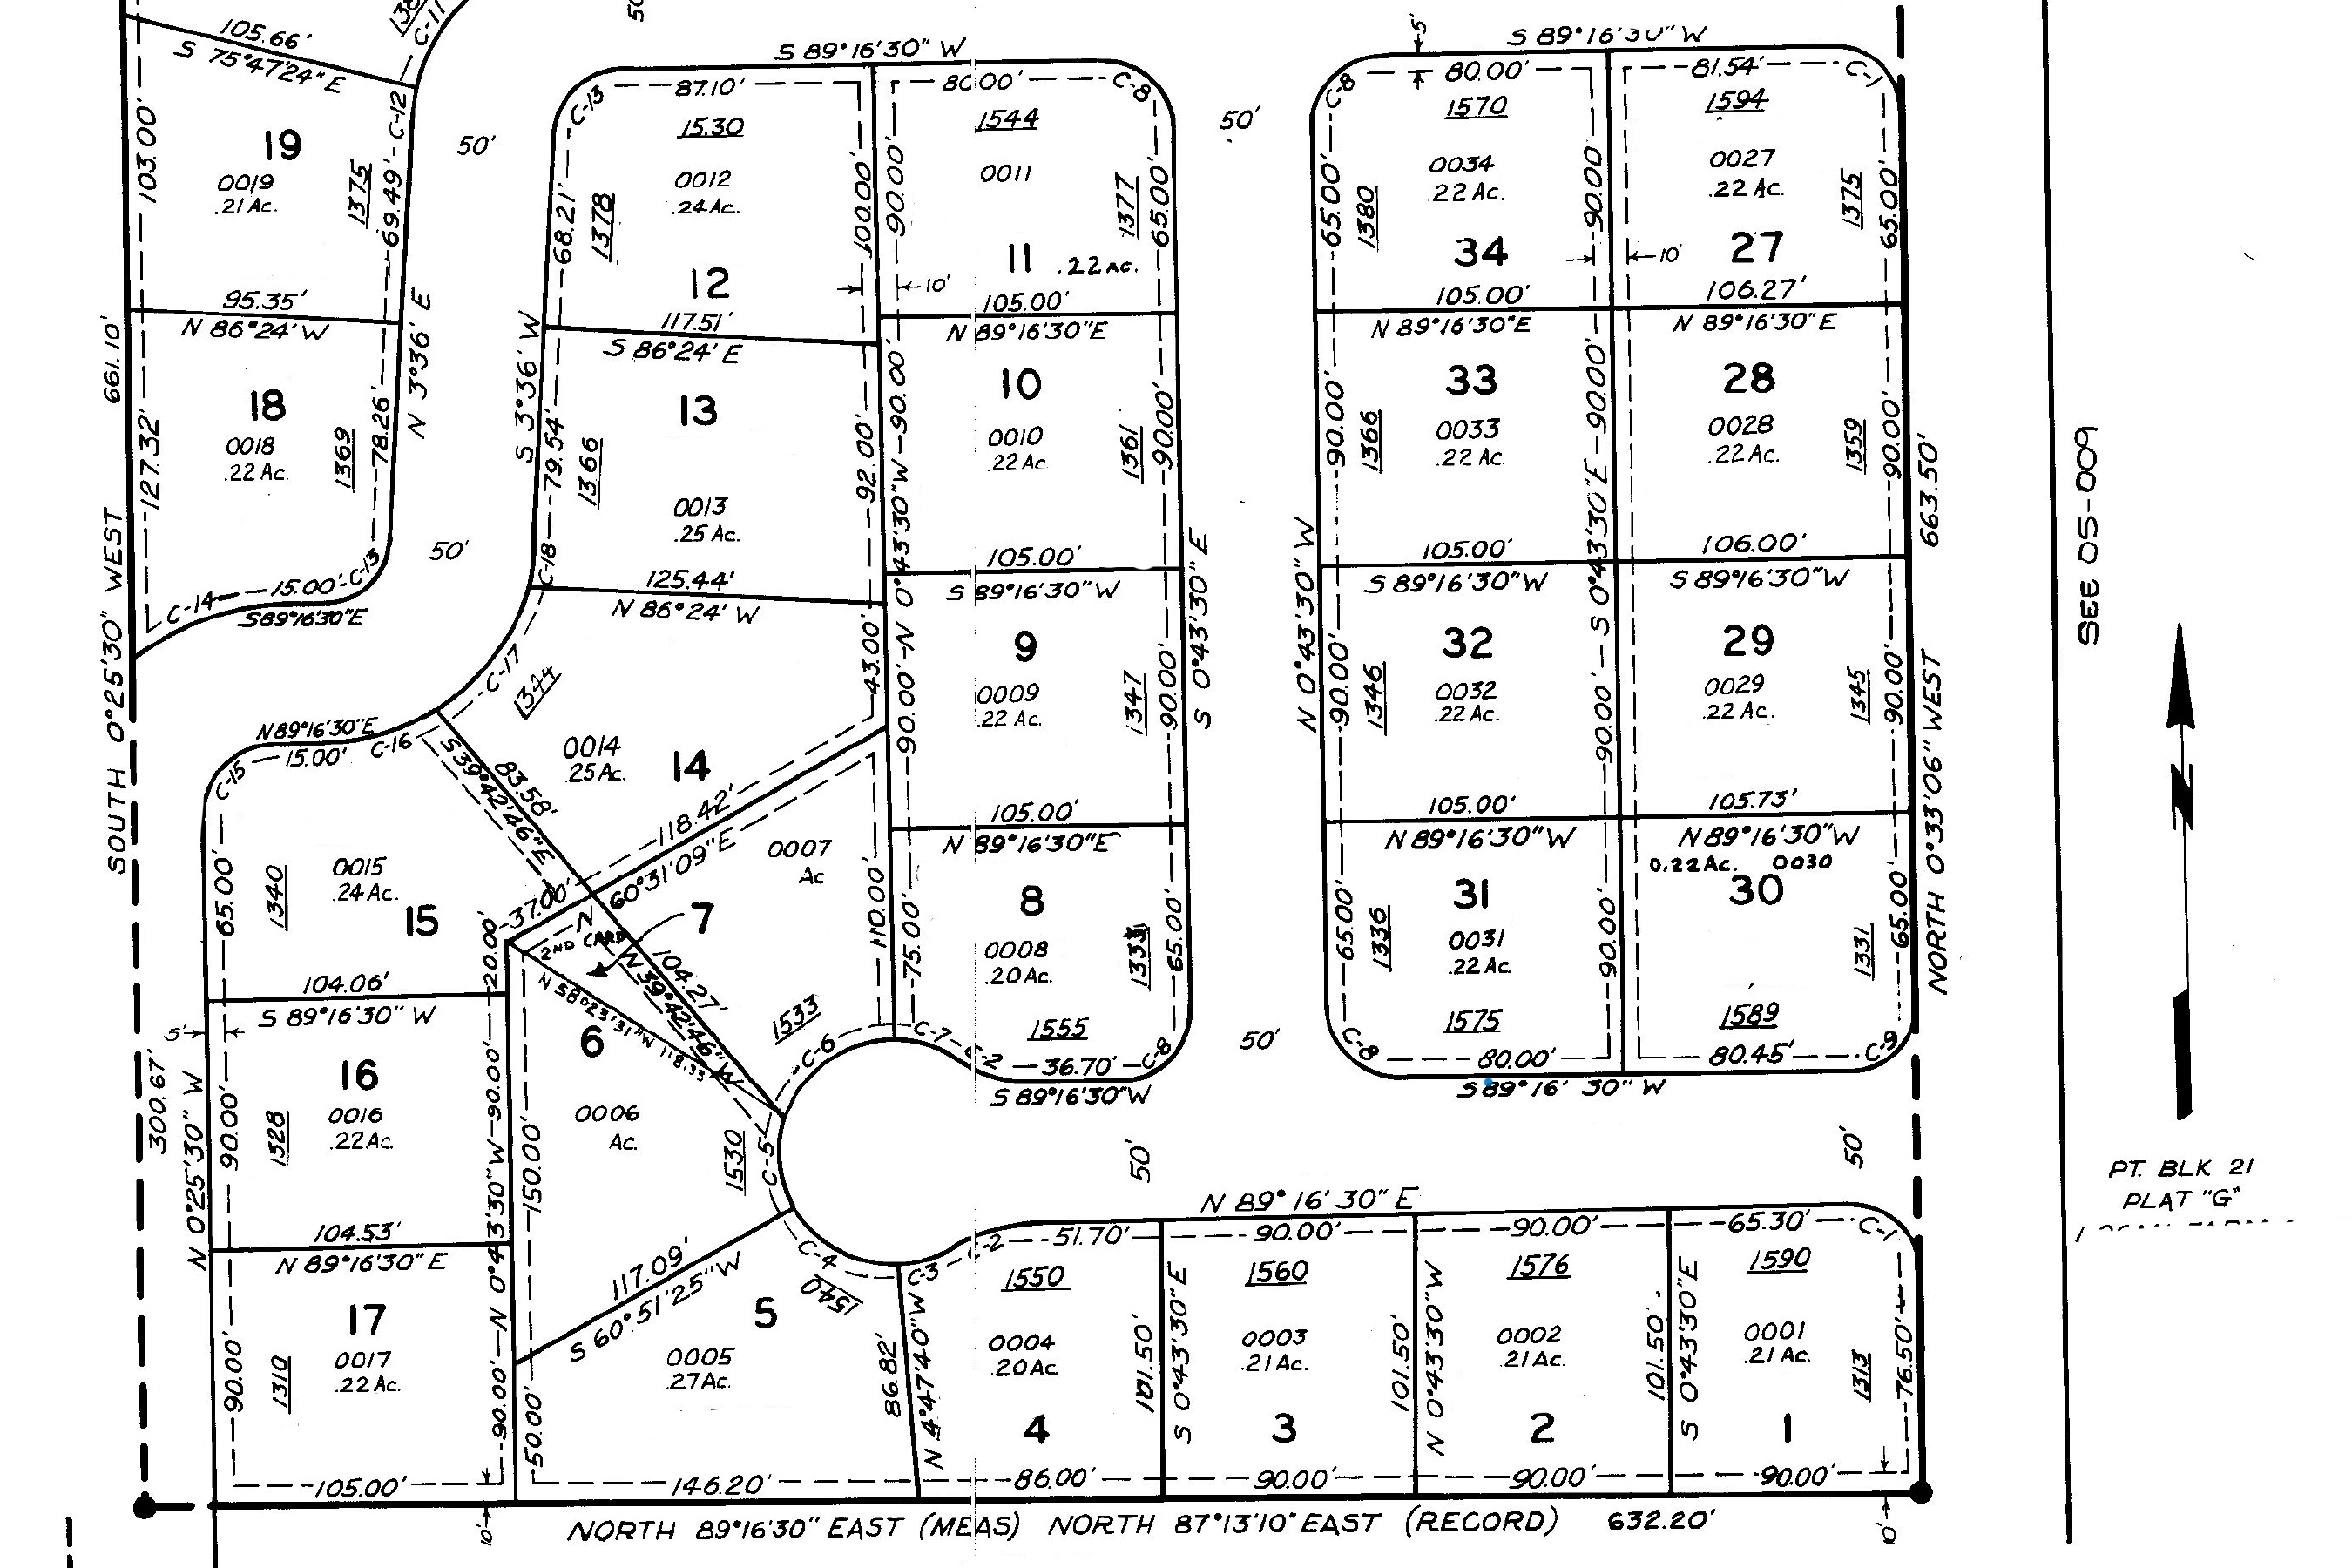
Recorder's Plat from County Parcel Data
These sources are a great starting point, but they are usually not complete enough on their own. Drawings from the city or county may only show property lines and not other features. Plans from previous owners are likely not up to date and may not be drawn to scale. Most often it is necessary to take physical measurements of the site.
Use the Right Tools
You can begin by using the measuring tools available with online mapping software, but you will likely need to verify with physical measurements of the space. This process can be accomplished using a variety of simple measuring tools.For this exercise you will need:
- 16- or 25-foot measuring tape
- 100-foot measuring tape
- Measuring Wheel (optional)
- Graph paper (8.5 x 11 or 11 x 17)
- Clip board
- Pencil and/or pen
- Camera

Clipboard with Design 4 Everyone Graph Paper

16-foot Measuring Tape

100-foot Measuring Tape
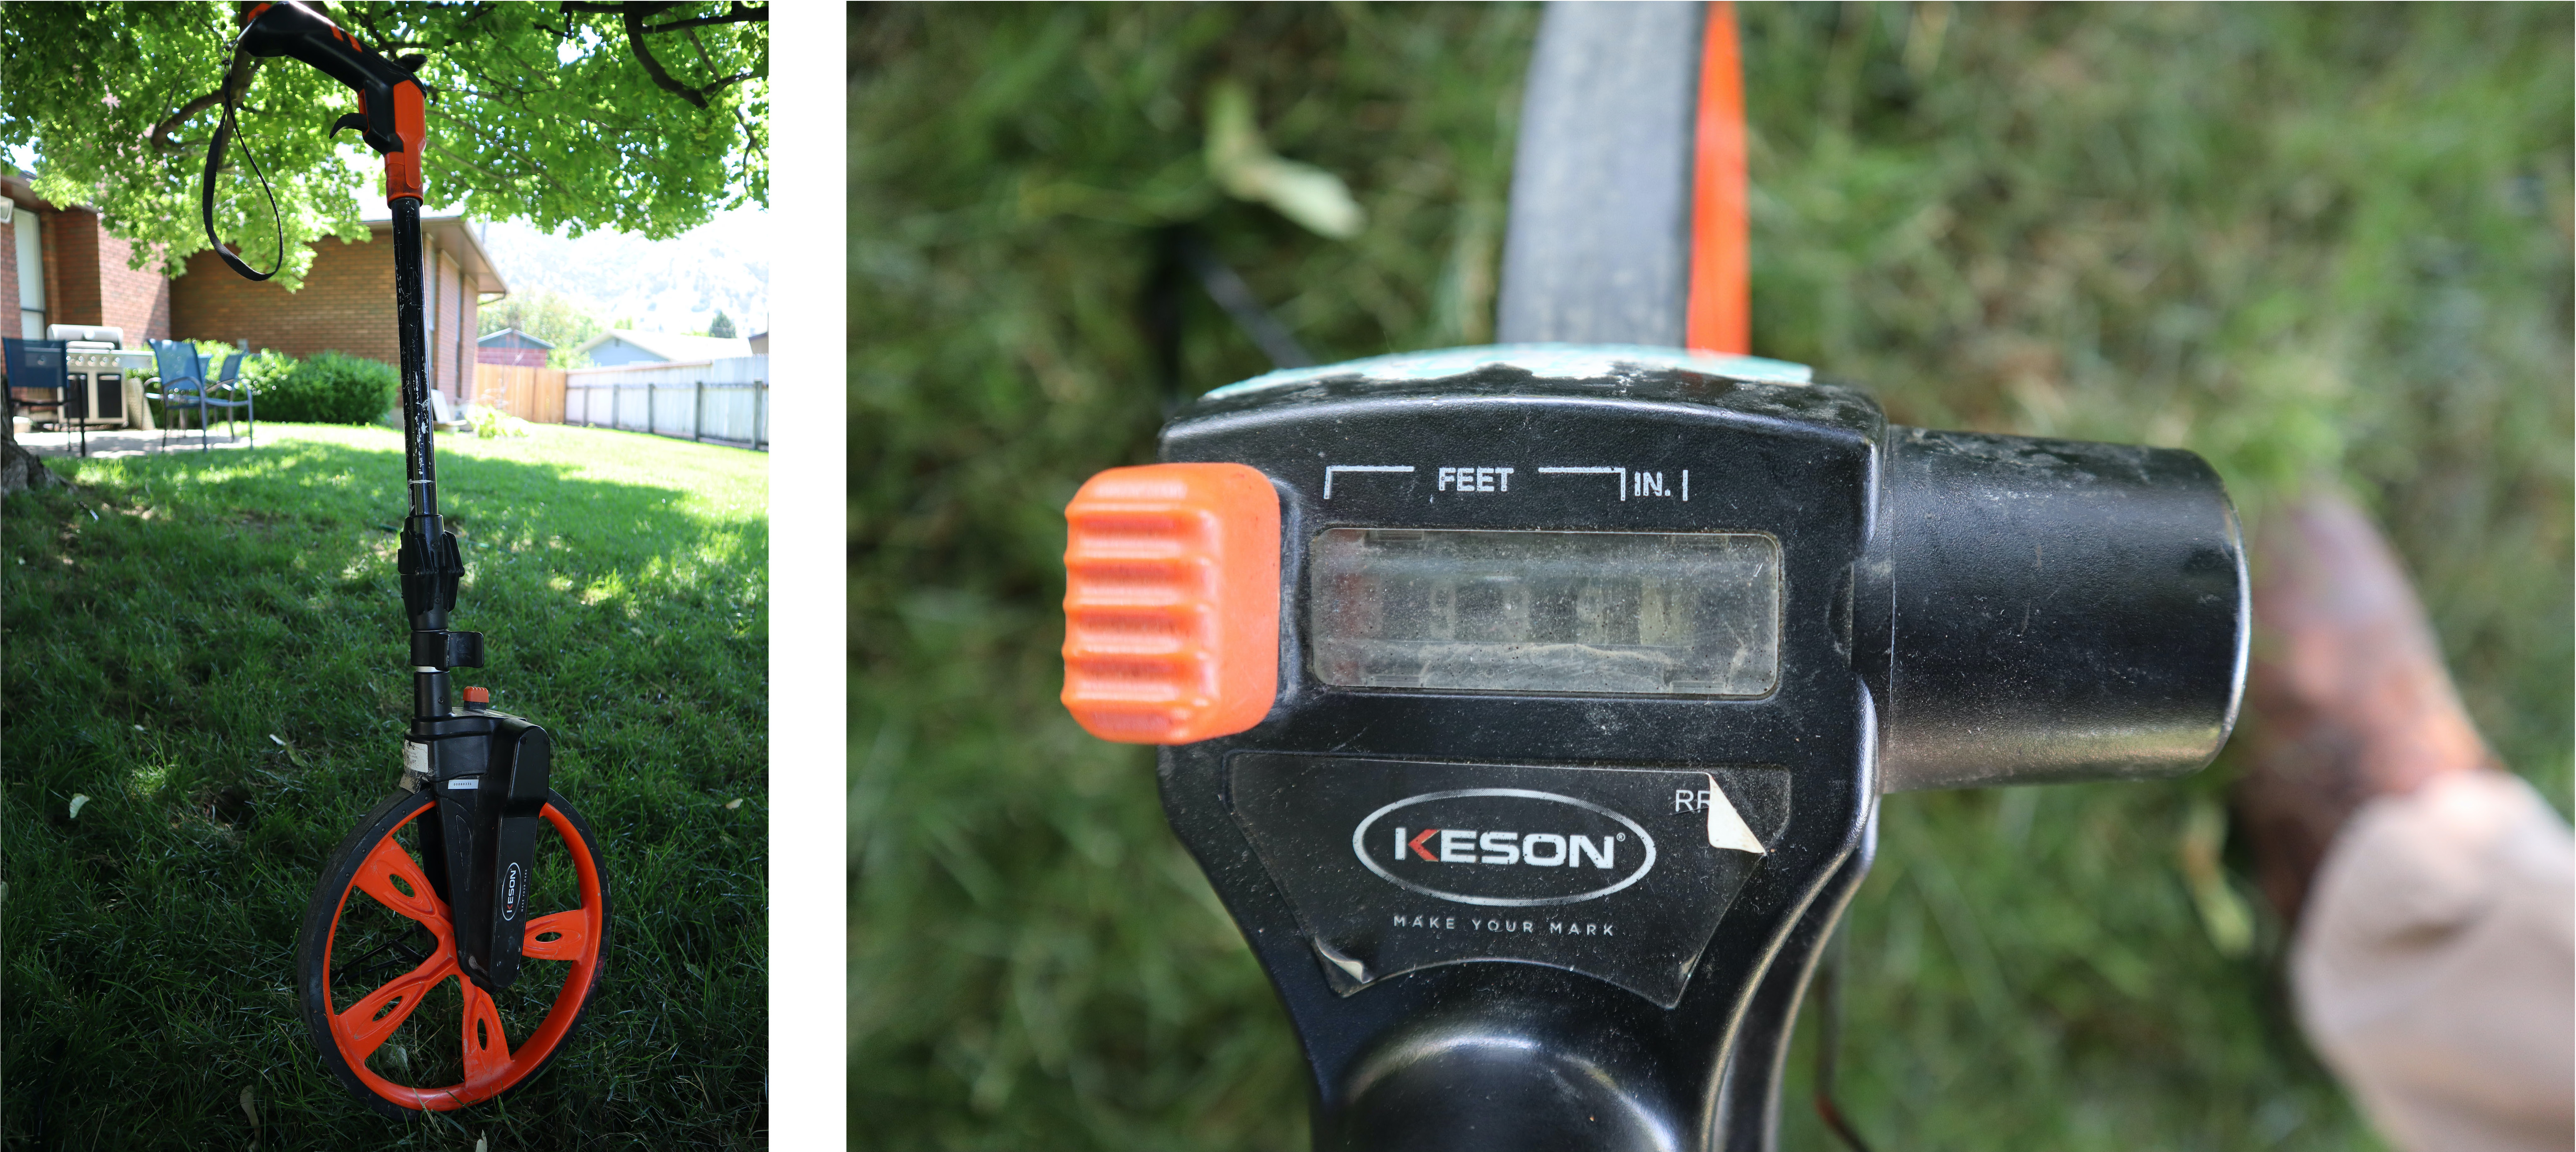
Measuring Wheel and Display

Cameras
Find a good assistant. The process of measuring for a base map is usually easier accomplished with two people working together. Graph paper can be useful while taking measurements and later when preparing the final base map. It is simple to use and can help keep your drawing neat.
Be Organized
As you begin to measure the space, the process will go more smoothly if you remember to take your time and stay organized. Using graph paper or drawing over a copy of a satellite photo can be helpful.
Eventually you will need to compile your measurements into one drawing, so make sure your notes are written neatly and legibly. You will be moving through the space as you take measurements, and there is a tendency to rotate your paper to face the direction you are facing. Your notes will be easier to follow if you avoid writing upside down or sideways.
Take photos as you are measuring for your base map. These can help you remember and sometimes clarify your notes later when you are drawing. Photos taken at this time can also serve as “before” photos to use as comparison once your landscape project is done.
Avoid Assumptions
It can be easy to make assumptions, especially about things that we see every day. As you are going through this process, it is important to record what is actually there.
Property lines can be tricky. In a technical sense, they are legal descriptions. Often, we only have a vague idea of where they are really located, and we misinterpret visual clues. For example, houses are not uniformly situated on their respective properties. This means the midpoint between one house and the one next door is not necessarily the property line. The spot in the side yard where the neighbor decides to stop mowing the lawn can be even more misleading. Even fences can be deceptive. A shared fence is placed directly on the property line and is shared by the owners on either side. However, a fence can be owned by only one neighbor, and if so, it can be placed anywhere inside the property line.
It can also be easy to make assumptions when relying on satellite photographs. Sometimes shadows in these photos can hide features or distort shapes. Also, observing an aerial view of a tree canopy does not always reliably help you locate the placement of its trunk.
Error Tolerance
There will be some degree of error in your measurements that is difficult to avoid. Parcel maps with property lines do not always line up exactly over the satellite imagery, some measurements are in hard to reach areas, and others have to be rounded. In these situations, it is important to identify where error may occur so you can adjust if needed. Keep measurements consistent when you round by sticking with one degree of precision (inch, half inch, etc).
Measuring Techniques
There are a few measuring techniques that will allow you to accurately place objects in relation to each other. These include Direct Measuring, Baseline Measuring, Grid Measuring, Triangulation, and Height Approximation. Watch the videos below to learn how and when to use each type of measurement.
Direct Measuring
Baseline Measuring
Grid Measuring
Triangulation
Height Approximation
Drawing
As you begin drawing your base map, it can save you time to be familiar with a few basic graphic conventions. These are simple to understand ways of representing objects in a drawing. For example, trees are typically drawn using a smaller circle to represent the center of the trunk surrounded by a larger circle that represents the canopy. Walls of a building are represented by a thick line with breaks for windows and doors.
Plan drawings are typically oriented with north at the top of the page. This may not be the way you visualize the property. However, any existing plans you might use as reference will be drawn that way and it will be the default orientation on any mapping software you use. Whether or not you decide to stick with the convention, include a north arrow on your plan. Later in the design process it will be important to understand sun angles.
Finally, it is important to think about scale. Choose a scale that will allow your plan to fit comfortably on a sheet of paper. For example, the Olmsted’s property is about 100 feet by 140 feet. This can be found using the measurement tool on Google Earth if it’s hard to measure the overall dimensions on site. The grid area on the Design 4 Everyone Graph Paper measures 9.5 x 8 inches. If we want 140 feet to fit across the area 9.5 inches wide, divide 140 by 9.5. You get about 14.7, which means 14.7 feet per inch. It is more common to see scales in intervals of 10 feet (ex. 1”=10’, 1”=20’, 1”=30’, etc.), so we rounded up to 1 inch = 20 feet. Do not round down, as this will make your drawing too large for your paper. Include a visual scale with your drawing. This will ensure that the scale of the drawing is understandable even if it is enlarged or shrunk.
To see the whole process of drawing the basemap for the Olmsted Residence, watch the video below!
Action Item
Create a basemap for your property!
Using the tools and techniques discussed above, collect all the important measurements of your site. You should also take photos during this step so you can reference them throughout your design process. Compile your measurements into a basemap drawing on graph paper (provided below).
8.5 x 11 Graph Paper
11 x 17 Graph Paper
Be sure to make copies (physical or digital) of your basemap so that you can use it again and again.