Maple Sap Collection and Sap Processing Systems
Jesse Mathews1, Youping Sun1, Steven Price1, Darren McAvoy1, Michael Farrell2, Paul Harris1, and Kelly Kopp1
1Utah State University, Logan, UT 2The Forest Farmers, LLC, Lake Placid, NY
Introduction
Starting a maple syrup operation as a hobby or a business can be a daunting task. This fact sheet can help a new maple syrup producer get started on their sugaring journey with information on sap collection methods and processing equipment. A separate fact sheet covers tree selection, tapping, and sap processing: Producing Maple Syrup From Boxelder and Norway Maple Trees.
Collection Methods
Method 1: Spile and Bucket or Bag
| Pros | Cons |
| Simple and easy to use | Labor intensive |
| Few materials needed to start | Limited storage capacity |
| Removed at the end of the season | Hard to scale-up to many trees |
| Does not block access between trees and remains out of the way | Buckets and bags can be blown from the tree if not secured properly |
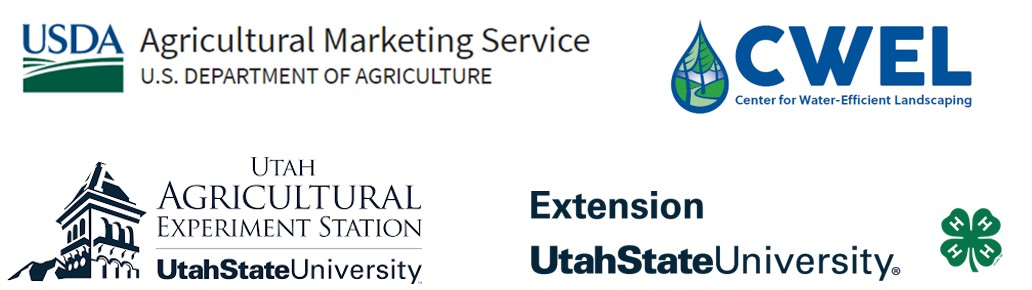
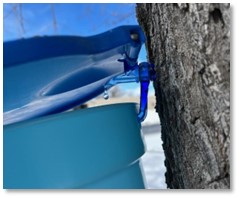
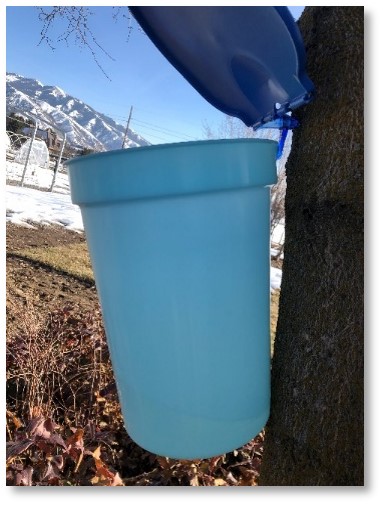 Figure 1. Sap Collection Bucket
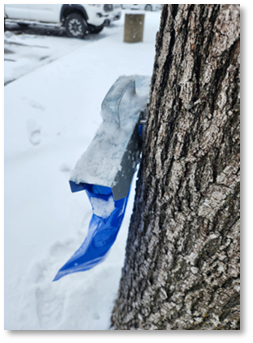 Figure 2. Sap Collection Bag
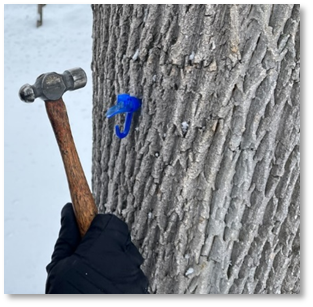
Spile and bucket or bag is the simplest and oldest collection method. Single trees are tapped with a spile at the beginning of the season and either a bucket or bag is hung from the spile to collect the sap (Figures 1 and 2). Sap is then collected from these vessels frequently throughout the sugaring season. At the end of the season, they are removed and stored for next year.
Spile and Bucket or Bag Steps
| Step 1. Drill a hole. | Step 2. Tap in the spile. | Step 3. Hang the bucket or bag and attach the lid |
 |
 |
 |
Method 2: Tubing System
| Pros | Cons |
| Less labor intensive once installed. | More complicated to install. |
| A single collection point. | Special tools and parts are needed for installation. |
| Multiple years of use with one installation | Animals can damage parts. |
| Vacuum can increase sap yield. | Tubing and parts are harder to sanitize. |
| Tubing systems left up year-round can make travel through the area difficult. |
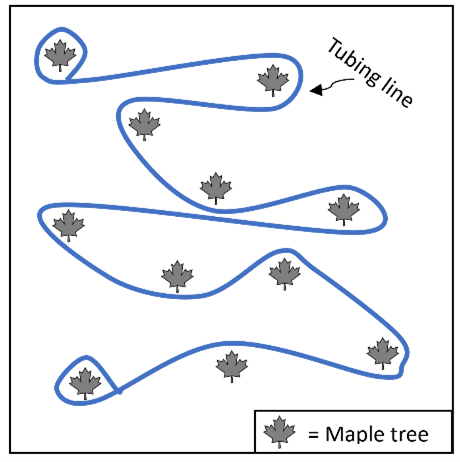
This collection system connects many trees together with tubing that collects the sap into one location through gravity or a vacuum pump (Figure 3).
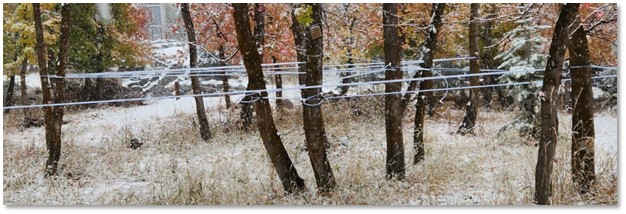
Figure 3. Tubing Collection System
The tools and parts shown in Figures 4 and 5 are required for a 5/16-sized tubing (outside diameter) and 3/16-sized (inside diameter) parts.
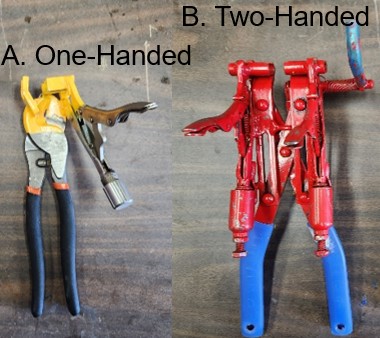
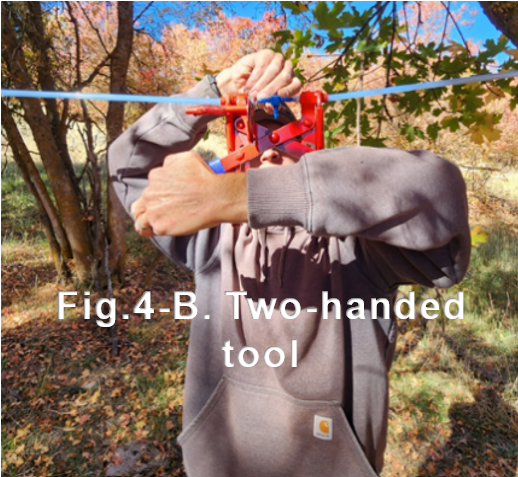
Figure 4. Tubing System Tools
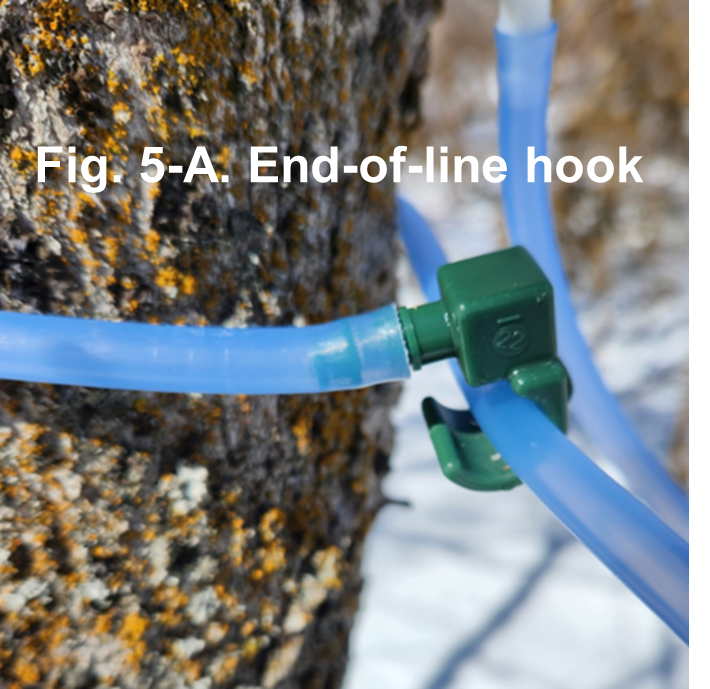
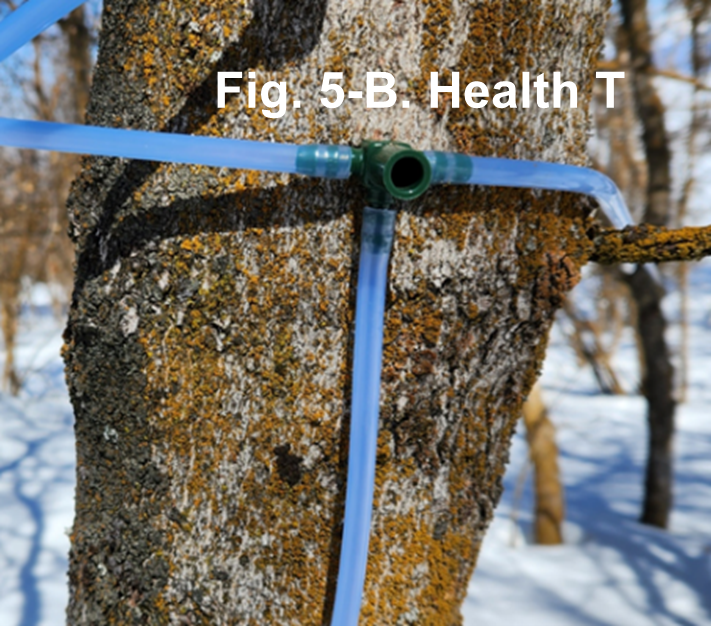
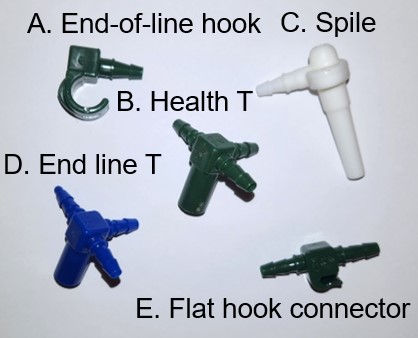 Figure 5. Tubing System Parts
Tubing System Steps
| Step 1. Find your anchor tree. The anchor tree is often the highest in elevation and doesn’t need to be the biggest but does need to be healthy. | 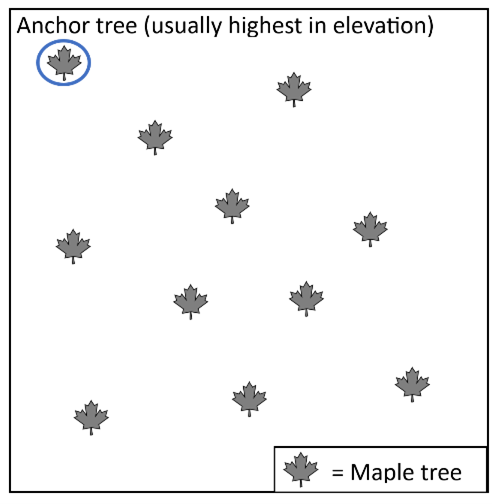 |
| Step 2. Starting from that anchor tree, lay tubing between trees and alternate the side that the tubing is on as you install the line. | 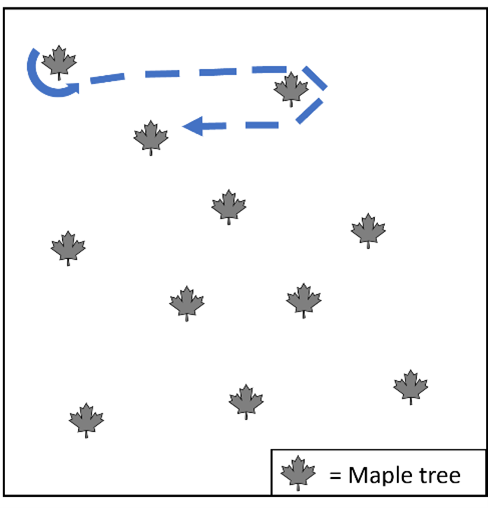 |
| Step 3. Once all trees that will be tapped are touching the tubing line, connect an end-of-line hook to the tubing (Figure 5-A) using the one-handed tool (Figure 4-A) and wrap it around the tree to secure it. Starting at the anchor tree, walk down the tubing line, pulling out all the slack. It must be pulled tight as the friction holds the tubing in place. |
 |
Step 4. After tightening the line, anchor the bottom of the line to the last tree or a support wire to keep the line tight without sagging. You can then begin to add “T’s” to the tubing line (Figure 5-B), using the two-handed tool (Figure 4-B), at each tree that is going to be tapped. These allow sap to flow from the tree into the system.
Step 5. Once every "T" is connected to the line, repeat Step 3 at the bottom-most tree and pull the tubing tight as it is anchored to the tree.
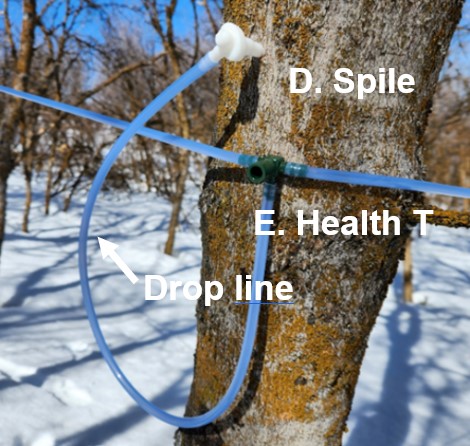
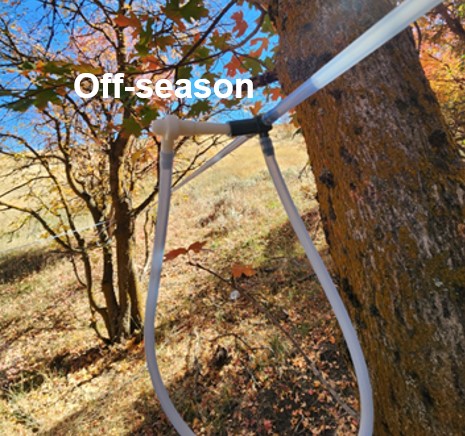
Step 6. Drop lines need to be connected to each “T” using the one-handed tool (Figure 4-A). These consist of tubing 2-3 feet long with a spile (Figure 5-C) connected at the end. The tubing needs to be long enough to reach completely around the tree to accommodate multiple years of tapping. The spile is placed in the open section of the “T” during the off season.
| Step 7. At the bottom of the line (after the last tree that is being tapped), connect the end-line T (Figure 5-D) into the tubing line using the two-handed tool (Figure 4-B). This is essentially an elbow that stops the sap flow in the tubing line and directs it to the connected tubing. | 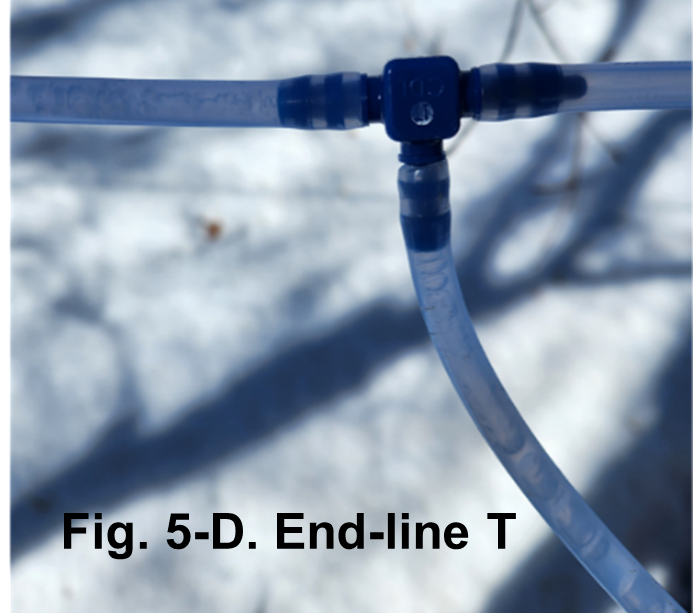 |
| Step 8. Connect a separate line or hose section to the end-line T (Figure 5-D) using the one-handed tool (Figure 4-A). This tube can either lead into a collection barrel or into a mainline. Here, it leads into a collection tank buried in the snow. | 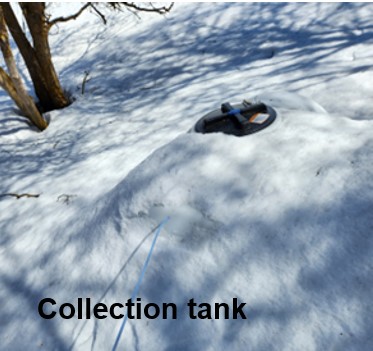 |
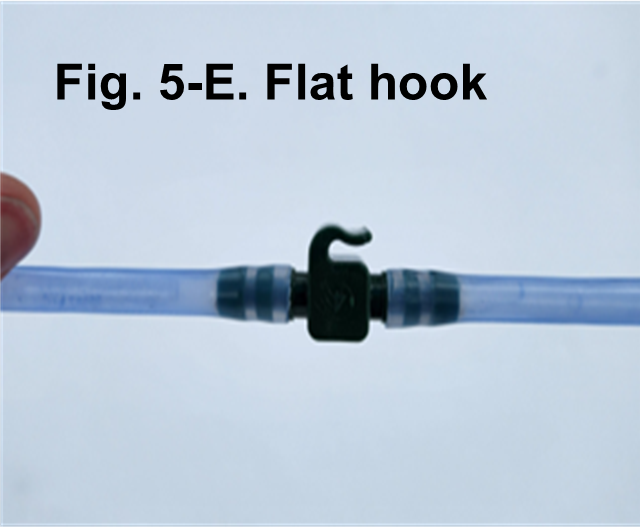
| Extra Step. Though not always used, flat hook connectors (Figure 5-E) are helpful in connecting two tubing lines together using the two-handed tool (Figure 4-B). It is used to repair a broken line or connect a new tubing roll when the first one runs out before completing the line. Another use is to anchor a lateral line to a main line support wire |
 |
These tubing systems can be used for a small number of trees or hundreds. The general rule is to have no more than 30 trees on a 3/16-inch line. To connect more trees into the system, the lateral line, installed in Step 8 that would go to the collection barrel, needs to feed into a main line that is larger in diameter. Smaller lines should always feed into larger ones. Never connect a line to a smaller-diameter tube meant to feed into it. Locate the collection point at the lowest elevation point with the main line feeding into it, but take care to ensure that the collection point is not subject to seasonal flooding.
Sap Processing Equipment
Evaporator
Maple sap generally has a 2% sugar concentration, varying between individual trees. To get maple syrup, producers must boil sap, removing enough water to make a concentration of at least 66%. Maple syrup regulated under the U.S. Food and Drug Administration (FDA) Code of Federal Regulations, Title 21, sec 168-180, contains no less than 66% soluble solids by weight. It can be prepared by removing water as needed to reach that level (FDA, 2023). Reverse osmosis systems can help remove water to increase sugar content in the sap before boiling, although research shows that the unique maple syrup flavor only develops through heating (Findlay, 1935; Garcia, 2020). Available equipment options are discussed in detail below, while the general finishing methods are covered in the same fact sheet mentioned in the introduction.
Pan Evaporators
Pan evaporators are often one of two types: a flat pan or a divided pan. The sole difference is that the divided pan has dividers that create baffles (Figure 6). As the sap dehydrates, a gradient forms with the higher sugar content near the outlet. This process allows for continually adding new sap at the top of the pan while the finished sap drains from the bottom. A flat pan only allows for one batch to be added and finished. These pans are often placed over wood fires or another heat source. These evaporators start at several hundred dollars and increase in price with quality and additional capabilities.
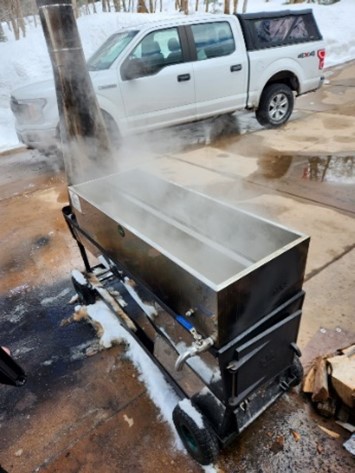 Figure 6. Divided Pan Evaporator
Other Evaporators
Although not the most efficient method, beginners or small-scale producers can boil sap at home. This option is only viable with small amounts of sap and can be costly. Sap can be evaporated in a pan or pot over a wood fire (Figure 7). It is difficult to keep temperatures consistent and can be a slow process, but it may be a good option if sufficient wood is available. Natural gas or propane can also be used with standard pans.
For larger commercial operations, obtain large industrial evaporators. These evaporators are costly to buy and use but are highly efficient at processing large amounts of sap.
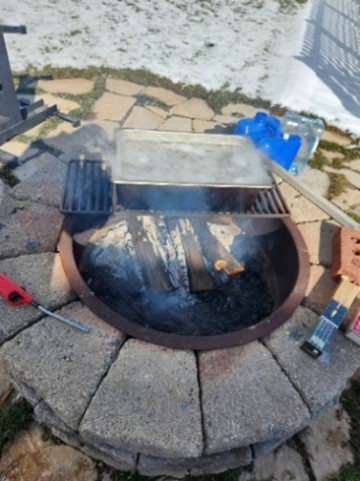
Figure 7. Fire Pit
Reverse Osmosis Systems
Reverse osmosis systems (Figure 8) are used to remove a significant amount of water quickly and concentrate the sap for heat finishing. Reverse osmosis uses pressure and semipermeable membranes to force water out of the sap while leaving the sugars and other dissolved solids. Sap with a 2% sugar content takes about 43 gallons of sap to produce 1 gallon of syrup. If that sap can be concentrated to just 4% using reverse osmosis initially, it only takes 21 gallons of concentrate to produce 1 gallon of sap after finishing. Obtain reverse osmosis systems from your local hardware stores; just make sure that they don’t have a carbon filter, as this will remove beneficial nutrients from the sap.
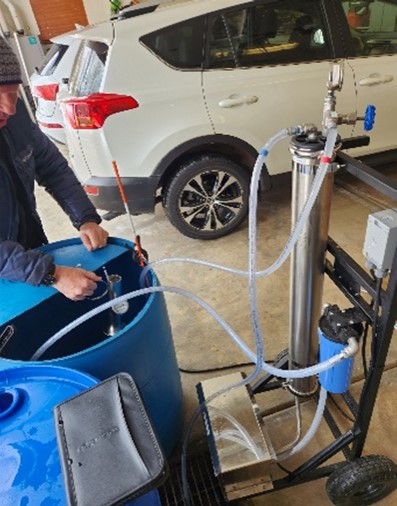
Figure 8. Reverse Osmosis System
Other Equipment
Brix Refractometer
A Brix refractometer is used to measure sugar content. This tool helps calculate the amount of sap needed to make 1 gallon of syrup. The revised Jones Rule equation is the amount of sap = 87.1/Brix – 0.32, where the Brix reading from the refractometer is used. The Brix refractometer can also be used when boiling or concentrating the sap to monitor the sugar content progress. They can cost anywhere from a few hundred dollars, like the digital one from Hannah Instruments depicted in Figure 9, to an optical type, costing around $20. Both can be useful; it depends on your budget and how accurate you need it to be. A quick Google search will yield many suppliers for both types.
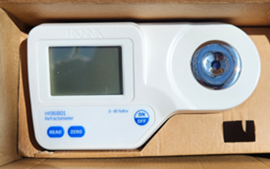
Figure 9. Brix Refractometer
Vacuum Filter
An important step in maple syrup processing is to filter the syrup right before finishing it. This filtering removes any particulates left in the syrup, referred to as “sugar sand.” A cheesecloth or coffee filter is often used for small-scale production, but more efficient vacuum filter presses (Figure 10) are available for larger operations. These typically cost a few hundred dollars based on quality and manufacturer.
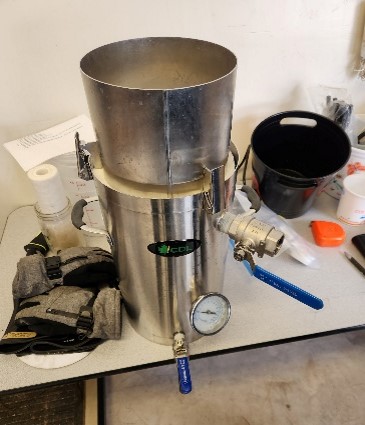
Figure 10. Vacuum Filter
Resources
Additional Information
Heiligmann, R. G., Koelling, M. R., Perkings, T. D., & van den Berg, A. K. (2022). North American maple syrup producers manual (3rd ed.). North American Maple Syrup Council. https://mapleresearch.org/pub/manual/.
Citations
Findlay, G. H., & Snell, J. F. (1935). Some constituents of the sap of the sugar maple (Acer saccharum, Marsh.). Canadian Journal of Research, 13(5), 269–275.
Garcia, E. J., McDowell, T., Ketola, C., Jennings, M., Miller, J. D., & Renaud, J. B. (2020). Metabolomics reveals chemical changes in Acer saccharum sap over a maple syrup production season. PLoS One, 15(8), e0235787.
U.S Food and Drug Administration (FDA). (2023). TITLE 21--FOOD AND DRUGS. CFR - Code of Federal Regulations Title 21. Title 21, sec 168-180.
Disclaimers
All photos, graphs, and tables may not be used without written permission from the authors. Pictures were provided by Jesse Mathews. This project was funded in part by the United State Department of Agriculture (USDA) Agricultural Marketing Service Acer Access and Development Program, Utah State University (USU) Extension Grants Program, Utah Agricultural Experiment Station (UAES), and the USU’s Center for Water-Efficient Landscaping (CWEL). The information reflects the views of the author(s) and not granting agencies. We sincerely thank Utah Farm Bureau Federation, the Stokes Nature Center (Logan, UT), Woodland Hills City, UT, and Woodland Hills Outdoors (Woodland Hills, UT).
In its programs and activities, including in admissions and employment, Utah State University does not discriminate or tolerate discrimination, including harassment, based on race, color, religion, sex, national origin, age, genetic information, sexual orientation, gender identity or expression, disability, status as a protected veteran, or any other status protected by University policy, Title IX, or any other federal, state, or local law. Utah State University is an equal opportunity employer and does not discriminate or tolerate discrimination including harassment in employment including in hiring, promotion, transfer, or termination based on race, color, religion, sex, national origin, age, genetic information, sexual orientation, gender identity or expression, disability, status as a protected veteran, or any other status protected by University policy or any other federal, state, or local law. Utah State University does not discriminate in its housing offerings and will treat all persons fairly and equally without regard to race, color, religion, sex, familial status, disability, national origin, source of income, sexual orientation, or gender identity. Additionally, the University endeavors to provide reasonable accommodations when necessary and to ensure equal access to qualified persons with disabilities. The following office has been designated to handle inquiries regarding the application of Title IX and its implementing regulations and/or USU’s non-discrimination policies: The Office of Equity in Distance Education, Room 400, Logan, Utah, titleix@usu.edu, 435-797-1266. For further information regarding non-discrimination, please visit equity.usu.edu, or contact: U.S. Department of Education, Office of Assistant Secretary for Civil Rights, 800-421-3481, ocr@ed.gov or U.S. Department of Education, Denver Regional Office, 303-844-5695 ocr.denver@ed.gov. Issued in furtherance of Cooperative Extension work, acts of May 8 and June 30, 1914, in cooperation with the U.S. Department of Agriculture, Kenneth L. White, Vice President for Extension and Agriculture, Utah State University.
October 2023
Utah State University Extension