Vermicomposting
 Worms can consume their own weight in food every day!
Revive Your Soil and Reduce Your Environmental Impact
Highlights
- Vermicomposting is using worms to break down discarded food into compost and liquid fertilizers.
- Vermicomposting can save you money and provide your plants and gardens with high-quality fertilizer.
- Choosing the right worms for vermicompost can make or break your compost system. It is important to understand the difference between earth worms and composting worms.
Vermicomposting, or worm composting as it is more commonly known, is the process of using worms to break down discarded food and other organic wastes and convert them into compost and liquid fertilizers. Not only will this process save you money, but it will also downscale your environmental footprint. Vermicompost systems can be purchased online or assembled cheaply by up-cycling materials found around the house or at a local thrift store.
Why Vermicompost?
Save Money
Implementing vermicomposting into your lifestyle benefits you financially.
- Avoid “tipping fees” for green waste implemented by many landfill diversion sites.
- Make your own nutrient-packed organic fertilizers for free; purchasing similar nutrient-rich fertilizer costs an average of $50 per 10 pound bag.
Create Nutrient-Packed Fertilizer
Products of your vermicompost can be used horticulturally for the benefit of houseplants and gardens.
- Vermicompost has more nitrogen, phosphorus, potassium, copper, zinc, and iron than farmyard manure.
- Produce useable compost year round, faster than alternative methods.
- Increase moisture and nutrient retention in your soil.
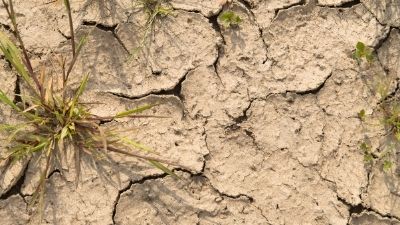
- Lessen crusting and other physical damages common to soils in arid climates.
Improve Your Local Environment
Vermicomposting encompasses all three R’s: reducing, reusing, and recycling.
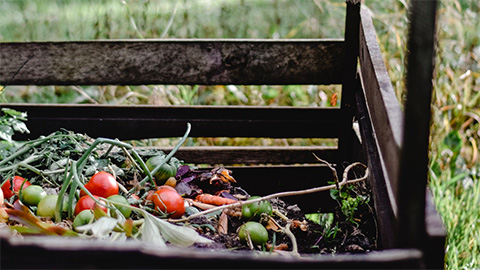
- Worms will reduce your waste production by reusing food scraps and recycling nutrients. The U.S. generates more than 34 million tons of food waste each year (EPA 2011). Prevent this unnecessary waste from ending up in landfills.
- Save energy typically required for waste removal and transportation.
A Word About Worms
All worms are not created equal! Choosing the right worms for vermicompost can make or break your compost system. It is important to understand the difference between earth worms and composting worms.
Earth Workers vs. Composters
Did You Know?
The largest earthworm ever found was
in South Africa and measured 22 feet from
its nose to the tip of its tail.
The worms you see most often, crawling on pavement after a long rain or burrowing deep into your garden are known as earth workers, or earth worms. While beneficial in their own way, earth worms are not ideal for composting. Composting worms, such as red wigglers (Figure 1), are a non-native species preferred for composting; they process large amounts of organic waste daily, can handle disturbances, and thrive in confinement, whereas earth workers do not.
Conversely, composting worms are not ideal for aerating mineral soil. Since they lack the muscle to dig through soil, it is not recommended to add red wigglers to soil unless it has been amended with sufficient organic matter.
Composting Worms

According to Mary Appelhof, worm expert and author of Worms Eat My Garbage (1997), red worms are the most satisfactory worms to use in home vermicomposting.
Red worms, also called red wigglers, manure worms, red hybrids, tiger worms, striped worms, etc., are common names that represent a few species of worms, including Eisenia fetida (the most common), Eisenia andrei, and sometimes, Lumbricus rubellus. Be sure to know the species or genus name of the desired worm specimen before ordering or visiting a dealer.
It is best to source your worms locally. You may be able to find a fellow gardener in your community who has extra compost worms to spare, or worms can be mailed to you from a trusted worm supply business.
The following steps will help you begin your own vermicomposting system.
Step 1: Make the Worm Bin.
Materials Needed:
- Container. Get creative! Use old buckets, garbage cans, tool boxes, etc. Rubber and plastic containers are cheap, easy to use, and durable. Wood will eventually be eaten but will work in a pinch. Be cautious of any chemical treatments containers may have undergone. It is best to use something that is 6 inches deep at the very least.
- Drill. A 1/16-inch bit is best for the optional drainage holes on the bottom, but a 1/4-inch or larger bit is best for ventilation.
- Landscape fabric or window screen mesh (optional). You can use this to cover holes so that insects cannot access the worm bin, but the worms can still get oxygen exchange.
- On the lid, drill several ¼-inch or larger holes to provide airflow. If the holes are drilled on the side of the bin, worms may escape through the holes.
- Optional: Use breathable fabric or window screen to cover these holes so that insects cannot enter or leave the worm bin.
- Optional: Drill 1/16-inch holes along the bottom of the bin to allow excess water to drain, but not so big that the worms could escape through them. This is a safety measure; if your worm bin gets so wet that water pools in the bottom, it can be released through the holes.
Step 2: Prepare Worm Bedding.

What Is Worm Bedding?
There are two classifications for the organic matter you’ll add to your worm bin. Bedding material is high in carbon and low in nutrients, moisture absorbent, and provides structure for airflow.
Though worms do eat bedding, its purpose is not nutrition. The purpose of using bedding is to maintain healthy conditions for the worms so they can be moist but still have access to oxygen (Figure 2).
Without bedding, a worm bin can fail and become stinky, pest-ridden, and the worms can die.
Some examples of worm bedding can include:
- Coco coir.
- Straw.
- Shredded cardboard.
- Aged compost
- Shredded paper. *
- Aged manure.
- Fall leaves. *
- Sawdust. *
- Peat moss.
*These materials are prone to matting or clumping, which will restrict airflow. It is best to mix them with another bedding that will provide physical structure to facilitate airflow. Air should be able to permeate throughout all your bedding.
- Once you’ve chosen what materials you’ll use to make your worm bedding, add it to your worm bin until you have 4 to 6 inches of depth in the bin.
- Add water, preferably non-chlorinated, to your bedding until it has the same feel as a wrung-out sponge. It should not be fully saturated. The bedding should be moist enough that worms won’t dry out, but not so wet that the worms can’t access any pockets or channels of air.
Hint: If you grab a handful of bedding and squeeze it, you should only see one to three drops of water come out. If you see less, it’s too dry. If a full stream of water comes out, it's too wet.
Step 3: Add the Worms.
Upon receiving your worms, they will likely experience transplant shock. If they were shipped to you, you can mist them with water to help them rehydrate.
Handle them with care and place them on top of your bedding. Keep a dim light on the worms and see if they willingly move into your bedding. If they work their way into your bedding it means they have given it their stamp of approval!
If they are remaining balled up and aren’t moving into the bedding, they are communicating that there is something wrong with it. If this happens, ensure the moisture is in a good range, check that it’s not too hot or too cold, or you may need to check your bedding’s pH or salt levels.
It is also advisable to leave a dim light over the worm bin the first night or two to encourage them to stay in their new home instead of looking for their old home. If the worms are consistently trying to escape, even with a light, assess why they are not burrowing into the bedding. It’s typically the same reasons already mentioned.
Step 4: Feed the Worms.

This is the fun part! Although you can add foods to the bin before the worms’ arrival, we advise waiting until after they settle in.
Materials that are considered “foods” (similar to “greens” in classic composting) are organic matter high in nutrients, which are typically naturally high in moisture content.
This includes:
- Fruits and vegetables.
- Manures.
- Trimmings.
- Grains, beans, or breads (without butter, margarine, or mayonnaise).
- Freshly cut leaves.
- Tea bags.
- Coffee grounds and filters.
- Lawn clippings and weeds.
You can use these foods in small amounts once you have some experience:
- Citrus products.
- Spicy capsicum waste products, such as peppers.
- Starchy foods like bread, rice, and pasta.
It is best to entirely avoid:
- Meat products.
- Dairy products.
- Oily products.
Worm Foods
Quick Tip
Avoid fruit flies by covering food scraps
with a few inches of bedding and/or
freeze food scraps before adding them to
your vermicompost bin.
Feed worms by burying food in a different area of the bin each time. For example, the first time you feed, you may choose the northeast corner; the second time, the northwest. Continue a pattern of choosing a different spot each time you feed to ensure even distribution of castings.
As long as it wouldn’t cause the bin to begin to hot compost, attract insect pests, smell bad, or get too wet, you can continue to add more food. However, as you are beginning, it is recommended to wait to add more food until the previous food is mostly consumed. This helps to avoid harming your new worm colony by adding too much food at once.
If you think you may have added too much food, simply remove it and do a quick check through the bin to make sure the rest is at a good moisture level and seems healthy. Add bedding as needed.
A cup or two of food at a time per pound of worms is a good starting point.
Worm Bin Maintenance
Once the worms have settled in, continue monitoring the following factors to ensure the worm farm remains functioning healthily.
Temperature
- Worms thrive best at temperatures between 55 °F and 77 °F. Keep your worm bin in a location with an average temperature that resides between these two extremes. Keep in mind, the temperature in the bin will be different than the ambient temperature—the internal temperature being more important.
- Red wigglers can survive to near-freezing temperatures, and their cocoons can survive even colder, but their production will suffer. Any temperatures approaching 90 °F can be fatal.
Moisture and Oxygen

- Worms need moisture to survive, but their need to breathe is more important. Your bin should stay wet, but not so wet that it displaces all the oxygen out of the bedding’s pore space. They should be able to find pockets or channels of air as they move through their moist bedding.
- To help you gauge whether your material is at an appropriate moisture level, grab a handful from the bin. It should feel like a wrung-out sponge in, and if you squeeze a handful of the material, you should see about 1 to 3 drops of water come out. Below that amount is too dry, and above it is too wet.
- Add dry bedding as needed to balance out water brought into the bin from high-moisture-content foods. Too much moisture can be especially concerning with fruit and vegetable waste, as it can be around 90% water by weight.
Managing Odor
- Odor is a common concern among those interested in vermicomposting. Because you bury the food and worms are voracious eaters, the most common smell described from vermicompost systems is “earthy.”
- Bins are generally kept with lids (don’t forget to drill holes!) either in a basement, garage, or under the kitchen sink. If you have a large enough compost pile, you can possibly keep your system outdoors year-round.
- If you are experiencing foul odors, it means the bin is being mismanaged. A healthy bin will smell earthy. Remove excess food, add fresh bedding, and check to ensure moisture is at a healthy level, and any unpleasant smells should dissipate.
Escape Attempts
- If worms are unhappy, they will let you know. If your worms are attempting to escape their bin, they are not happy.
- Some common causes of worm escapees are vibration, excessive or insufficient moisture, and extreme temperatures.
Options to Harvest Compost and Casting
Generally, it takes 2 to 3 months for a newly developed worm bin to generate a good amount of vermicompost (a combination of castings and compost). Employ the methods shown in Table 1 to obtain the vermicompost from the bin; use the methods in combination for best results. For example, bait worms to an area, remove the worm-rich material, and then use the “light fright” method to get a more precise separation.
Table 1. Harvesting Compost and Castings
| Baiting method | Method procedures |
|---|---|
| Light fright |
|
| Mass migration |
|
| Bait method |
|
| Compost screener or sieve |
|
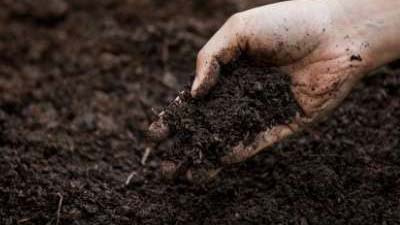
Using Worm Bin Products: Casting and Compost
Worm Casting
Deposits that have moved through a worm’s digestive tract are worm castings. Castings are more homogenous and have a slightly higher salt concentration than regular compost. To achieve a higher concentration of castings in your bin, feed worms smaller amounts, less often.
Use worm castings for potting soil, top dressing, and liquid fertilizer:
- Potting soil: Mix with other potting materials to decrease salt concentration.
- Top dressing: Put castings around (not directly touching) house plants.
- Worm tea: Mix castings with water and use as a liquid fertilizer (see the “How to Make Liquid Fertilizer” callout box).
How to Make Liquid Fertilizer
Worm Tea
- Insert 1 cup of castings and 1½ tsp. molasses into a 2L soda bottle.
- Fill the bottle with non-chlorinated water, leaving about an inch of air at the top. Tighten the cap and shake the bottle to aerate the solution. Then remove the cap or pressure will build in the bottle as bacteria grow (bacterial growth is a good thing).
- To aid in growth, aerate the contents several times a day, remembering to remove the cap again after agitating the bottle. After 24 hours, the entire contents may be used as a liquid fertilizer.
Worm Compost
A dark mixture of worm castings, organic material, and bedding in varying stages of decomposition is called worm compost. To achieve a higher concentration of compost in your bin, feed your worms larger amounts, more often.
Use vermicompost for seed bedding, transplanting, and topdressing:
- Seed bedding: Mix in with soil in seed rows to give seedlings a boost.
- Transplanting: Mix with soil into a prepared transplant hole.
- Topdressing: Sprinkle around the base of growing plants, not directly touching the plant.
Acknowledgments
- Scott Kent of Hungry Worms provided all photos in this fact sheet.
- The authors did not use generative AI in the creation of this content, and it is purely the work of the authors. This content should not be used for the purposes of training AI technologies without express permission from the authors.
Sources
- Appelhof, M. (1997). Worms eat my garbage: How to set up and maintain a worm composting system (2nd ed.). Flower Press.
- United States Environmental Protection Agency (EPA). (2019). 2019 wasted food report [EPA 530-R-23-005]. https://www.epa.gov/system/files/documents/2024-04/2019-wasted-food-report_508_opt_ec_4.23correction.pdf
Utah State University Extension
Authors
Hayley Waldbillig and Roslynn Brain, updated in 2025 by Scott Kent and Roslynn Brain McCann

Roslynn McCann
Sustainable Communities Specialist
Environment and Society Dept
Related Research

Are Organic Matter Soil Amendments Created Equal?
Each class of material has specific characteristics and management issues when it comes to using it as a soil amendment.
Backyard Composting in Utah
The benefits of using compost as a soil amendment include increasing soil tilth, fertility, water holding capacity, aeration, and drainage.
Gardening in Sandy Soils
Learn the basics of clay, silt and sand soils with an emphasis on gardening in soils with high sand content. Get tips for gardening tips for managing sandy soils, and the types of plants that grow best in sandy soils.
It's All About Soil Structure!
The single best soil amendment—the one that provides desirable benefits regardless of the soil one applies it to—is organic matter.

Policies and Programs for Water-Wise Residential Landscaping in Utah
Water-wise landscaping is the practice of using plants in a landscape that are adapted to local conditions and only need small amounts of water. Converting yards to water-wise landscaping conserves water and is a climate adaptation action residents can ta
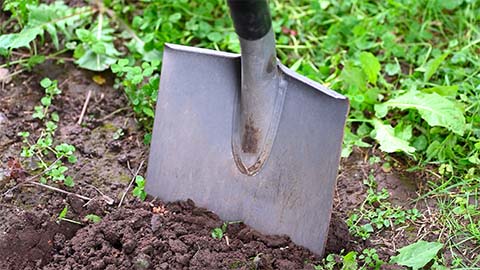
Preparing and Improving Garden Soil
A great garden starts with healthy soil. In Utah, there are unique considerations for creating and maintaining healthy soils.