Training and Pruning Apple Trees
Training and pruning are critical parts of growing a productive apple tree. The rewards of proper training are a tree that is easy to harvest, has sustained high yields, and quality fruit. Careful attention to training and pruning in the early years of the tree will establish the correct form and make caring for it in maturity much more manageable. However, training and pruning cannot overcome poor genetics and improper matching of scion and rootstock.
Introduction
The objectives of tree training are to: 1) develop a structure that will support the weight of the fruit, 2) create a balance between vegetative growth and fruit growth, and 3) prevent the top of the tree from shading the bottom of the tree. Training begins when a tree is planted and continues throughout the life of the tree. Traditional training approaches for apples in Utah create an umbrella shaped tree that produces copious numbers of upright shoots in the tops of trees that must be removed each year. A better approach is to train a tree into a conical, or Christmas tree, shape where the top of the tree is narrow compared to the bottom of the tree.
The objectives of tree pruning are to: 1) remove any damaged or diseased growth, 2) maintain a new supply of limbs that are of optimal fruit-bearing age and placement, and 3) keep the tree shaped according to the form that was desired in the initial training. Pruning should seek to achieve a balance between vegetative and reproductive (fruitful) growth. Vegetative growth is necessary for developing a large leaf area to support the fruit as well as for developing new bearing wood.
Reproductive growth (fruit) is the ultimate goal of a fruit tree. However, an excessively heavy fruit load risks breaking branches, moves the tree toward biennial bearing, and sacrifices needed vegetative growth.
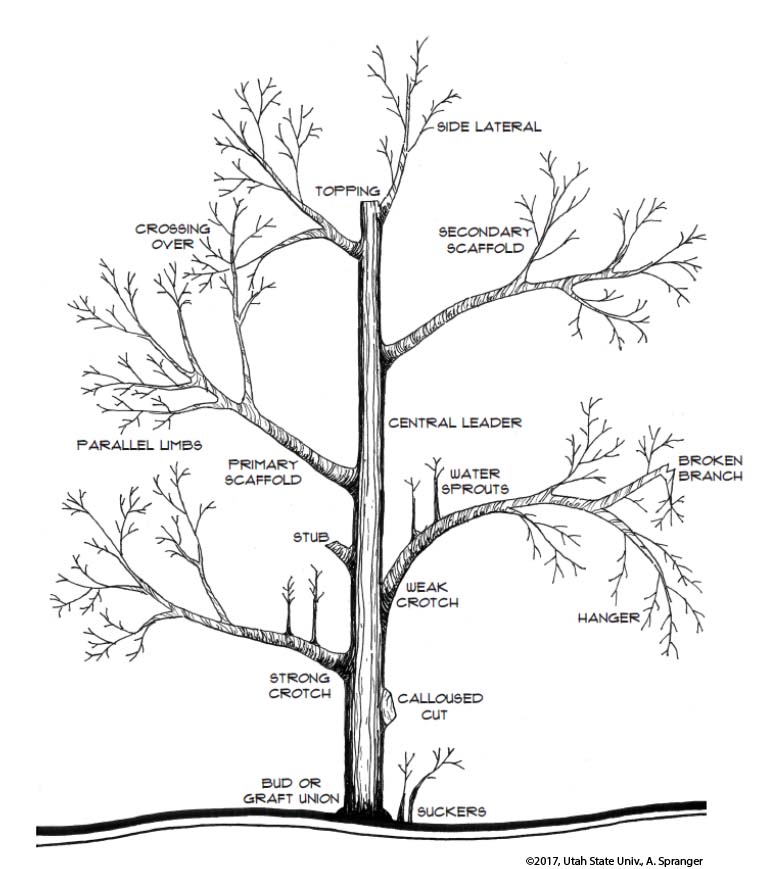
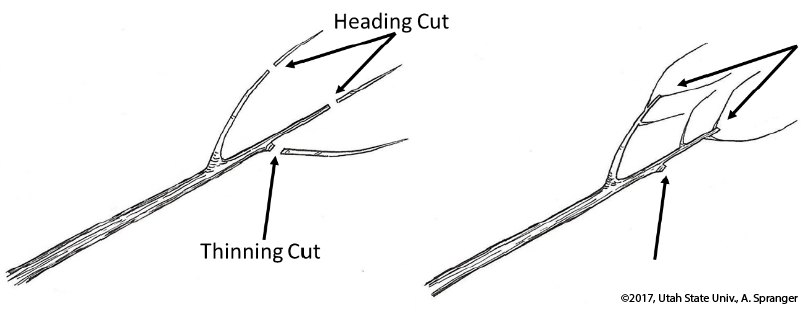
Fig. 1 illustrates several common types of branches and situations found on a mature apple tree, as well as some of the different pruning cuts. Always use sharp tools when pruning. Sharp tools will leave cleaner cuts and reduce the risk of infection.
When to Prune
In general, trees grow to maintain balance between roots and branches. Pruning affects this balance, and the tree responds predictably when limbs are removed. Removing branches during the dormant season disturbs the balance so that the tree has more root reserves than necessary for the available canopy, and this excess energy will promote additional new growth the following season. As a result, pruning when the tree is dormant tends to increase the vigor of the tree. During the summer, the tree is actively growing and removing branches will remove resources, resulting in reduced tree vigor. Both summer and dormant pruning have their place in orchard management.
Dormant Pruning
should be done after the coldest part of the winter, but before spring bud swell. Pruning earlier in the year puts the tree at risk of low-temperature injury since maximum hardiness may not have been achieved and pruning temporarily decreases cold hardiness of the surrounding tissue. Pruning after bud swell can knock blossoms and buds off of the remaining branches, and may result in reduced tree vigor. Remember that dormant pruning should be used to create the right form of the tree through directing vegetative growth.
Summer pruning
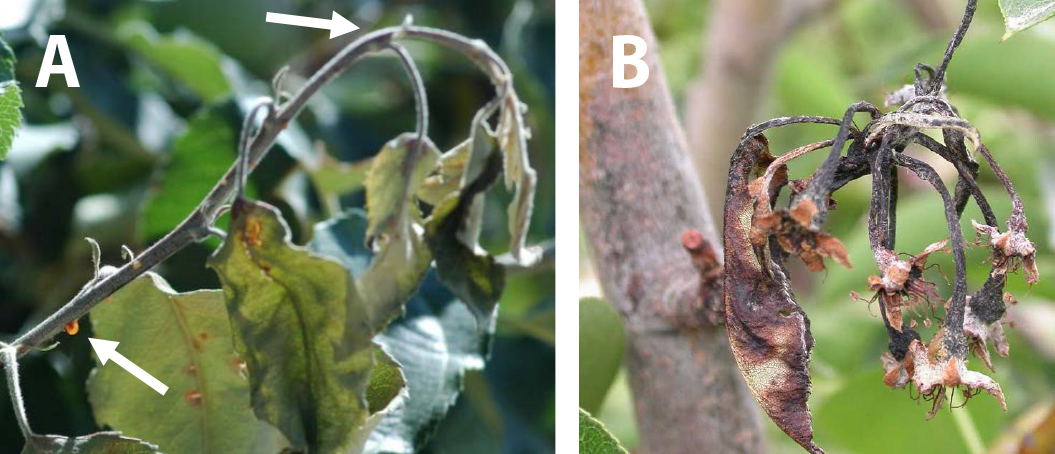
can be done any time during the summer. However, if fire blight has been a problem in your tree, wait to summer prune until conditions are hot and dry to minimize fire blight risk. Summer pruning is the best way to remove vigorous, upright water sprouts (Fig. 1) and not stimulate new growth where no new branches are desired. Use summer pruning to bring trees back into balance that have become overly vigorous. Pruning out diseased branches is another important part of pruning. Remove infected wood from the area and destroy it to minimize the chance of spreading disease back into healthy tissue. Between each cut and after pruning, dip your pruning tools in a 10% bleach solution (1-part bleach, 9-parts water) to avoid spreading the infection throughout the plant. Fire blight is a particularly common bacterial disease that plagues Utah apple trees (Fig. 2). For fire blight infections, make a pruning cut at least 8 to 12 inches below the lowest visual sign of infection. For more information about fire blight and other diseases visit utahpests.usu.edu.
Planting
After planting, inspect the tree and start envisioning the form you want it to take. Look at where branches originate from the main trunk and their angle. Sometimes, the tree will have branches well-spaced on the trunk and minimal adjustments will be necessary. Other trees may have poor lateral branch placement or narrow crotch angles and need significant work.
If you plant a “whip” (a very young nursery tree that has poor or no lateral branch development) heading back the central leader to encourage lateral branch development may be necessary. Make the heading cut at 30 to 36 inches above the ground. A cluster of vigorous shoots will form near the cut in the following growing season. Select one shoot, usually the top one, and pinch out the competing new shoots that formed directly next to the cut while they are still young and succulent (early summer). Keep new shoots that develop farther down the branch to develop into scaffold branches. Spreading branches to achieve a wide crotch angle may be necessary (Fig. 3). Each year, watch for any competing shoots that develop near the top of the tree and remove them early in the season. When purchasing larger trees from the nursery, the heading cut may have already been made and there may already be branches appropriately positioned for developing scaffolds.
Occasionally, growth of the central leader will be excessive with little branching, resulting in weak growth and making scaffold selection in that part of the tree difficult. If this occurs, make a heading cut to remove about one-fourth of the new growth. This will strengthen the central leader and encourage lateral growth. Select the new growth that is best positioned to form new scaffolds, and remove the rest.
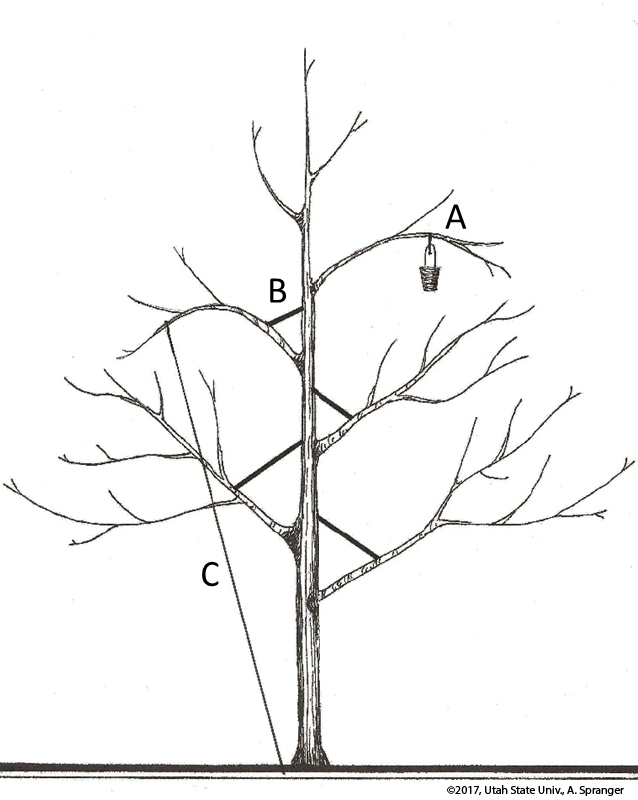
Selecting and spreading lateral branches to become strong scaffolds is one of the most important practices during the non-bearing years of the tree. The wood is most flexible just after bud-break in the early spring; spreading at this time will reduce the risk of breaking branches. Strive to bring the branches to about a 60-degree angle away from the central leader. Wide spread branches will improve light penetration, form structurally strong connections to the central leader due to appropriate crotch angles, and stimulate fruiting rather than vegetative growth. Do not spread branches below horizontal. Correct positioning of scaffold branches will also keep them from interfering with other scaffolds farther up the leader. This can be accomplished with the use of spreaders, by placing weights on the end of the branch, or by tying the branch down with string or twine to maintain the proper form (Fig. 3). Leave spreaders for at least one growing season.
Continue the process to develop a central leader over the next few years. If a scaffold branch that has previously been spread begins to return to vertical growth, re-establish the appropriate growth angle. Strive to have the lower scaffolds be the largest and extend furthest out from the trunk (like a Christmas tree). As the form solidifies and the tree begins to bear, focus will shift from training to maintaining tree form.
Establishment (non-bearing years)
Few pruning cuts are needed during the first 1 to 3 years. Excessive pruning will delay flowering in the tree. Focus during this time should be on training the tree and limiting cuts to those critical for achieving the proper form. Scaffold limb selection also takes place at this time.
How to prune
At the time you plant the tree, you should know the desired final tree form. When pruning, review what sequence of cuts will need to be made before you start cutting. Visualize what the tree will look like once the branch is removed. Remember, a pruning cut is permanent. Growth throughout the tree is not equally vigorous. Upright growth, particularly in the top of the tree, is very vigorous and has little fruiting potential. Branches that grow below horizontal are low in vigor and are less fruitful. Branches that are horizontal to slightly above horizontal have adequate vigor and are very fruitful. These differing levels of vigor dictate what pruning cuts should be made (discussed below). Understanding different types of pruning cuts is important. Three main types of cuts used in pruning apple trees are heading, thinning, and stub or renewal cuts. Heading cuts (or heading back) involve removing the upper portion of a branch back to a side branch or bud (Fig. 4). These cuts typically stimulate vigorous new growth immediately below the cut. A thinning cut removes the entire shoot or branch down to the junction with a main lateral or scaffold branch and are less invigorating than heading cuts (Fig. 4).
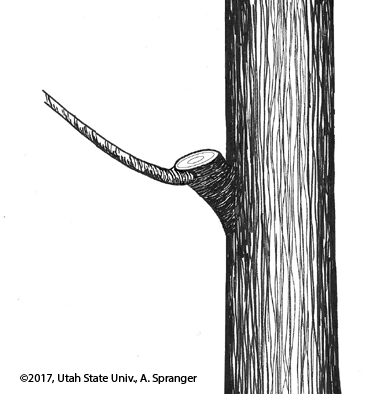
Thinning cuts do not result in major changes in growth pattern, rather they result in the redirection of shoot growth to the existing branches. Thinning cuts should be smooth and at the branch collar to completely remove the branch, but minimize the resulting exposed wood. Uneven cuts that leave stubs or snags are slower to heal and can be points of entry for diseases. A stub cut is a type of renewal cut and is a pruning technique where the branch is removed, but a stub is left. The stub should be cut such that the lower side is longer than the upper side to encourage a new shoot to develop from the underside of the stub (Fig. 5). This stub will produce one or several new shoots. Shoots originating from the underside of the stub will have a wide crotch angle resulting in a strong connection to the central leader or scaffold, and will tend to grow at an angle optimized for fruit production. If more than one new branches originate from a stub cut, select one branch to keep while the new growth is still succulent, remove all other shoots and spread the newly selected branch as needed. Use a stub cut to replace a fruiting limb that is in the correct location, but may need to be replaced due to poor branch angle, disease or damage, or to generate new fruiting wood. Lateral scaffold branches should not exceed half the diameter of the central leader.
Central Leader
Prune apple trees to a cone or pyramid shape. This form allows for good sunlight penetration, minimizes unproductive zones in the canopy, and the majority of the fruit develops low in the tree so it is easier to reach. Achieve this form by training the tree to a central leader with horizontal scaffold branches as shown in Fig. 1. Some apple cultivars naturally tend toward this form with only minor adjustments made each year, and others need to be careful training and pruning to achieve a successful central leader.
Developing a Central Leader:
A strong central leader is critical. The loss of leader dominance results in the tree moving toward an unfavorable globular canopy shape, often with weak, narrow crotch angles and poor light distribution. The first years of tree growth are the most important for establishing the central leader. Remove any fruit that forms on the leader; otherwise, the weight of the fruit can bend the leader over causing it to lose dominance. Remove any competing shoots before they become large and woody. A good rule of thumb for young trees is to either remove or bend to horizontal any branches that are greater than half the diameter of the central leader, so that these do not become co-dominant.
Developing Scaffold Branches:
Developing scaffold branches is one of the most important steps in training an apple tree. Select and train the scaffolds early in the growth of the tree. Do not allow too many scaffolds to develop from one point on the trunk. This weakens central leader growth. The first scaffold should be about 18 inches above the ground and following scaffolds should be distributed around the tree and spaced 6 to 8 inches apart vertically. This takes more than 1 year in order to achieve optimum spacing. Choose branches that are well distributed around the trunk so their development does not encroach on or shade neighboring scaffold branches.
As the tree continues to mature, you can develop a second tier of scaffold limbs 2 to 3 feet above the first set of scaffolds. Again, choose or create branches with wide crotch angles. In order to minimize shading, the lowest branch of the second tier should be at least 24 inches above the top branch of the lower tier. Additionally, the upper branches must be kept shorter than the lower branches to keep them from shading lower branches.
Maturity (bearing years)
After establishing the form and once the tree begins to bear fruit, continue to maintain the central-leader and selected scaffolds. Strive to maintain a form that will allow for good light penetration. Overall, encourage branches that grow outward and remove those that grow toward the center of the tree to improve light penetration in the center of the tree.
When pruning, start with any needed large cuts. These generally include any branches that may have broken in the previous year, cuts needed to restrict top growth, or prevent low lateral branches from overlapping with closely planted adjacent trees.
Topping
As trees reach their desired height it is always tempting to cut out the top of the tree in an effort to maintain a short tree. This cut is a heading cut and results in vigorous growth of several shoots in the top of the tree. This can be avoided by allowing fruit to set in the top of the tree. The weight of the fruit will bend over the top of the central leader, reducing the vigor of the growth. Shoots may develop at the top of the arc, but these will be weak shoots. Alternatively, you can tie the top shoot into an arc with the same result. Either approach is better than repeated invigorating cuts at the top of the tree.
Remember that after pruning out large branches, trees will usually produce water sprouts (vigorous upright shoots) where the cut was made. Remove these by tearing or rubbing them off while still succulent in the late spring to early summer. Rubbing or tearing them off produces less regrowth than removing them during dormant pruning. When shortening lateral branches to avoid overlapping, do not make heading cuts as these will stimulate additional vigorous growth near the end of the cut branch. Rather, make a thinning cut that removes the branch back to the main scaffold. Next, remove any undesirable smaller branches or water sprouts that were not removed during summer pruning.
Shoots and branches that have been cut from trees should be removed from the area as they may harbor insects and diseases. Pruning can seem daunting, but with careful attention to detail and dedicated yearly pruning, you will be rewarded with a compact, efficient tree that is easy to manage and harvest.
Acknowledgements
We gratefully acknowledge Anne Spranger, Senior Lecturer, Plant, Soils and Climate Department, Utah State University, for creating the line drawings used in this publication.
References
- Forshey, C.G. Training and pruning apple trees. Cornell Cooperation Extension Publication #112. Ecological Agriculture Projects. http://eap.mcgill.ca/CPTFP_7.htm
- Lane, P. Pruning mature apples and pears. Ohio State University Extension. HYG-1150-93 http://ohioline.osu.edu/hyg-fact/1000/1150.html
- Polomski, B. Pruning & training apple & pear trees. Clemson Cooperative Extension. HGIC1351. http://www.clemson.edu/extension/hgic/plants/vegetables/tree_fruits_nuts/hgic1351.html
Utah State University Extension
Peer-reviewed fact sheet
Authors
Tiffany Maughan, Brent Black and Teryl Roper

Brent Black
Fruit Specialist
Plants, Soils and Climate
Related Research
Apple Production and Variety Recommendations for the Utah Home Garden
This bulletin presents appropriate information pertaining to growing apple trees in the home orchard. Success depends on several key factors.

Backyard Fruit Production in Utah’s High Mountain Valleys
Many homeowners who are new to these regions wish to establish perennial fruit crops in their gardens. This publication outlines the challenges to fruit production in Utah’s high mountain valleys, offers mitigation suggestions, and lists plant materials t
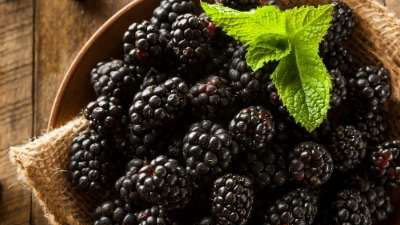
Blackberry Management in Utah
Blackberries can be grown successfully in Utah but careful cultivar selection and care is needed. Harsh winters and frequent late spring frosts often result in significant blackberry cane damage and crop loss.
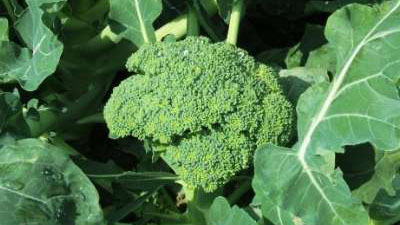
Broccoli in the Garden
Broccoli is a cool season vegetable that prefers sunny locations and fertile, well-drained soil. Incorporate some organic matter and a complete fertilizer into the area before planting.
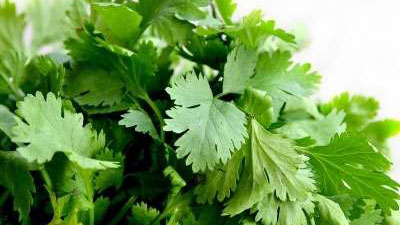
Cilantro/Coriander in the Garden
Cilantro/coriander is a cool-season herb that grows best in full sun and fertile, well-drained soils. Explore the best varieties to grow in Utah, and learn how to properly care for the herb to get a great harvest.
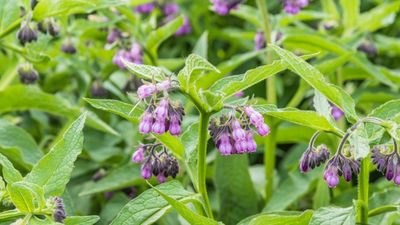
Comfrey in the Garden
Comfrey (Symphytum officinale) is a very hardy perennial herb adaptable to most conditions. Comfrey grows best in partial to full sun in moist, fertile soil. Comfrey is propagated by root cuttings or crown divisions.