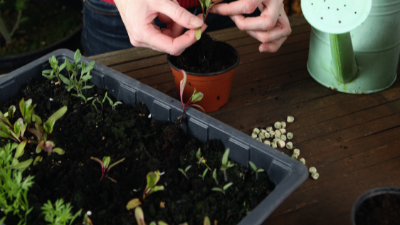
Grow Your Own Transplants At Home
Advantages of Growing Transplants
Some of the reasons for starting your own transplants are:
- Ability to grow new or unusual plant varieties unavailable at local retail outlets
- Reduce the time required between planting and harvesting of at least 4 to 8 weeks
- If you grow a lot of different plants you could have a financial savings
- Pleasure of starting plants from seed
- Working with tiny green seedlings during the winter months
Challenges of Growing Transplants
Growing your own transplants requires:
- Time and patience to grow transplants from seed
- Regular monitoring of transplants is required
- Proper growing conditions or transplants will be of poor quality
- Additional equipment (i.e., grow lights, trays, etc.) is required to grow healthy transplants
Requirements for Success
Several important elements need to be considered in order to grow transplants. These elements are:
- Viable seed to germinate
- Plant seed at the proper time
- Provide the proper growing medium/soil
- Use the right type of growing containers
- Provide the right amount of light
- Provide the proper day/night temperatures for growing transplants
- Provide the right amount of moisture and fertilizer
- Harden off seedlings properly
Seed Selection
Make sure you order your seeds well in advance of when it is required to plant them for transplants. Most seed
companies will provide you with a free seed catalog if you request one from them. In short growing season areas
“days to harvest,” or the number of days it takes from sowing to harvest, is important to consider when selecting vegetable varieties.
Time to Plant the Seed
The date of the average last spring frost is important to know to determine when to sow seeds indoors and when it is safe to transplant them outside. Your local county Extension office should be able to provide this information. Once you know your area’s last spring frost date, use the following table to determine amount of time needed to grow transplants.
Time and temperatures needed to grow vegetable transplants
| Crop | Time from seeding to germination (days) |
Optimum soil temperature (F) |
Time from germination to transplanting (weeks) |
| Broccoli | 7-10 | 50-85 | 5-7 |
| Cabbage | 4-10 | 50-85 | 5-7 |
| Celery | 9-21 | 50-65 | 10-12 |
| Cucumber | 6-10 | 65-85 | 4 |
| Eggplant | 6-10 | 65-85 | 6-9 |
| Lettuce | 6-8 | 50-65 | 3-5 |
| Melons | 6-8 | 65-85 | 3-4 |
| Onion | 7-10 | 65-85 | 8 |
| Pepper | 9-14 | 65-85 | 6-8 |
| Squash | 4-6 | 65-85 | 3-4 |
| Tomato | 6-12 | 65-85 | 5-7 |
(Source: Salt Lake County/USU Extension Service Fact Sheet: 'Starting Vegetable Seed Indoors')
Soil Mix
One key element in growing transplants is the quality of the growing media. The soil mix must be loose, fertile and disease free. Home gardeners should use a quality commercial mix in growing their transplants, since a commercial mix will have the proper ingredients to grow healthy transplants. Also, remember to use fresh soil media each time you start to grow new transplants. Do not add garden soil as you may introduce pathogens to your commercial mix.
Transplant Containers
Any type of clean container which will hold the soil mix, allow drainage and is stable can be used. Containers
should hold at least 3 tablespoons of soil. If containers have been previously used for growing plants, sterilize
them before reuse. Wash them thoroughly with hot water and soap, and then soak for 10 minutes in a solution of 1 part household bleach and 9 parts water. After sterilizing them, rinse well and let dry before use.
Light Requirements
Young actively growing transplants need lots of light or they will be spindly, weak and feeble. Seedlings need light as soon as they have emerged. Most seedlings require more light than a sunny window can provide, therefore successful gardeners use artificial light to grow healthy transplants.
You can buy or build a specially made plant light stand to provide the light needed by the transplants. If you choose to build an artificial plant light stand, Utah State University Extension Service can provide you with simple plans to build it. To view the plans for a PVC grow light stand go online to: http://extension.usu.edu/saltlake/files/uploads/pvc%20indoor%20light%20garden.pdf
Fluorescent tubes are used to provide the appropriate spectrum of light. Use one cool white tube and one red light tube or special wide- spectrum tubes (manufactured specifically for growing plants) in a two-tube fluorescent fixture. You must keep the lights 2 to 4 inches above the plants as they grow, and lighting should run for 12 to 14 hours per day. Turn off the lights at night to give plants their needed rest.
Temperature Requirements
Most transplants prefer daytime air temperatures between 60 to 80 degrees. Temperatures in the lower range will produce tougher transplants, but will take longer to grow. Temperatures above this range will produce spindly or stunted plants. Night temperatures should be 5 to 10 degrees cooler than the daytime temperature. Most plants prefer a soil temperature between 50 to 85 degrees.
Moisture and Fertilizer Requirements
After seeds are planted (depth three to four times its diameter) cover with a fine soil mix. Moisten the mix with a fine mist of water, being careful not to wash the seed out. Cover the container with a plastic sheet or place in a plastic bag to help retain the moisture. Once seedlings have emerged remove the plastic sheet or bag. Regularly check the
containers to determine the moisture content and repeat watering with a mister, as needed. If germinating seeds or
seedlings dry out (even for a few hours) they will probably not survive. The soil mix should be kept damp but never water logged. After seedling emergence and during early development, strong, rapid growth can be assured by watering the soil with a carefully prepared solution of a soluble fertilizer which is specifically designed for plant production. Prepare the solution exactly as directed on the label. Apply the solution as an irrigation when water is needed. Apply enough to allow some of the solution to flow out the container drain hole.
Hardening Off Young Transplants
Hardening is a process to toughen up the tender leaf tissue of transplants to tolerate the outdoor environment. This usually takes about 2 weeks. Harden off seedlings when they are 4 to 6 inches high or have 4 to 6 leaves. Place them outside for gradually lengthening intervals over the 2 week period. Start with an hour in the afternoon and work up to a full 24 hour cycle.
Cold Frame Use
Cold frames can be used to assist with the hardening off process. A cold frame is a bottomless box with a
removable transparent top. It is used to protect small plants from wind and low temperatures. No artificial
heat is used in a cold frame and ventilation is the only method for controlling temperatures. The process of hardening plants involves longer and longer ventilation periods for approximately 2 weeks. After the hardening off process is complete the seedlings are ready for transplanting in your garden.
Summary
The key to successfully growing transplants indoors from seed are:
- Use good viable seeds of high germination percentage.
- Know the average last spring frost date and then plant seed indoors accordingly.
- Use a good soil mix for germinating seedlings.
- Provide the proper growing conditions, i.e., light, temperatures, moisture and nutrition.
- Harden off seedlings properly.
- Transplant mature seedlings outside at the proper time.
References
- Utah State University, Salt Lake County Extension Service, “Starting Vegetable Seed Indoors,” (handout). (1 February 2011)
- Utah State University Salt Lake County Extension Service, “Indoor Light Garden Construction,” http://extension.usu.edu/saltlake/files/uploads/pvc%20indoor%20light%20garden.pdf (1 February 2011)
- Texas A&M University, “Timely Tips on Starting Seedlings at Home,” http://aggie-horticulture.tamu.edu/extension/ornamentals/se edlings/seedlings.html (1 February 2011)
- Burpee Seed Company, “Indoor Seed Starting,” http://www.burpee.com/vegetables/vegetables-seeds/indoor-seed-starting-article10002.html (1 February 2011)
Utah State University Extension
Peer-reviewed fact sheet
Download PDF
Authors
Sterling Banks
Related Research
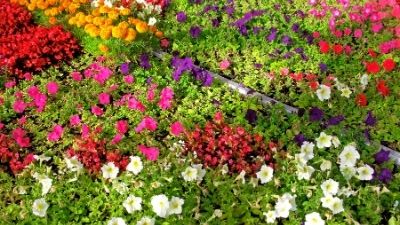
Annuals for Utah Gardens
Annuals are plants that come up in the spring, reach maturity, flower, set seeds, then die all in one season. They provide eye-catching color to any flower bed and can be used as borders, fillers, or background plantings. There are several ways to find an
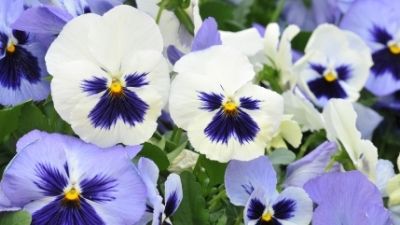
Growing Pansies
Pansies are among the most popular garden flowers today. They exhibit a wide range of colors, markings and sizes. Read about where to plant, how to plant, propagating, and more!
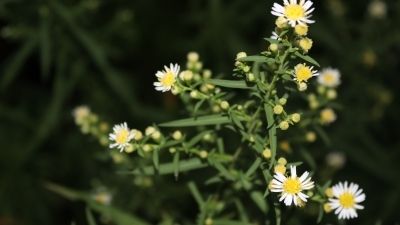
Some Flowers Turn Into Weeds
Annuals that reseed themselves can make gardening easier, but some soon try to bully the rest of the plants. In my opinion, some ornamental flowers are weeds once they are planted,” says Jerry Goodspeed, Utah State University Extension horticulturist. “Si