A Beginner's Guide to Growing Mushrooms at Home
Welcome to the wonderful world of mushrooms! Mushrooms are not only nutritious and delicious but also provide a myriad of known medicinal benefits, such as protection against cancer, protecting brain health, stimulating gut health, and supporting a healthy immune system (Valverde et al., 2015). Lately, psychedelic mushrooms have been receiving considerable attention as a promising treatment for mental health conditions, such as depression, post-traumatic stress disorder and end-of-life anxiety among the terminally ill. This publication provides a simple guide for beginners interested in growing basic gourmet and medicinal mushrooms at home for personal use using easily accessible, relatively inexpensive materials.
I. Fungi
A mushroom is the visible reproductive fruiting body of a certain fungus. The vegetive portion, mycelium, consists of a root-like network of fungal threads called hyphae (Figure 1).
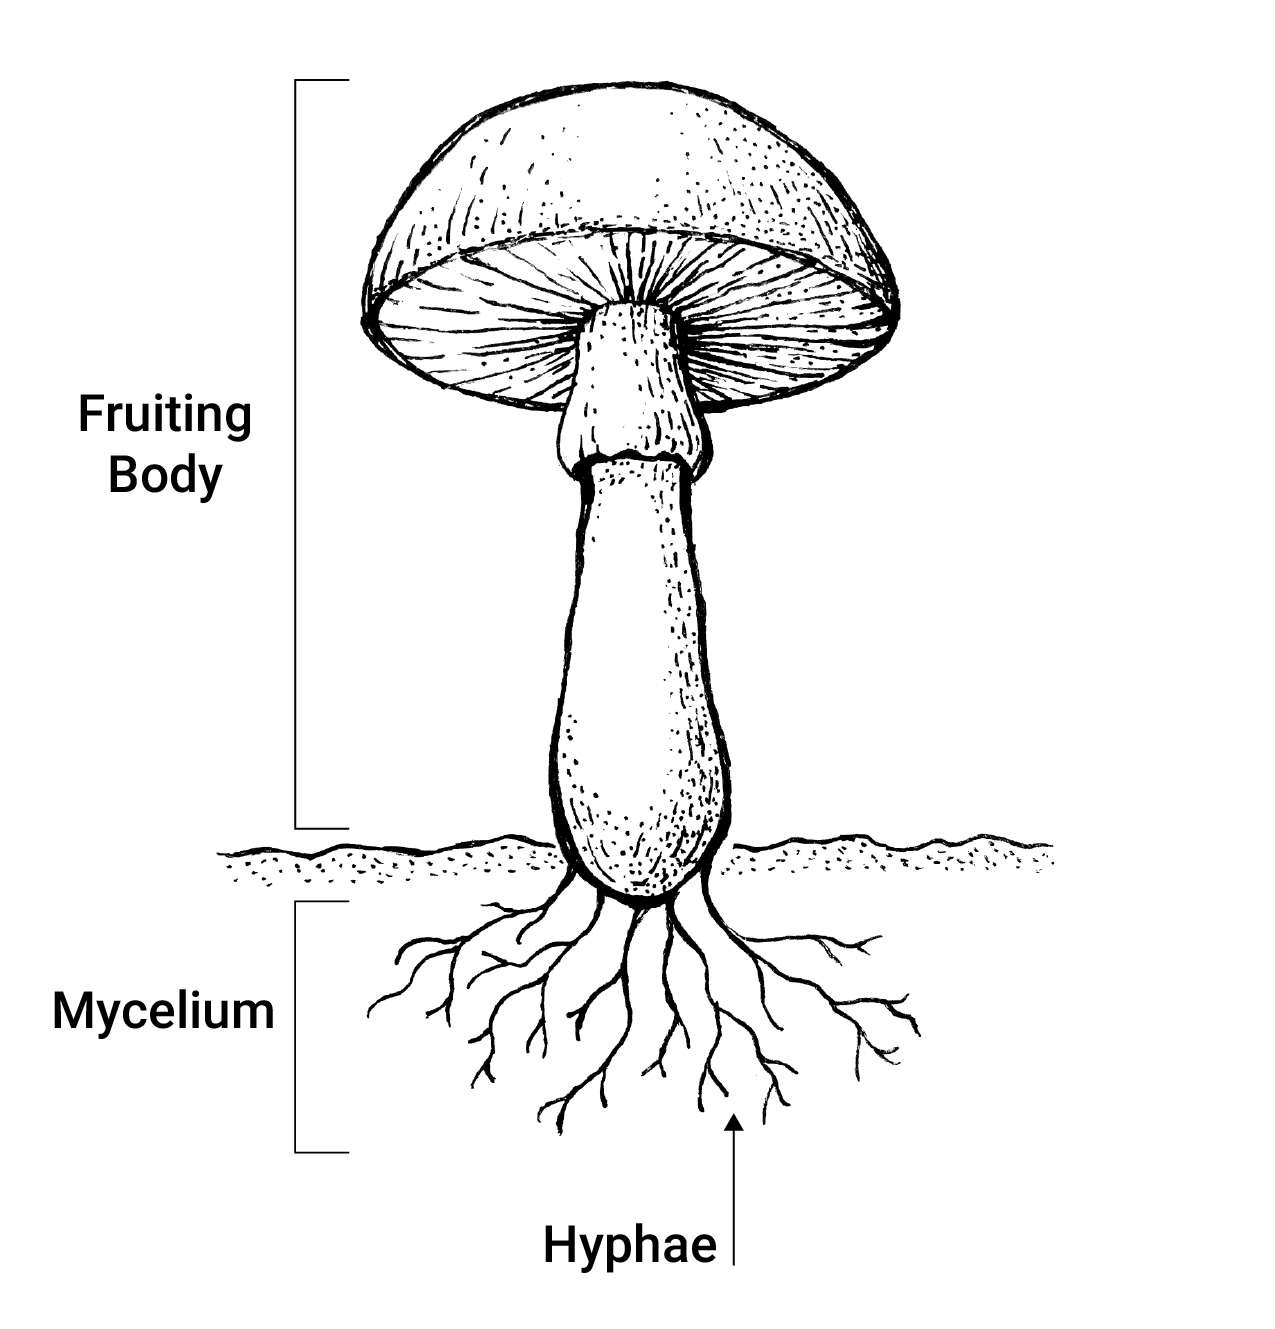
The relationship of a mushroom to the mycelium is analogous to an apple to the tree. The extent of the mycelium network is remarkable. It is so pervasive that a cubic inch of topsoil contains enough fungal cells to reach 8 miles if placed end to end, and every footstep can impact more than 300 miles of mycelium (Stamets, 2005). In fact, the largest living organism on earth is a fungal species, Armillaria ostoyae, growing in the Malheur National Forest in Oregon, USA, that spreads over an area greater than 3.5 square miles (Schmitt & Tatum, 2008).
Fungi were originally classified as part of the plant kingdom. It wasn’t until 1969 that ecologist Robert Whittaker suggested fungi have their own kingdom (Whittaker, 1969), which formally became the fungi kingdom in 1980. The fungi kingdom includes mushrooms, yeast, and molds. Genetically, fungi are actually more closely related to animals than plants. As the well-known mycologist and author Paul Stamets said, “Fungi and animals share a more common ancestry than with any other group. Humans share nearly 50 percent of their DNA with fungi, and we contract many of the same viruses as fungi.”
Also, unlike plants, which produce their food through the photosynthesis process, fungi and animals are heterotrophs and consume organic carbon from other sources for their food. However, fungi do not ingest their food like animals but rather live inside their food. They burrow their hyphae strands into their substrate and feed from the inside. Specifically, hyphae secrete enzymes and acids that break down and dissolve organic matter into nutrients that the hyphae can then absorb.
II. Fungi Life Cycle
Mushrooms, the fruiting body of certain fungi, produce and eventually release spores into the environment (inoculation). The spores hold all the necessary ingredients and genetics to form a new fungus. Germination occurs when environmental conditions are suitable, resulting in an emerging strand of hyphae from the spore, forming a mass of mycelium. The mycelium spreads through the substrate (growth medium) colonizing as much area as possible, and when conditions are right, the mycelium condenses into hyphal knots, which will develop into baby mushrooms.
III. Recommended Mushrooms to Grow at Home for Beginners
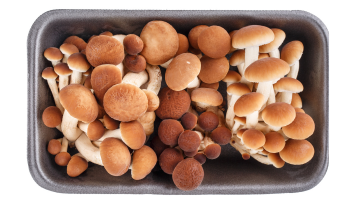
To begin your mushroom-growing journey, we recommend the following five mushroom species that are easy to grow and yield mushrooms relatively quickly.
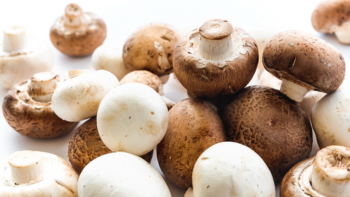
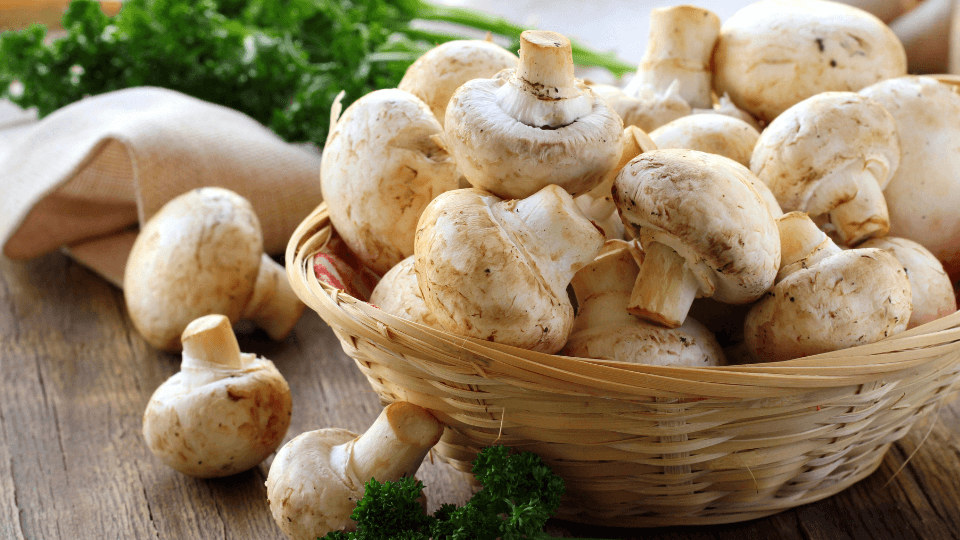
White Button, Cremini, and Portobello (Agaricus bisporus)
These are the same mushroom but at different stages of maturity—white button being the youngest and portobello the most mature (Figure 2). They contain numerous antioxidant compounds with potential cancer-fighting, immune-boosting properties, as well as compounds that aid in promoting cardiovascular and gut health.
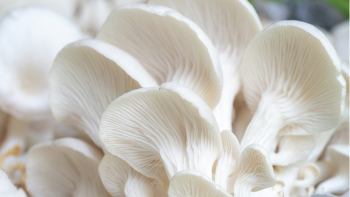
Oyster (Pleurotus ostreatus)
Following its name, oyster mushrooms have a fanned, oyster shape (Figure 3). There are several types of oyster mushrooms (golden, pink, pearl, blue, king). Oyster mushrooms contain compounds that may have immune-boosting properties and aid in promoting cardiovascular and gut health and brain function.
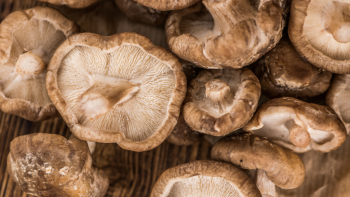
Shiitake (Lentinula edodes)
Shiitake mushrooms (Figure 4) are rich in compounds that protect against cell damage, boost the immune system, and have anti-inflammatory properties.
Piopinno (Cyclocybe aegerita)
Piopinno mushrooms (Figure 5) are more traditional-looking mushrooms containing compounds with antioxidant, antiaging, and organ-protecting effects, as well as anti-inflammatory and anti-tumor properties.
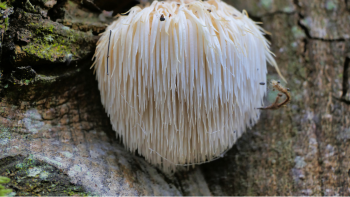
Lion’s Mane (Hericium erinaceu)
Lion’s mane mushroom is a cream-colored mass with no cap or stem (Figure 6). Instead of gills, it has beard-like teeth, giving it the look of a lion’s mane. It may protect against dementia, decrease symptoms of depression and anxiety, and aid in repairing nerve damage.
Step 1. Ensure your work area is clean and sterile!
Supplies:
- Isopropyl alcohol (90%).
- Sterile latex or nitrile gloves.
- Face mask.
The cleaner you are, the more success you'll have.
Cleanliness is the key to successful mushroom cultivation since growing mushrooms is a constant fight against competing molds or another fungus. It is essential to establish a cleaning routine that includes sterilizing all container surfaces, growth substrates, inoculant, and work areas. Wash your hands and pull your hair back. Wear a face mask and sterile gloves (latex or nitrile). Do not have any air flow in the room. Close windows and air conditioning vents. Do not have any pets near the area. Do not have anything nearby that you constantly touch throughout the day without ever cleaning it, like your cell phone. Do not breathe directly onto any work area surfaces. The cleaner you are, the more success you’ll have. Be aware that mold is everywhere. When in doubt, spray and wipe it with 90% isopropyl alcohol!
Step 2. Prepare the growth medium (substrate.)
Supplies:
- Clear plastic monotubs (similar to plastic storage/organizing bins, which can be as small as a shoe box or up to 66 quarts) and opaque plastic sheets to line tub bottom.
- Painter’s tape and micropore tape.
- Heavy duty 5-gallon bucket with a locking lid.
Preparing Monotubs
Use clear plastic monotubs that have been thoroughly sterilized. A typical monotub size volume ranges from 35 to 60 quarts, to which you will add about 7.5 to 10 pounds of prepared substrate. These tubs act as fruiting chambers that help limit outside exposure, keep humidity, and control airflow.
- Fit the opaque plastic lining at the bottom of the tub and then place roughly 1.5 inches of substrate atop the lining.
- For fresh air exchange (FAE), cut four holes (two on opposite sides of the tub) about 1 inch in diameter and 3 inches from the bottom.
- Cut two additional holes (one on opposite sides) of the same diameter and 3 inches below the top of the tub. Pressure differentials from temperature and humidity will drive the flow of FAE into the bottom holes and out of the top holes.
- These holes will be covered with painter’s tape throughout the colonization phase but then replaced with micropore tape (paper tape) once fruiting conditions begin.
Note: Mushroom monotube containers with FAE ports can also be found and purchased through online vendors.
Fungi require oxygen to respire and exhale carbon dioxide. FAE is essential for triggering their fruiting instinct (carbon dioxide levels need to be below 1,000 ppm). The mushrooms need consistent, moderate temperatures (60 °F to 80 °F) with humidity levels < 80%. Fungi do not photosynthesize but respond positively to light as a directional guide; however, they can grow in complete darkness.
Nutrient uptake is from their preferred substrate. Fungi have preferences to what kind of substrate they thrive in. As a primary decomposer, they are mainly saprobic in nature, meaning they decompose and feed on fallen trees, organic matter, leaves, anything with cellulose, manure, etc.
Effective substrates include wood pellets, straw, pasteurized manure (cow or horse), and coco coir.
For home growing, the most effective substrates are wood pellets, straw, pasteurized manure (cow or horse), and coco coir. All species of fungi share the need for their substrates to be near field capacity—the amount of water the substrate can hold against the force of gravity. A good way to make sure it’s at field capacity is to take one handful at a time and squeeze firmly until excess water has been expelled.
Sterilizing Substrate
It is critical to sterilize the substrate before inoculation since the presence of pathogenic bacteria and molds can quickly inhibit mushroom growth. The easiest method is the “bucket technique.” For this technique, you will need a heavy duty 5-gallon bucket with a locking lid, a large cooking pot, water, and your substrate. The idea behind this technique is to create a makeshift pressure cooker (but much more affordable).
- First, clean your workstation. Wipe down all surfaces with isopropyl alcohol (inside the bucket, too), close the windows, turn off any fans, remove any animals, let the air settle, and wear a mask.
- Now that you’ve set yourself up for success, add your substrate to the bucket. All forms of substrate will work— composted manure, straw, wood pellets, coco coir, newspapers, banana peels, mulch, coffee grounds, etc.
- Bring ¾ to 1 gallon of water to an aggressive boil, then add it into the bucket with the substrate.
- Quickly mix, then put the lid on as soon as you can. Microorganisms are killed at 149 °F, and boiling water hovers at 212 °F. Mixing the substrate with boiling water, we heat and pressurize the bucket enough to kill unwanted bacteria.
- Let it sit and cool overnight. Once cooled, it is ready for the next step: preparing the spawn.
Step 3. Prepare spawn.
Supplies:
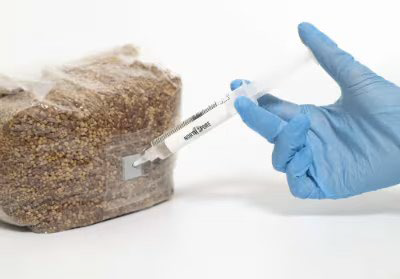
Photo credit: North Spore (northspore.com), used with permission
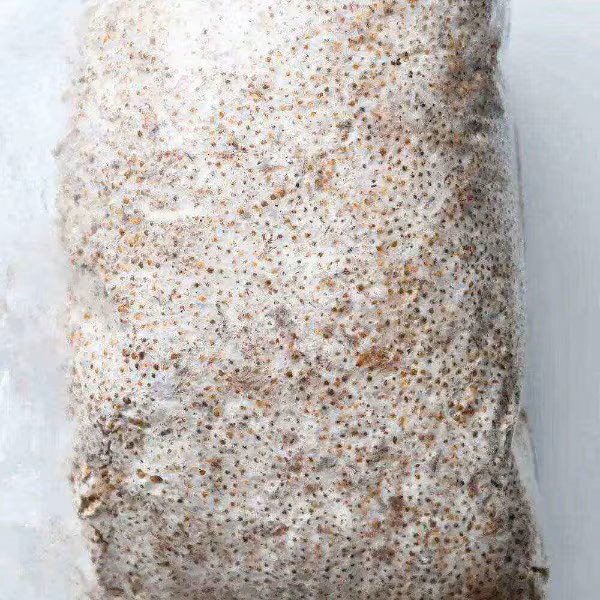
Photo credit: North Spore (northspore.com), used with permission
- Pressure cooker or Instant Pot®.
- Grains (rye, millet, corn kernels, wheat) for inoculant.
- Mushroom grow bags with a self-healing injection port (Figure 7).
- Liquid culture (syringe containing fungal spores; Figure 7).
Spawn is the mycelium starter used for mushroom production. It is created by inoculating sterilized grains (inoculants) with the liquid culture containing the desired fungal spores. Rye, millet, corn kernels, and wheat are the most successful inoculants and are fairly simple to work with. They need to be hydrated with boiling water, then sterilized by pressure.
- Boil your grain for several minutes, being careful not to damage the grain by letting the grain walls break by keeping an eye on them while cooking.
- Once hydrated, sterilize the grain by putting it into a mushroom grow bag with a self-healing injection port and then put it into your pressure cooker at the highest setting (about 250 °F and 15 psi) for 120 minutes. Each spawn bag will contain between 2.25 to 3 pounds of sterilized inoculant.
You can also purchase spawn bags already containing hydrated, sterilized grain through online vendors (Figure 7).
Next, the liquid culture containing the spores is introduced via the spawn bag injection port into the sterilized inoculant that has cooled to room temperature. Commercially, HEPA filter flow hoods or sterile still air boxes are used to help ensure clean inoculations. However, these are relatively expensive and excessive for beginning mushroom growers.
Instead, you can use your oven. By bringing the oven temperature to around 225 °F and opening the door and leaving it down, you’ve created a make-shift flow hood. Wipe down the inside oven door and use it as a work bench. The constant, gentle flow of hot, clean air provides a good space to inoculate. If that isn’t possible, you will need to pay special attention and make sure that everything is as clean as possible.
- Once your work area is ready, wipe down the injection port of the spawn bag with isopropyl alcohol.
- With a lighter, hold the needle tip of the syringe containing the liquid culture over the flame until red hot, let it cool, then insert into the port roughly 1 to 2 inches deep.
- For every ½ pound of grain, you will want to inject no more than 1 cubic centimeter of spores or liquid culture. Too much will make the bags too moist and could lead to rotting. Gently change the angle of the syringe while injecting to distribute the spores more evenly. Withdraw the syringe once you’ve injected enough liquid culture.
- Keep the inoculated spawn bags in a clean, dark, and warm (72 °F to 75 °F) place. Over the next 2-4 weeks, the spores will germinate and colonize the grains. They should look white and stringy (Figure 8).
It is common for mycelium to excrete droplets of metabolites with a dark yellow color. This is normal and healthy. If any other colors (black, purple, green) show up, your bag wasn’t sterilized completely, and mold has begun to colonize. Discard quickly to prevent any further spread of contamination.
Be Patient. Wait until grain is 40% colonized, then you can massage the bag to spread mycelium evenly, but be careful not to cause damage.
Be patient and don’t check your bags too often. An optional technique to quicken the colonizing time is to wait until the grain is roughly 30%–40% colonized, then break up the mycelium and massage the bag until the mycelium is evenly spread throughout the entire bag. Be careful when using this technique; though usually successful, there is a chance the mycelium will not recover if damaged.
Step 4. Introduce spawn into substrate.
Once the grain inoculant is completely colonized, it is time to introduce it to the sterile substrate. This is the step where the fungus will be most exposed and vulnerable; therefore, the importance of cleanliness cannot be stressed enough. Before starting anything, completely wipe down the tub with isopropyl alcohol and follow your cleanliness protocol (wear a mask, wash your hands, wear clean clothes, latex gloves, etc.).
- Take the colonized spawn and break it into small pieces for spreading. The ratio of spawn to bulk substrate should be about 1 part spawn to 3 parts substrate, or 3 pounds of colonized spawn to 10 pounds of bulk substrate. The sterilized substrate must be at room temperature and at field capacity.
- Place the sterile, precut opaque plastic lining at the bottom of the bin.
- Add roughly 1 inch of the substrate into the bin with about 3 pounds of the grain spawn.
- Mix the spawn and substrate until evenly distributed. Gently pack it down to make a flat surface.
- Add another 1 inch of substrate to the top and pack it down—this is our casing layer. The casing layer is laid on top of the colonized substrate and its job is to facilitate moisture retention in the substrate. Make sure everything looks even, flat, and clean. You should have a little over 2 inches of substrate overall with clean sides and taped FAE holes.
- Put the lid on and clean your work area. Store your bin in a clean, dark, and consistently warm (72 °F to 75 °F) place.
Step 5: Colonize substrate.
Be wary of contamination and keep environmental conditions consistent.
The colonization process will take roughly 10–20 days. During this time, be wary of contamination and keep environmental conditions as consistent as possible. You should begin to see white hyphae strands stretching their way through the casing layer within a few days. Thousands of tiny water droplets on the mycelium are an excellent sign of good health. Let it colonize until it occupies around 80% to 90% of the substrate.
Step 6: Maintain and optimize fruiting conditions.
You have created the perfect, noncompetitive environment for your fungus to establish itself and its evolutionary instinct will be to reproduce. And as we know, mushrooms are the fruiting bodies that carry their spores. A slight drop in temperature and increase in oxygen, humidity, and light signals fungi to begin reproducing. You will provide that signal:
- Remove the painter’s tape off the tub holes and replace it with micropore tape (or paper tape) to introduce FAE, drop the temperature to 68 °F to 71 °F, and introduce light to the tubs for 6–8 hours a day.
- Use a fine-misting spray bottle to mist the inside walls and bottom of the tub lid—just to the point before the water runs down the side. This will provide humidity. Mist once a day in a clean, still air environment.
- Guard against potential contamination and adhere to your cleanliness routine. Wash your hands, wear a mask and gloves, do not lean over the bin and breathe on it, and keep your hair back, etc. If you keep the environment clean and consistent, you will see your mushrooms forming within a couple of days.
Step 7. Monitor fruit maturity and harvest.
If all steps have gone according to plan, you will see little mushrooms growing from your substrate. They will go from tiny pins to fully mature mushrooms within 2–3 days. At this stage, it is important to frequently check in on your mushrooms as they can quickly mature and even pass maturity within hours. If harvested too late, they will begin to degrade and even rot; if too early, you’ll get a less-than-optimal yield. It is important to have researched the mushroom species you are cultivating to know the optimal harvest time.
Research harvest times for the mushroom species you're growing. If harvested too late, they begin to degrade and even rot; if too early, you'll get less yield.
To harvest your mature mushroom, gently pinch the bottom of the stem near the substrate. Carefully twist and pull just enough to pluck it from the mycelium. Take a clean blade and cut off the very bottom where there will be bits of substrate. Don’t cut off more than you need. Pat yourself on the back because you have grown mushrooms at home successfully and can now enjoy the “fruits” of your labor.
V. Troubleshooting Contamination: Mold
Even experts will experience mold contamination from time to time. Mold’s preferred environment is, unfortunately, exactly the same as the one we are creating for our fungi. Just remember to be as clean and conscientious as possible.
Common mold contaminants are Trichoderma, cobweb mold, and black mold. Initially, it’s near impossible to tell the difference between newly forming Trichoderma from your healthy mycelium. However, once it changes color (black, green, pink, orange), you’ll be able to distinguish it; discard the substrate quickly to avoid contaminating the other bins or bags. Rarely, it is possible to identify and remove the mold if it’s less than dime-sized.
VI. Legal Status of Psychedelic ("Magic") Mushrooms
With the attention that psychedelic or “magic” mushroom therapy is getting in alleviating the symptoms of depression and anxiety, addictive behaviors, post-traumatic stress disorder (PTSD), and helping to ease fear and anxiety in terminal cancer patients, we would be remiss if we did not mention them. Plus, you may have noticed on your internet search for mushroom-growing supplies that many sites sell mushroom growth kits and liquid cultures focused on psychedelic mushrooms, particularly Psilocybe Cubensis—the mushroom species most commonly used for therapy. What is the legal status of purchasing and growing these psychoactive mushrooms at home? “Where are Magic Mushrooms Legal? StateBy-State Guide” by Phil Dubley provides an updated guide on the legal status of psychedelic mushrooms.
Psychedelic mushrooms per se aren’t illegal in the U.S., but it’s the psychoactive compounds (psilocybin) that they contain. So, by proxy, the mushrooms are also illegal. Psilocybin is listed as a Schedule I drug, and therefore, cultivating mushrooms containing this chemical is considered a felony under federal law. However, possession of magic mushroom spores in the U.S. is not prohibited because the spores do not contain the psychoactive constituents, so in most states, it is legal to have psychedelic mushroom spores for research microscopy purposes only. Even though magic mushrooms are banned at the federal level, federal laws can be superseded by state regulations, and several states and municipalities have decriminalized or legalized psilocybin mushrooms. As of October 2023, psilocybin mushrooms are fully decriminalized in Oregon (legalized use of psilocybin for therapeutic purposes under the supervision of licensed professionals) and the District of Columbia and decriminalized in certain cities in California, Colorado, Massachusetts, Michigan, and Washington.
Photo Credits
Photos were provided by Depositphotos unless otherwise noted. Michael Langenheim of Utah State University Extension supplied the Figure 1 illustration.
References
- Dubley, P. (2024). Where are magic mushrooms legal? State-by-state guide. Tripsitter. https://tripsitter.com/magicmushrooms/legal/
- Schmitt, C. L., & Tatum, M. L. (2008). The Malheur National Forest: Location of the world’s largest living organism (the humongous fungus). United States Department of Agriculture and Forest Service, Pacific Northwest Region. https://www.fs.usda.gov/Internet/FSE_DOCUMENTS/fsbdev3_033146.pdf
- Seladi-Schulman, J. (2020, September 16). What temperature kills bacteria in water and food? Healthline Media. https://www.healthline.com/health/what-temperature-kills-bacteria#bacteria-in-water
- Stamets, P. (2005). Mycelium running: How mushrooms can help save the world. Ten Speed Press.
- Valverde, M. E., Hernández-Pérez, T., & Paredes-López, O. (2015). Edible mushrooms: Improving human health and promoting quality life. International Journal of Microbiology, 376387. https://doi.org/10.1155/2015/376387
- Whitaker, R. (1969). New concepts of kingdoms of organisms. Science, 163, 150–160.
April 2024
Utah State University Extension
Peer-reviewed fact sheet
Download PDF
Authors
Jacob Hawkes, Paul Grossl, and Melanie Stock
Related Research
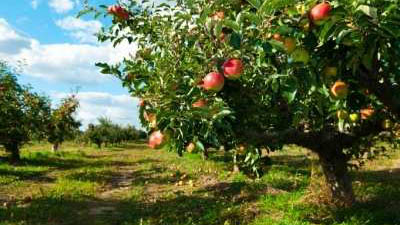
Apple Production and Variety Recommendations for the Utah Home Garden
This bulletin presents appropriate information pertaining to growing apple trees in the home orchard. Success depends on several key factors.

Backyard Fruit Production in Utah’s High Mountain Valleys
Many homeowners who are new to these regions wish to establish perennial fruit crops in their gardens. This publication outlines the challenges to fruit production in Utah’s high mountain valleys, offers mitigation suggestions, and lists plant materials t

Blackberry Management in Utah
Blackberries can be grown successfully in Utah but careful cultivar selection and care is needed. Harsh winters and frequent late spring frosts often result in significant blackberry cane damage and crop loss.
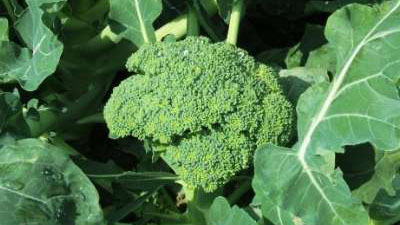
Broccoli in the Garden
Broccoli is a cool season vegetable that prefers sunny locations and fertile, well-drained soil. Incorporate some organic matter and a complete fertilizer into the area before planting.
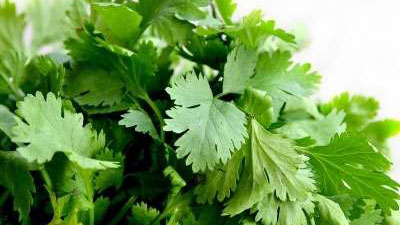
Cilantro/Coriander in the Garden
Cilantro/coriander is a cool-season herb that grows best in full sun and fertile, well-drained soils. Explore the best varieties to grow in Utah, and learn how to properly care for the herb to get a great harvest.
Comfrey in the Garden
Comfrey (Symphytum officinale) is a very hardy perennial herb adaptable to most conditions. Comfrey grows best in partial to full sun in moist, fertile soil. Comfrey is propagated by root cuttings or crown divisions.