Grazing on the Arizona Strip: Catchment History and Repair
 Introduction
The Arizona Strip encompasses nearly 3 million acres of arid land north of the Colorado River and south of the Utah border. Ranchers have grazed cattle there since the late 1800s, and it is the source of 100,000 Animal Unit Months (AUMs) with an economic value of $7.1 million a year (Center for Western Priorities, 2015). The Grand Canyon geographically separates the Strip from other parts of Arizona, and it is culturally tied to Utah and Nevada, as residents of these states own most grazing permits.
Water, not forage, is the limiting factor on the Arizona Strip in wildlife sustainability and livestock production. Springs and groundwater are rare or absent over most of the area, and pipelines and hauling water are prohibitively expensive to sustain wildlife and livestock. Harvesting natural precipitation is the main source of water for animals.
What Are Catchments?
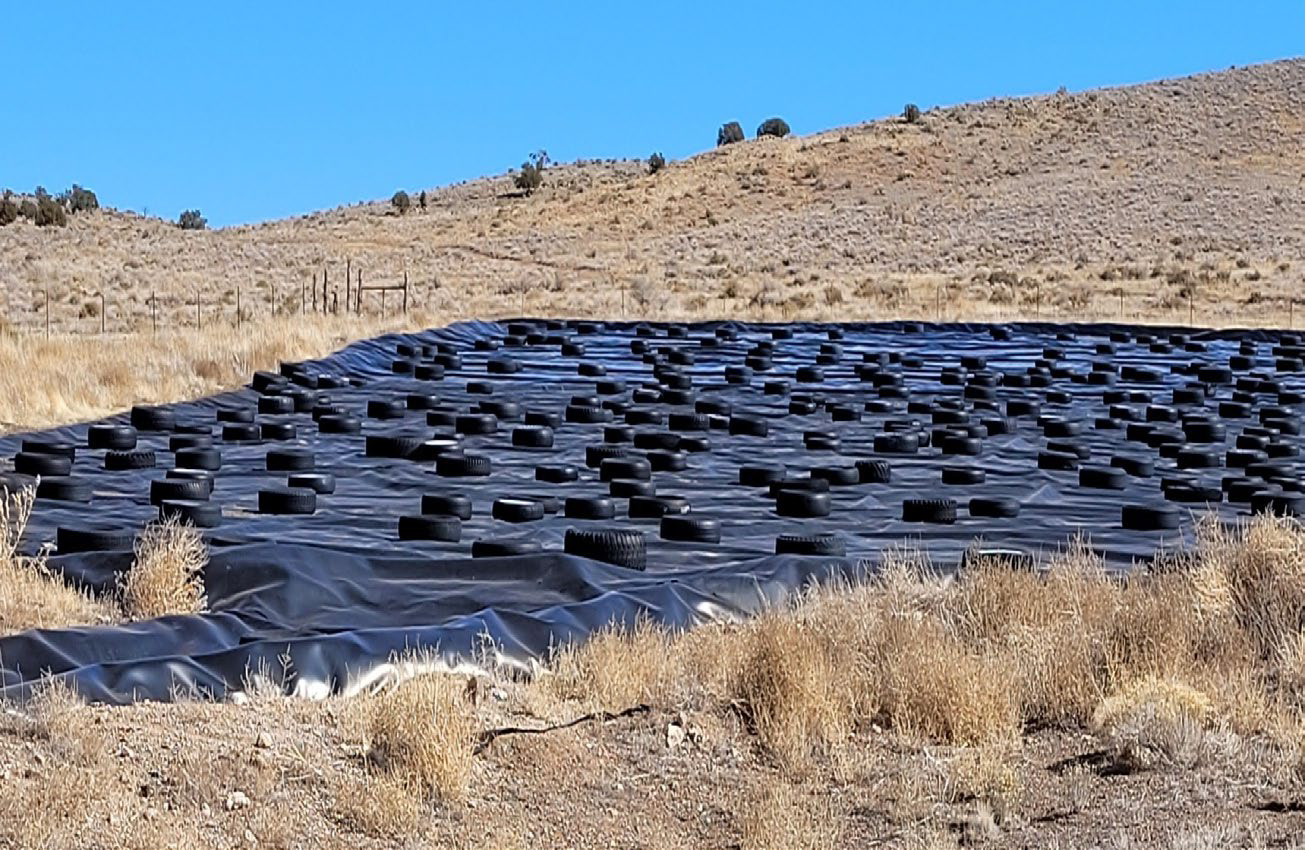
Due to the unpredictability of rain and the soil’s inadequacy to hold water for sufficient lengths of time, using earthen reservoirs to catch and store water can be unreliable (Cooley et al., 1978). A catchment system is a more water-efficient alternative, requiring less land and vegetation disturbance. A rubber water catchment apron is spread over an area of cleared soil with a slope of 5% to 8% and anchored with used tires to avoid wind damage (Cooley et al., 1978; Figure 1). When it rains or snows, water is piped from the apron in high-density polyethylene pipe to a tank or lined pond with a capacity of 80,000–200,000 gallons.
The amount of land for the apron and the required tank size are calculated to fill the storage tank with 75% of the area’s average precipitation. For example, in an area receiving 10 inches of average annual precipitation, a 100,000-gallon storage tank would require a half-acre apron because each inch of precipitation yields approximately 27,000 gallons of water over 1 acre (Bureau of Land Management [BLM], 2017).
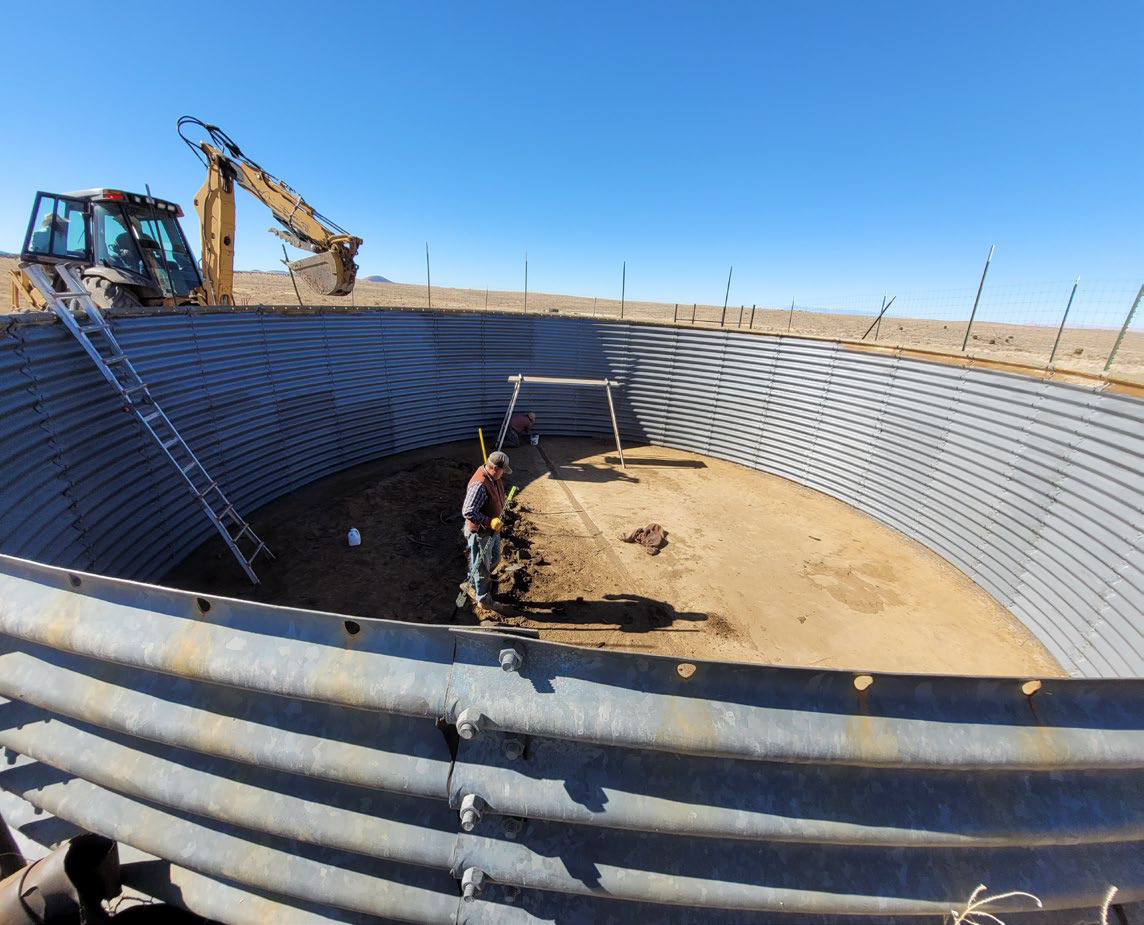
Aboveground or belowground storage tanks are typically steel sided with a concrete bottom (Figure 2). A fence is constructed around the apron, underground tanks, and lined ponds to avoid damage by or entrapment of animals. Storage tanks have wildlife escape ramps and floating bird ladders if they are not covered with a lid. Water from the tank or pond is piped to troughs or guzzlers for availability to wildlife and livestock.
Since the 1940s, catchments have been installed on the Arizona Strip as a joint effort between livestock grazing permittees and government agencies, such as the Arizona Game and Fish and the BLM (Serpa, 2018). This collaboration benefits both wildlife and livestock.
Catchment Significance and Maintenance
Catchment installation and water development distributes grazing within the BLM parameter of 50% utilization throughout allotments and results in more uniform usage of resources. Water developments appear to increase mule deer populations and affect their distribution (BLM, 2017). About one-third of catchments on the Arizona Strip are owned by Arizona Game and Fish, while various federal agencies, such as the BLM, own the rest (Serpa, 2018). Livestock grazing permittees share in the installation and maintenance costs as the catchments benefit their ability to use their allotments.
The life expectancy of a catchment project is 20–50 years, and maintenance includes repairing leaks and clogs in pipes (BLM, 2017). As these tanks, or any steel or concrete troughs, age, rust causes holes to form and concrete can crack or develop leaks. Eventually, water-holding tanks and troughs become unusable when they are unable to hold water.
Replacing troughs and tanks can be prohibitive due to removal and replacement costs and distance materials must be hauled. As of 2024, replacing a steel water tank costs approximately $1 per gallon, depending on capacity and freight distance. Welding can be a temporary fix for steel tanks, but it can be time-consuming and prone to failure.
Epoxy Repair:
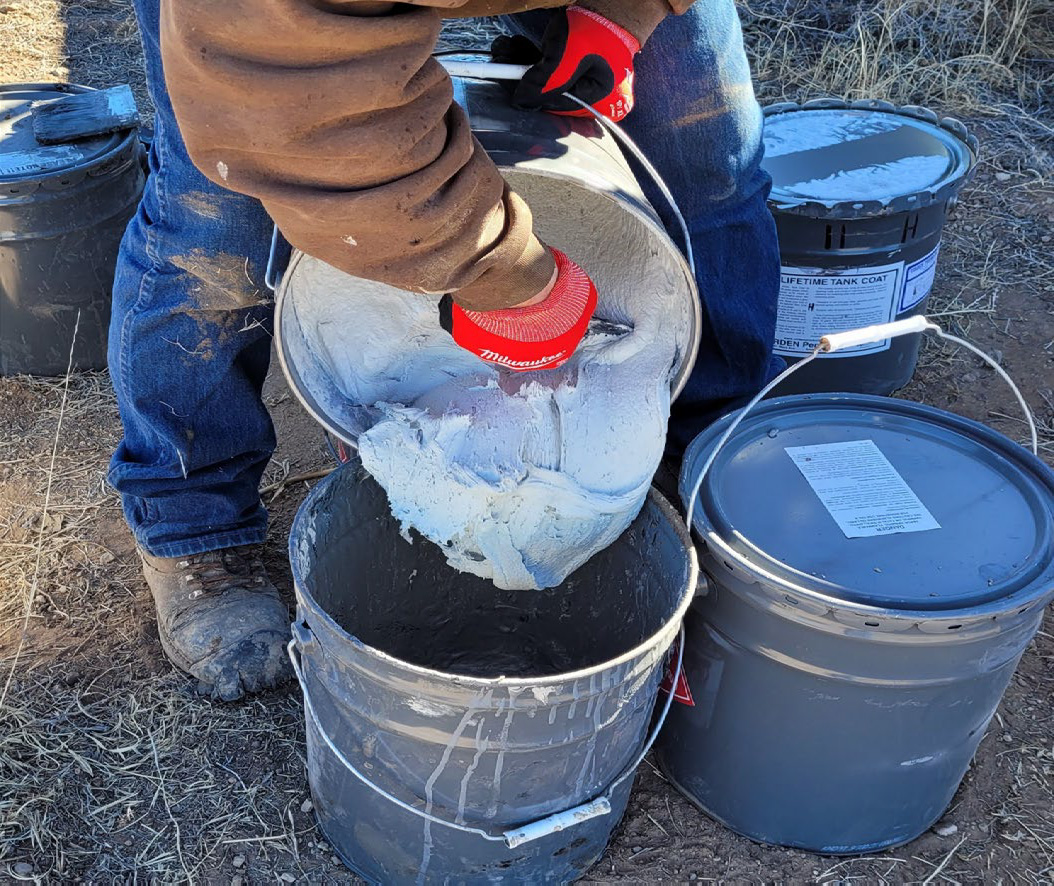
Coating the steel interior of a catchment tank or trough with epoxy is an economical alternative to replacement or fixing with welds (Figure 3). In 2024, the cost to coat an 80,000gallon steel tank was about $3,000, not including labor. Epoxy can also seal porous cement that has small to moderate cracks. Nearly all other coatings will react to alkaline water and loosen, allowing moisture and oxygen to permeate and cause rust and corrosion. However, water alkalinity does not soften epoxy (Berry, 2022). Epoxy cures to a rock-hard finish and is impervious to gasoline and many acids. Before applying epoxy, clean tanks and troughs of dirt, corrosion, and rust. Temperatures should stay above freezing when applying and curing epoxy.
Coat tanks and troughs with epoxy in the following manner:
- Select epoxy that is labeled for tank and trough use and is safe for potable water
- Combine epoxy resin and hardener in equal parts using a cordless drill and mixing attachment (Figure 3).
- Apply mixed paste with a putty knife to holes 3/8 inch across or smaller, preferably on the interior of the tank or trough, but it can also be used on the exterior. For larger holes, those from pencil-size to several inches across, apply the mixed paste around the hole’s edges. Cut a patch from a tin can or similar material and apply it over the hole. Coat the patch and edges with two coats of thinned epoxy.
- Thin paste with epoxy thinner to the consistency of gravy or a heavy-bodied liquid. If the mixture is too thin, it will not provide a waterproof barrier.
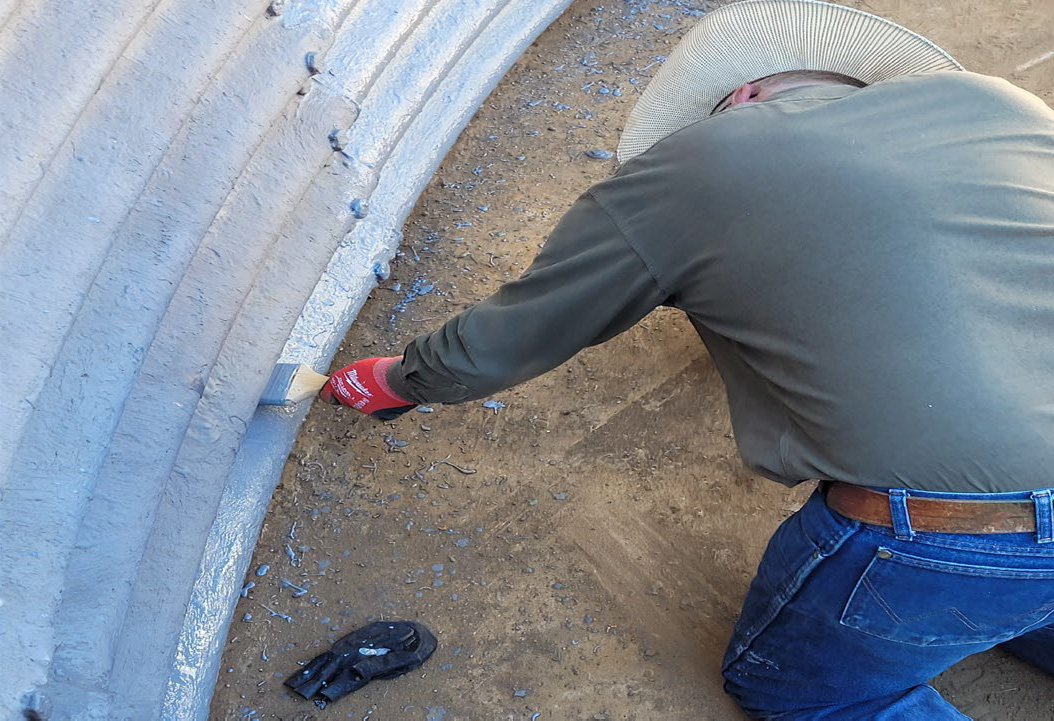
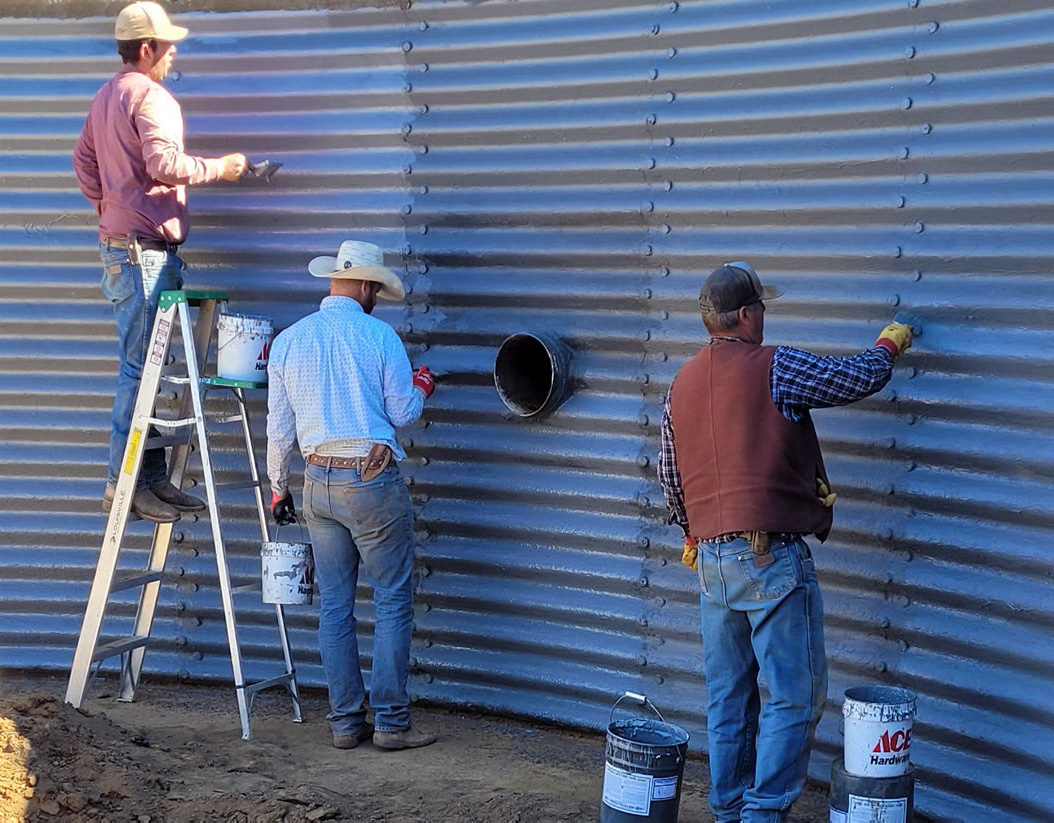
- Apply the thinned mixture with a bristled paintbrush, making sure to evenly coat all crevices, joints, bolts, and cracks (Figure 4).
- Allow the epoxy to cure overnight. Step 7. Apply a second coat of epoxy, repeating Steps 5 and 6 (Figure 5). A second coat of epoxy must be applied to fill all pores remaining after a single coating (Vodak, 2017).
Allow the epoxy to cure for at least 96 hours before adding water or other material. Wear gloves and eye protection when applying epoxy. Any epoxy spilled on clothes or footwear will be permanent. Epoxy thinner is a toxic material like gasoline, turpentine, or other paint thinners. It is a flammable solvent, so epoxy mixed with thinner should not be used around sparks or an open flame. Apply thinned epoxy only in well-ventilated areas. When epoxy is adequately cured, the vapors will dissipate and not affect the water’s taste.
Photo Credit
The author provided all photos.
References
- Berry, A. (2022, March 25). The most common tank coatings & application mistakes. Wastewater Digest. https://www.wwdmag.com/wastewater-treatment/article/10940696/the-most-common-tank-coatingsapplication-mistakes.
- Bureau of Land Management (BLM). (2017). Environmental assessment for the proposed Arizona Strip field office water development projects on the Arizona Strip, Mohave and Coconino Counties, Arizona [DOIBLM-AZ-A010-2016-0027-EA]. https://eplanning.blm.gov/public_projects/nepa/65159/97609/117765/Water_Development_EA_(Final).pdf.
- Center for Western Priorities. (2015, November 17). Economic impacts of the proposed greater Grand Canyon Heritage National Monument. BBC Research & Consulting. https://westernpriorities.org/wpcontent/uploads/2015/11/Economic-Impacts-of-the-PGGCHNM.pdf.
- Cooley, K. R., Frasier, G. W., & K. R. Drew. (1978). Water harvesting: An aid to range management. Proceedings of the First International Rangeland Congress, pp. 292–294. https://www.tucson.ars.ag.gov/unit/publications/PDFfiles/299.pdf.
- Serpa, N. (2018, August 8). Arizona maintains thousands of water catchments to ensure healthy wildlife populations. Cronkite News. https://cronkitenews.azpbs.org/2018/08/08/arizona-officials-maintainthousands-of-water-catchments-to-ensure-healthy-wildlife-populations/.
- Vodak, P. (2007, August 31). Tanks & structures: Coatings protection against tank corrosion translates into longer lifespan. Water Technology. https://www.watertechonline.com/home/article/14171257/tanksstructures-coatings-protection-against-tank-corrosion-translates-into-longer-lifespan.
April 2024
Utah State University Extension
Peer-reviewed fact sheet
Authors
Melanie Heaton,USU Extension Assistant Professor

Melanie Heaton
Extension Assistant Professor | Agriculture, Natural Resources | Garfield County Director
Agriculture and Natural Resources