Maple Tapping in Utah
Nicole King and Darren McAvoy
Introduction
Maple syrup is made by collecting sap from a maple tree in late winter/early spring and boiling it until it is 66% sugar concentrate. Although most maple syrup is produced from sugar maple (Acer saccharum; Figure 1) and red maple (Acer rubrum) trees, it is possible to collect sap from any maple species (genus Acer). A growing number of people are interested in producing maple syrup in Utah, using both native and introduced maple species.
There are many great resources for how to tap trees and produce delicious syrup. The purpose of this article is to introduce the process and provide details specific to the Intermountain West. This article focuses on hobby production, not commercial tapping operations. Further resources are listed at the end of this article.
Tapping on Public Lands
It is best to use your own maple trees, whether that is in your front yard or in the woods on your property. If you don’t own maple trees and don’t know anyone who would let you use their trees, you may want to consider tapping public trees (Figure 2).
If you want to harvest maple syrup from your local national forest, first call the ranger district office near you. However, since maple tapping is not commonly done in the West, don’t be surprised if they do not understand your request.
Always be mindful of the environment and choose trees in locations that are away from high traffic areas where your bucket and tap will be undisturbed. Be respectful of public and private property laws in your area.
Getting Started
Find a Maple Tree
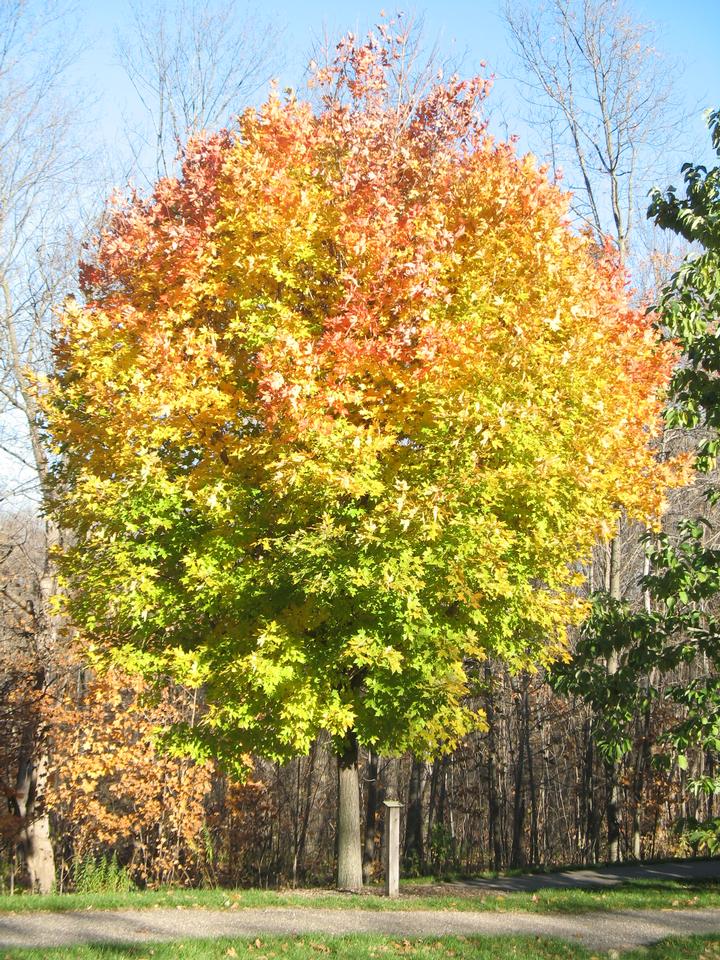
Figure 1. Sugar maple trees are traditionally tapped for maple syrup production, particularly in the eastern U.S.
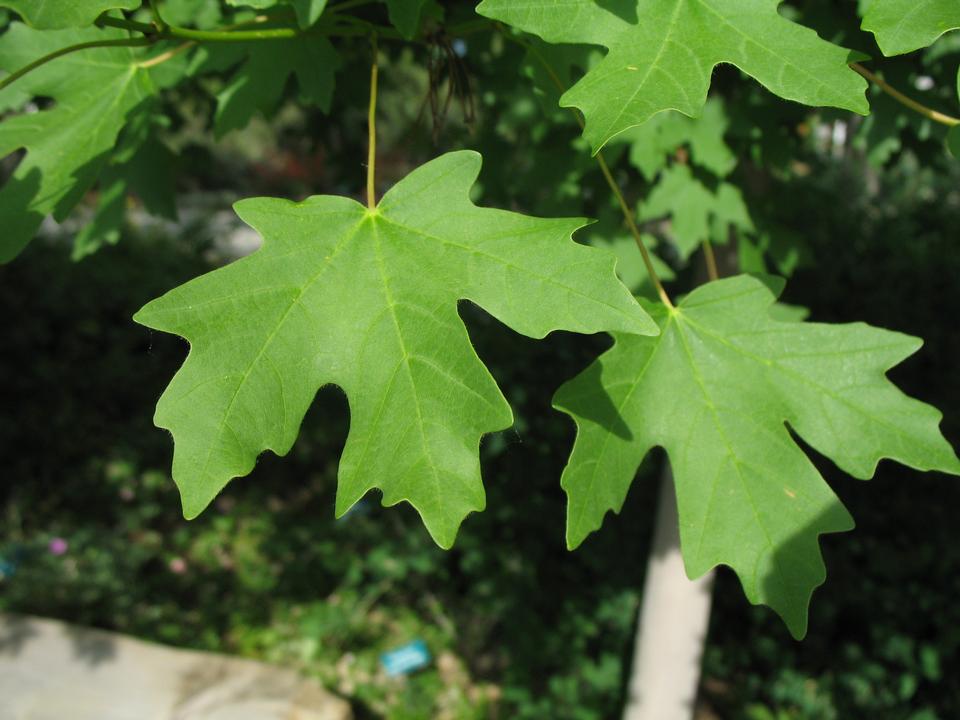
Figure 2. Bigtooth maple leaves.
The best time to identify maple trees is in the summer or fall before they drop their leaves. For help identifying the most common maple trees in Utah, check out the resources at the end of the article.
One detail to look for in the winter is the winged seeds, which have similar structure across all maple species. Additionally, maple trees have paired leaves and buds (Figures 3, 4, and 5).
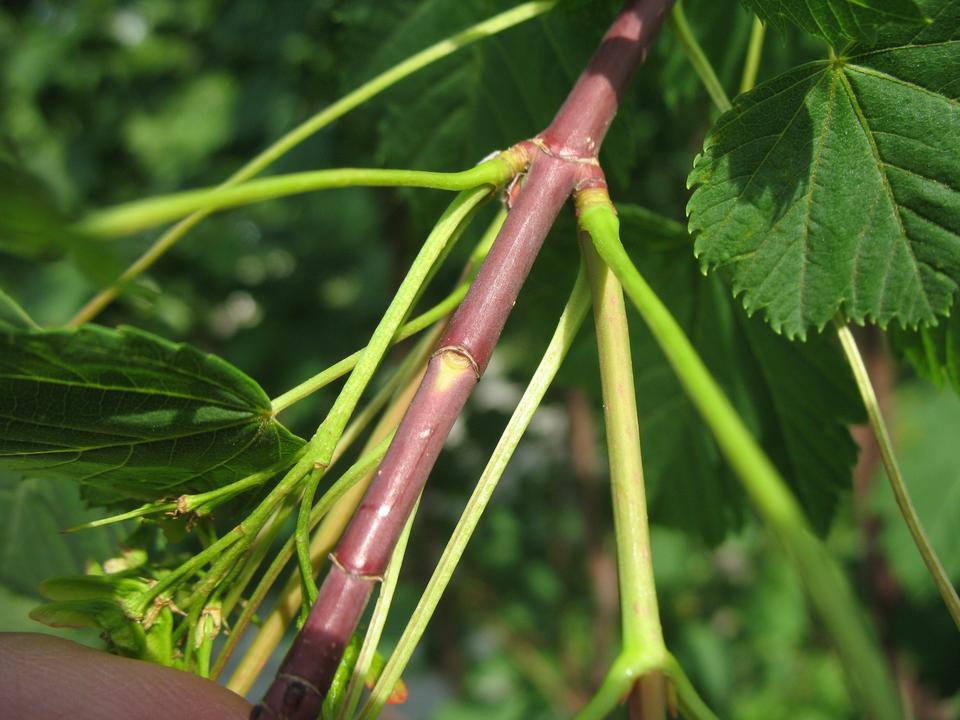 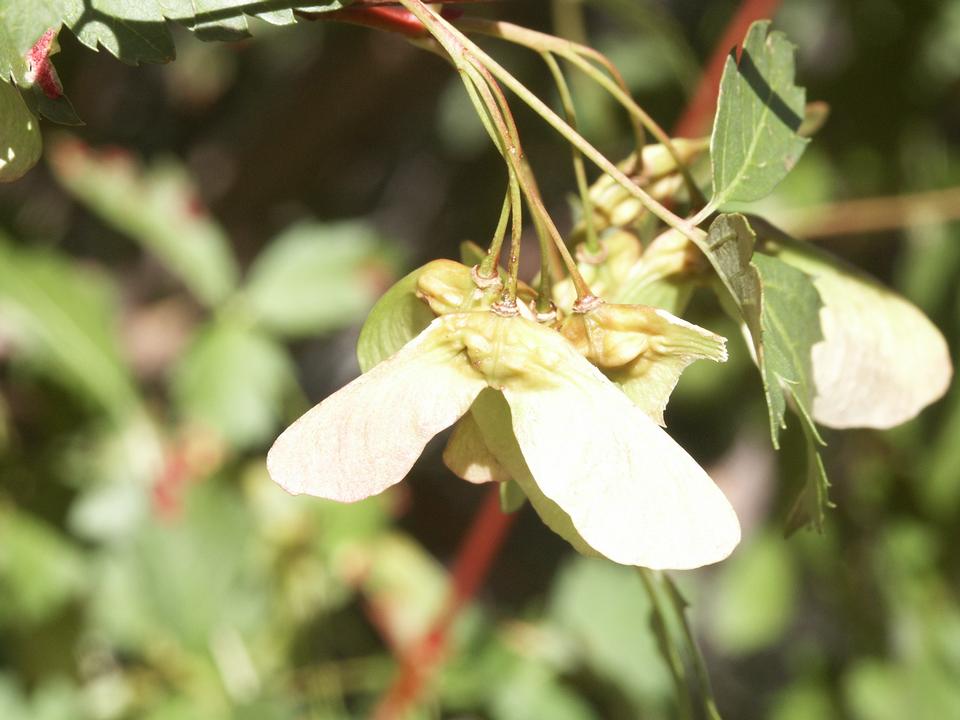 Figure 3. Rocky Mountain paired leaf connection and winged seeds. |
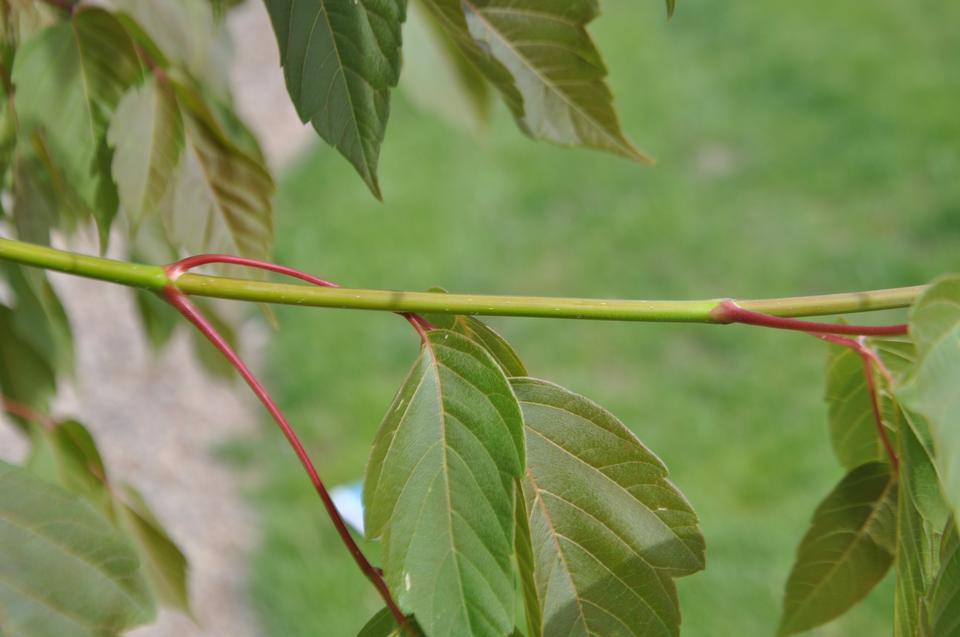 Figure 4. Box elder paired leaf connection. |
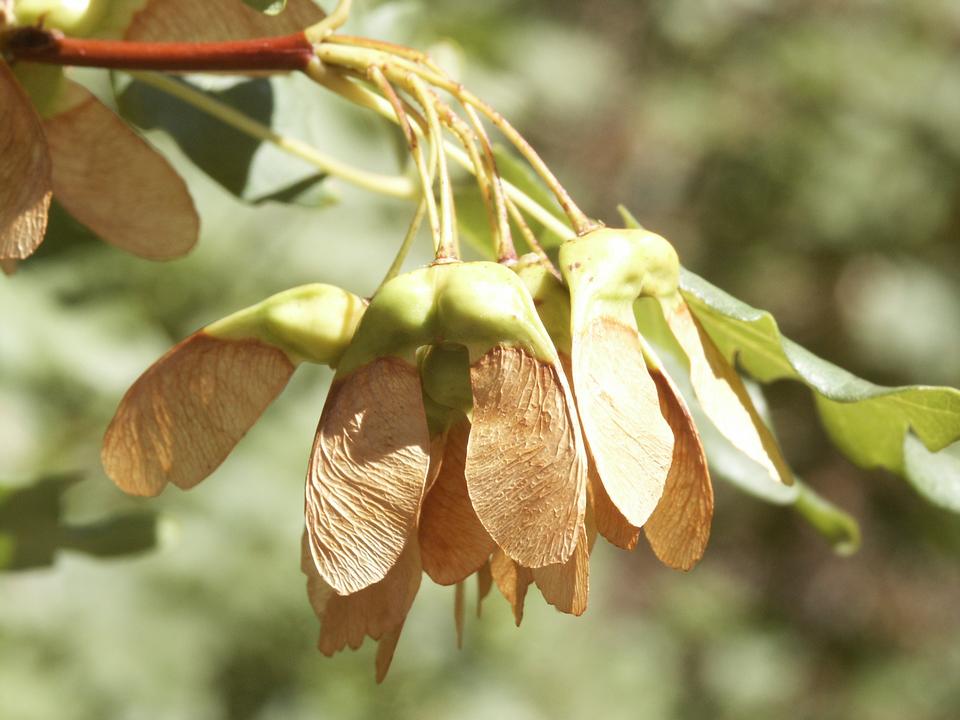 Figure 5. Bigtooth maple winged seeds. |
After identifying the species, the next most important thing is to make sure the tree is big enough to support tapping. The tree’s diameter should be 10 inches minimum at 4.5 feet above the ground. Although smaller trees can be tapped, you won’t get as much sap, and there are long-term sustainability concerns about tapping trees that are too small. Tree diameter can be measured in several ways:
- Biltmore stick (see Measuring Tree Volume With a Biltmore Stick).
- Tree calipers.
- Logger’s tape around the circumference.
- Standard flexible measuring tape; measure the circumference at 4.5 feet, then divide by
14 (pi).
A tree with a diameter of 10 to 20 inches can support a single tap hole. In the Intermountain West region, it is not advised to put multiple taps on any single tree.
Watch the Weather
The ideal timing for maple tapping varies by region and may be different from year to year. The most important pieces of information you will need are daytime temperature highs and nighttime temperature lows. Look for temperatures that are above freezing during the day, preferably around or above 40 degrees Fahrenheit, and nighttime temperatures that are below freezing, preferably in the mid-20s.
The daily freeze/thaw cycle changes the pressure within the tree’s branches, which forces the tree to draw water up from its roots (Figure 6). As the tree thaws in the sunlight, sap flows downward from the branches to the roots and out the tapping hole.
This weather pattern can be relatively short, and the maple tapping season varies from year to year. If tapping many trees, consider putting test taps on a few trees to observe the sap flow rate. Once the flow rate is satisfactory, tap the rest of your trees. Do not remove your taps until you are finished collecting sap for the year. Removing and re-inserting taps can introduce bacteria and pathogens into the tree.
Stop collecting when you notice leaves starting to bud or when the sap turns a yellowish color. Sap may continue flowing after the tree begins to leaf out in spring, but the sap will contain additional nutrients to benefit the new growth. This changes the color of the sap and negatively impacts the taste.
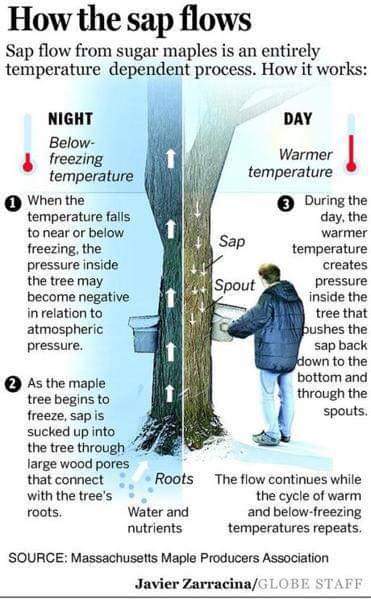
Figure 6. Maple sap flow is temperature dependent. Image credit: Massachusetts Maple Producers Association
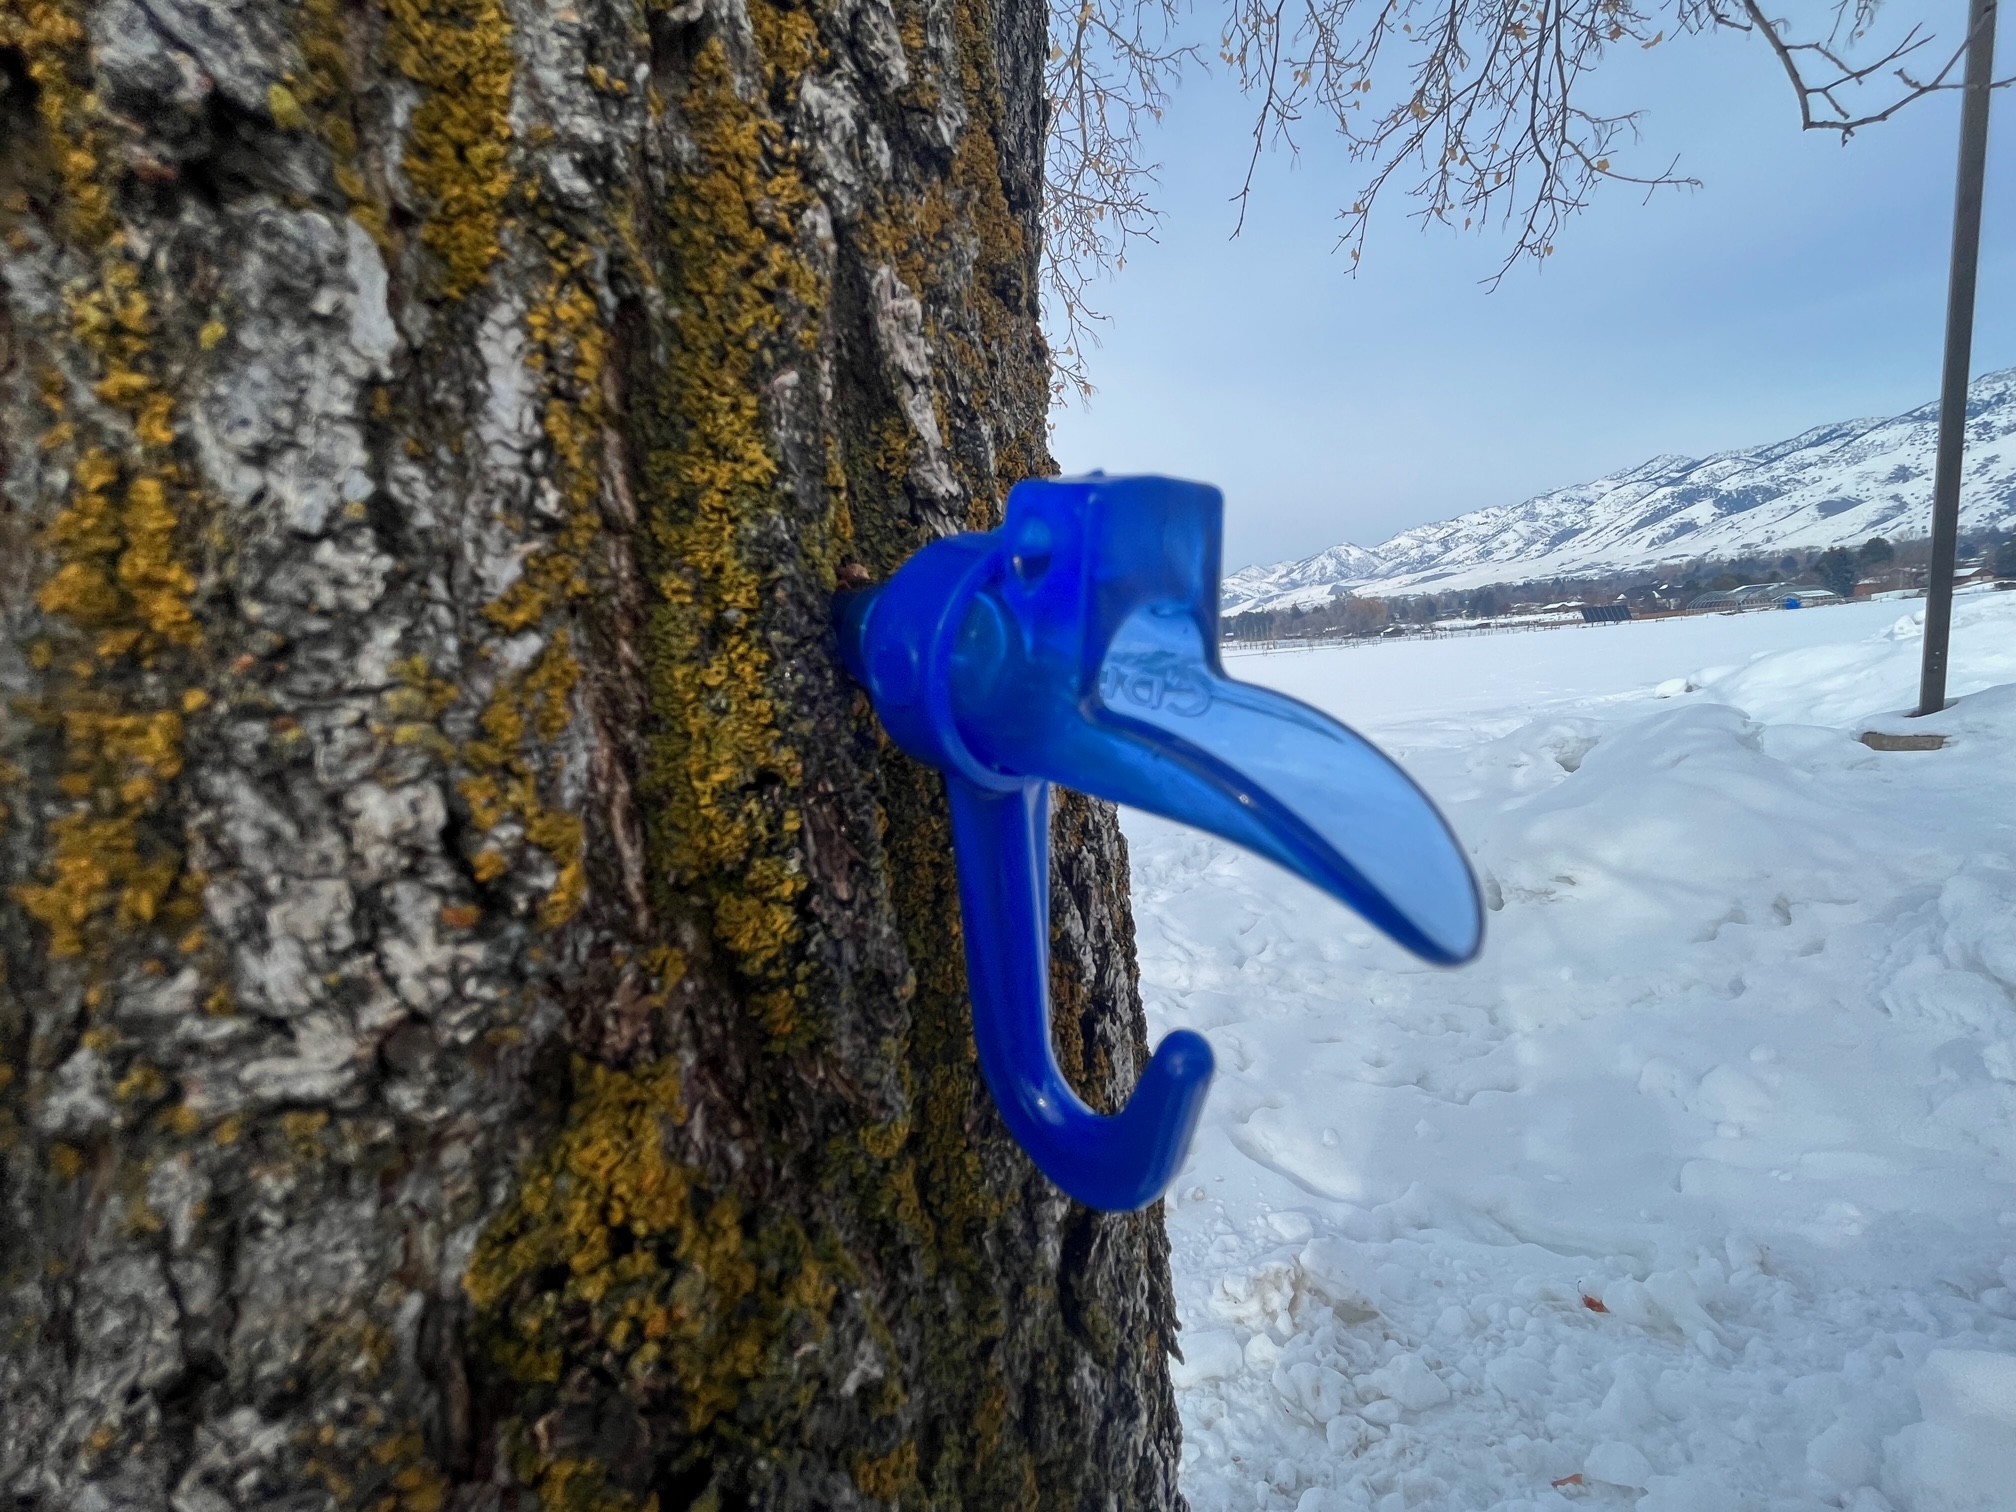
Figure 7. A spile with hook to support a bucket.
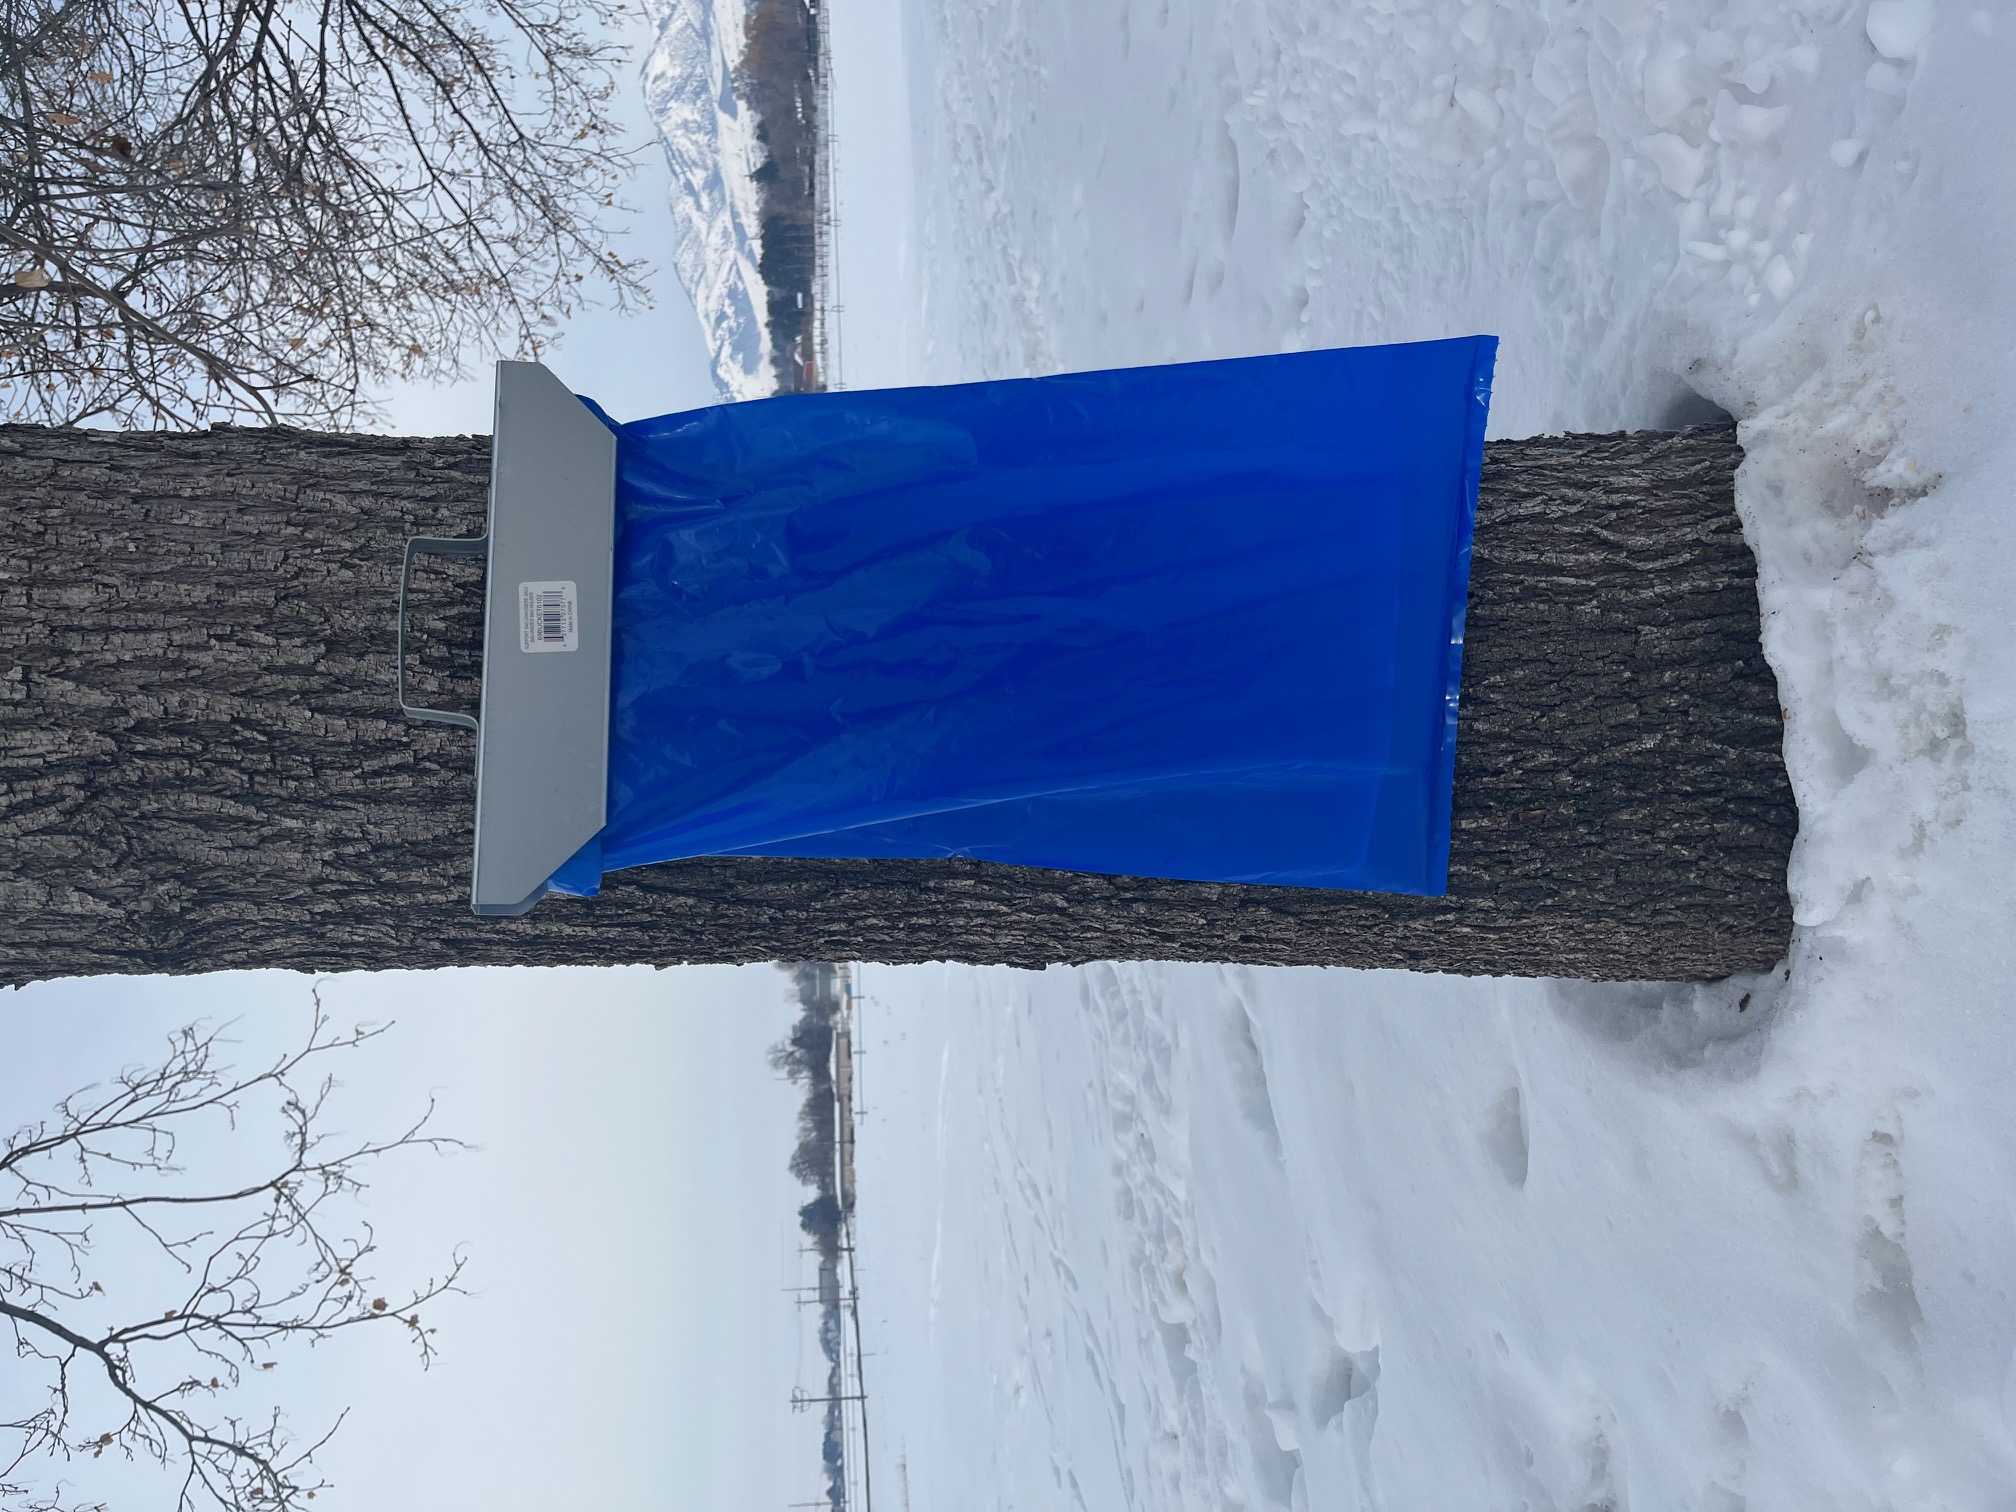
Figure 8. This bag style is a convenient way to collect sap and keep debris and pests out.
How to Tap: A Brief Overview
Now that you know which trees to tap and have favorable weather conditions, it’s time to get started.
- Decide where to tap. The south side of a tree will have higher sap flows in the beginning of the season, whereas the north side tends to run better later in the season. The key is to stagger your tapholes so you move around the trunk of the tree over time. Choose an undamaged spot on the trunk, at least 2 inches to the left or right and 10 inches vertically from prior years’ tapholes.
- Drill your hole directly into the tree, holding the trigger all the way while drilling in and while pulling the drill out. Using a 5/16-inch drill bit that is designed for drilling maple wood, drill approximately 1.5–2 inches into the trunk.
- Tap the spout into the hole. Don’t pound it in too deep, as this can potentially split the wood and cause lower sap yields. There are many different spout designs, from traditional metal spiles to plastic spouts with hose attachments.
- Attach your bucket, bag, or hose (Figures 9 and 10). Be sure that whatever you are using is clean, food grade, and covered to protect from debris or critters getting into your precious sap.
- Process or store your sap. Sap can be stored at low temperatures (38 ⁰F or lower), but it is recommended to process your sap as soon as possible to avoid bacteria growth.
Processing
Processing sap into syrup is a long process, as you need to evaporate approximately 98% of the water out of the sap. It takes 30–60 gallons of sap to make 1 gallon of syrup, depending on the sap’s initial sugar content. It is not recommended to process large amounts of sap indoors, as the humidity can damage your kitchen.
Other uses for maple sap include drinking plain or cooking with the sap. It can be used in place of water in any recipe and will add a bit of natural sweetness. Maple water may have health benefits as a post-workout beverage due to the electrolyte content (Cleveland Clinic, 2021; Matias et al., 2019).
This article does not provide specific directions for making maple syrup. See the USU Extension fact sheets by Mathews et al., Maple Sap Collection and Sap Processing Systems by Mathews et al., and the resources at the end of the article for more information.
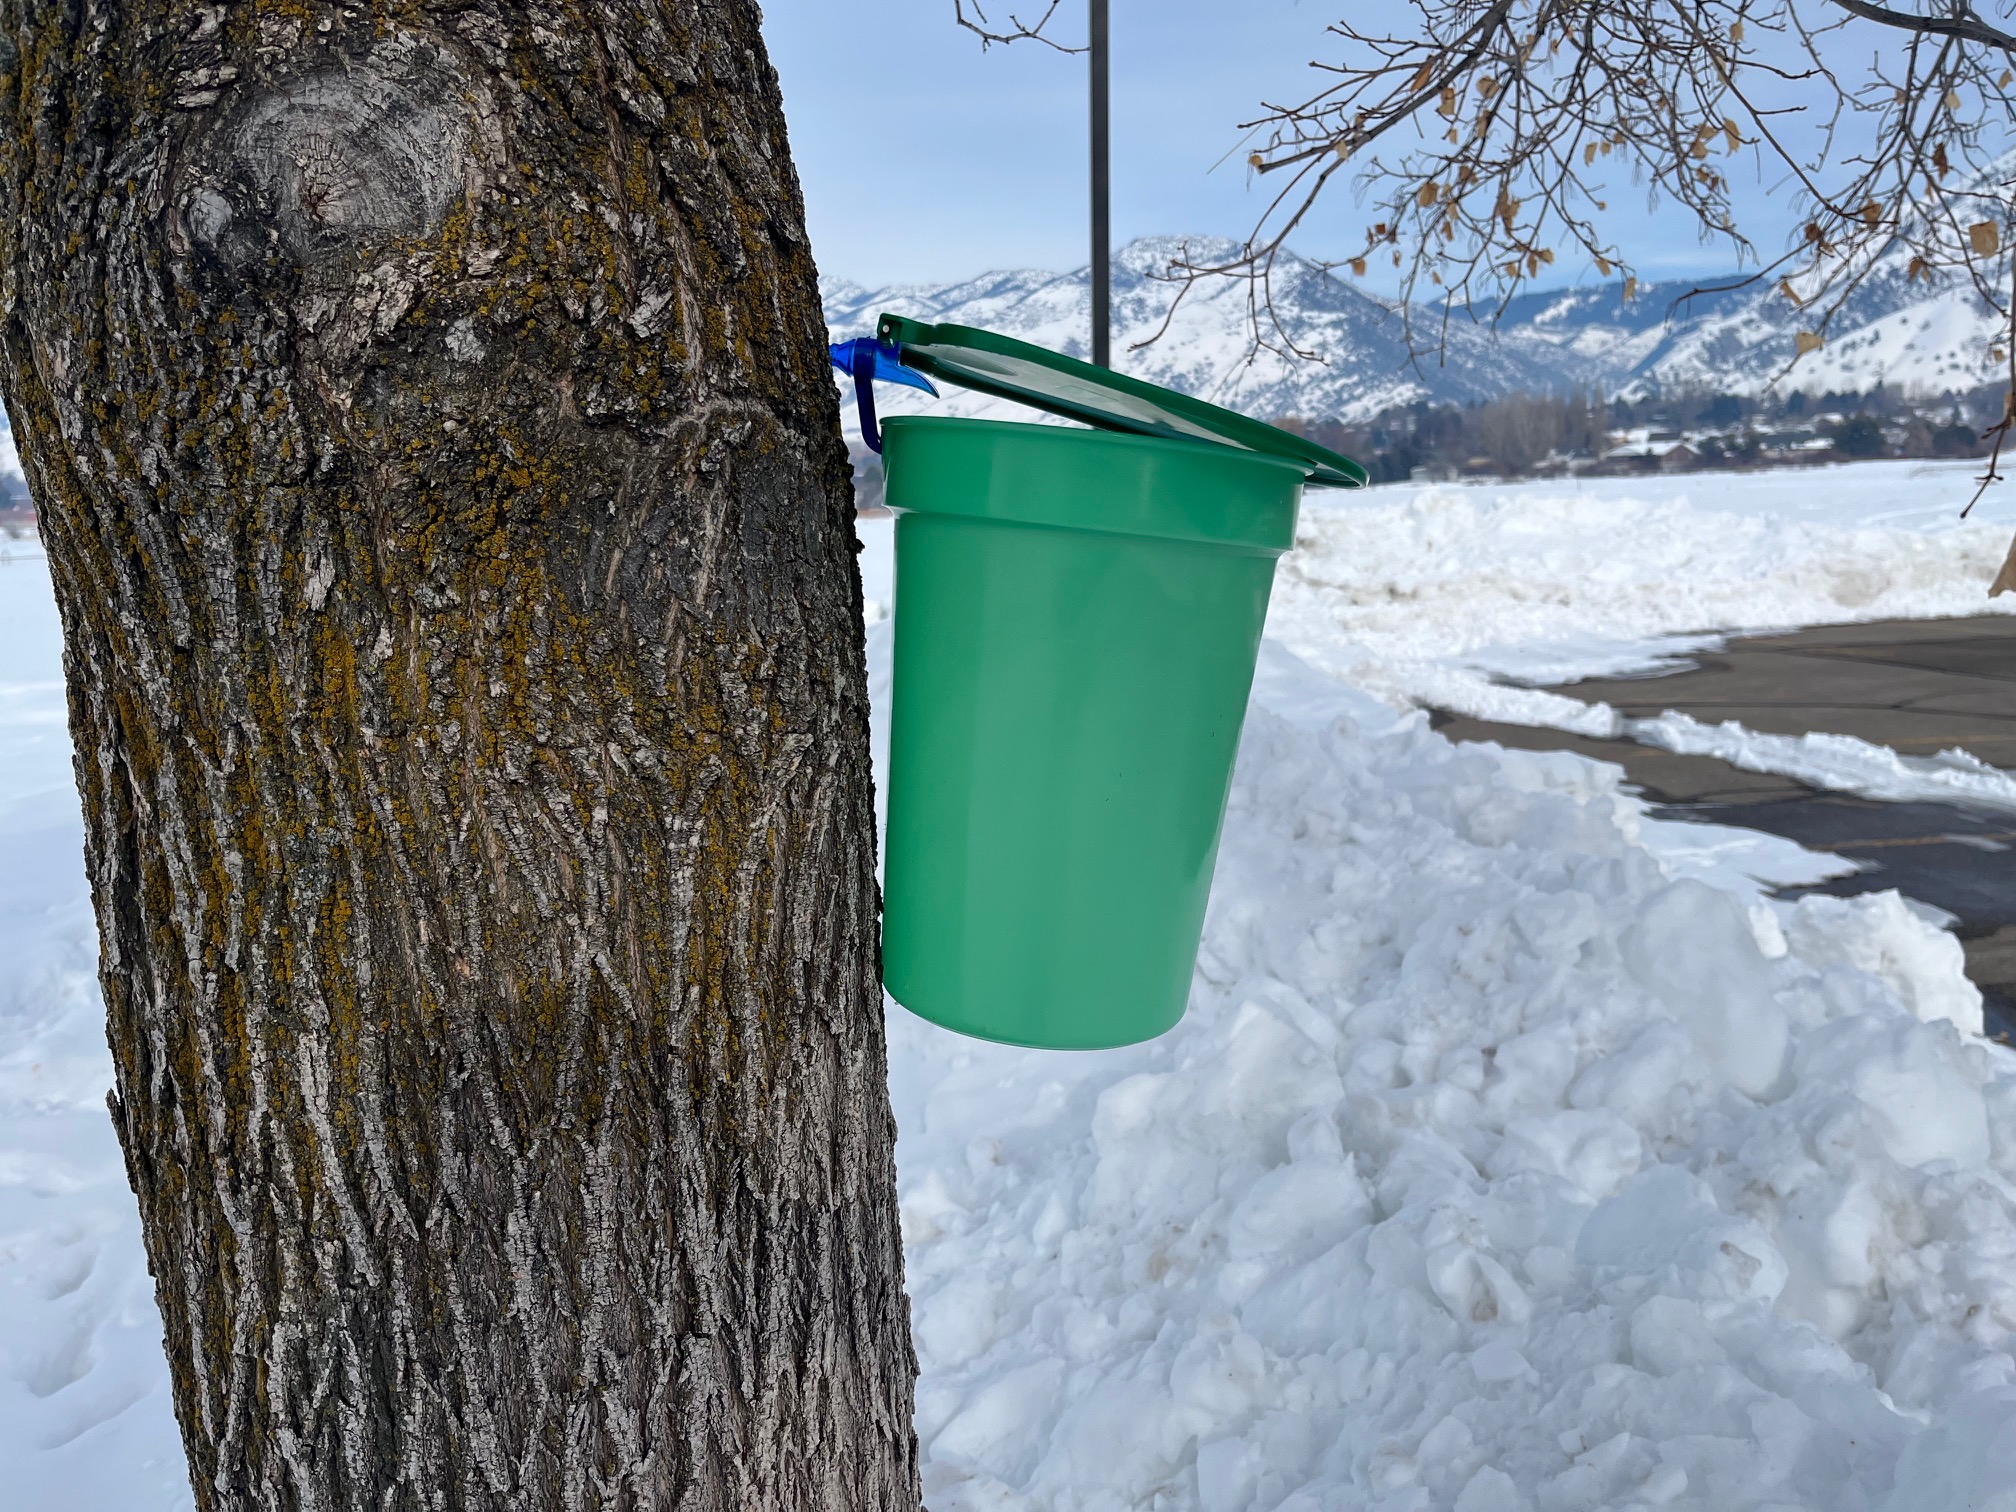
Figure 9. A bucket with a lid ready to collect sap.
Resources and References
Maple Tree Identification
When to Tap
- Snyder, M. (2011, spring). When is the best time for sugarmakers to tap their maples trees? Northern Woodlands. https://northernwoodlands.org/articles/article/when-is-the-best-time-for-sugarmakers-to-tap-their-maple-trees
How-to Guides
Utah-Specific
- USU Extension. (2022). Tapping trees for syrup in the West [Video]. YouTube. https://www.youtube.com/watch?v=4n3Hg9TzTxs
- USU Extension. (2022). Introduction to harvesting maple syrup in Utah [Video]. YouTube. https://www.youtube.com/watch?v=HhOhwEoCST4
Other Guides
- Black, J. (n.d.). Measuring tree volume with a Biltmore stick [Fact sheet]. USU Extension. https://extension.usu.edu/forestry/rural-forests/forest-management/measuring-stick
- PennState Extension. (n.d.). Maple syrup. https://extension.psu.edu/maple-syrup-production-for-the-beginner
- This Inspired Life. (2023). Why and how you should tap that maple tree in your yard. https://thisinspired.life/how-to-tap-maple-tree-in-your-yard/
Processing
- Inspired Life. (2023). Small batch maple syrup making. https://thisinspired.life/small-batch-maple-syrup-making-guide/
- Mathews, J., Sun, Y., Kopp, K., McAvoy, D., Price, S., Harris, P., Farrell, M., Sagers, M., & Kelly, P. (2023). Producing maple syrup from boxelder and Norway maple trees [Fact sheet]. Utah State University Extension. https://digitalcommons.usu.edu/extension_curall/2338/
- Roberge, S. (2013). Maple sugaring: Tips for beginners and backyard maple sugar producers [Fact sheet]. University of New Hampshire Cooperative Extension. https://extension.unh.edu/resource/maple-sugaring-tips-beginners-and-backyard-maple-sugar-producers
- Tap My Trees. (2019). Collect sap & make syrup. https://tapmytrees.com/collect-sap-make-syrup/
- Mathews, J., Sun, Y., Price, S., McAvoy, D., Farrell, M., Harris, P., & Kopp, K. (2023). Maple sap collection and sap processing systems [Fact sheet]. Utah State University Extension. https://digitalcommons.usu.edu/extension_curall/2362/
Maple Water
- Cleveland Clinic. (2021, October 29). What is maple water and should you be drinking it? https://health.clevelandclinic.org/benefits-of-maple-water/
- Matias, A., Dudar, M., Kauzlaric, J., Frederick, K. A., Fitzpatrick, S. & Ives, S., J. (2019, February 11). Rehydrating efficacy of maple water after exercise-induced dehydration. Journal of the International Society of Sports Nutrition, 16(5). https://jissn.biomedcentral.com/articles/10.1186/s12970-019-0273-z
Sap Flow Mechanics
- Tyree, M. (n.d.). Maple sap exudation: How it happens. Maple Syrup Journal, 4(1), 10-11. https://www.uvm.edu/~uvmaple/maplesapexudation.pdf
- Wilmot, T. (2009, March 1). Maples under pressure. Farming, The Journal of Northeast Agriculture. https://mapleresearch.org/pub/wilmot_underpressure-2/
Cautionary Tale
- NEAT Bristol, & Kuhns, B. (2012, March 3). mp4. [Video]. YouTube https://www.youtube.com/watch?v=EqreE_O6mBU&t=14s
Disclaimers and Acknowledgments
Special thanks to the following organizations and individuals for their collaboration and assistance in the creation of this article.
- Stoke’s Nature Center, Logan, Utah
- Youping Sun, Utah State University
- Michael Farrell, The Forest Farmers, LLC
- Patrick Kelly, Stokes Nature Center
- Steven Price, Utah State University
Images are by USU Forestry Extension and Darren McAvoy unless otherwise noted.
In its programs and activities, including in admissions and employment, Utah State University does not discriminate or tolerate discrimination, including harassment, based on race, color, religion, sex, national origin, age, genetic information, sexual orientation, gender identity or expression, disability, status as a protected veteran, or any other status protected by University policy, Title IX, or any other federal, state, or local law.
The following individuals have been designated to handle inquiries regarding the application of Title IX and its implementing regulations and/or USU’s non-discrimination policies: Executive Director of the Office of Equity, Matt Pinner, JD, matthew.pinner@usu.edu, Title IX Coordinator, Hilary Renshaw, hilary.renshaw@usu.edu, Old Main Rm. 161, 435-797-1266. For further information regarding non-discrimination, please visit equity.usu.edu, or contact: U.S. Department of Education, Office of Assistant Secretary for Civil Rights, 800-421-3481, ocr@ed.gov or U.S. Department of Education, Denver Regional Office, 303-844-5695 ocr.denver@ed.gov. Issued in furtherance of Cooperative Extension work, acts of May 8 and June 30, 1914, in cooperation with the U.S. Department of Agriculture, Kenneth L. White, Vice President for Extension and Agriculture, Utah State University.
October 2023
Utah State University Extension
Peer Reviewed Fact Sheet
![]()
![]()