017 - Planting Landscape Trees
Introduction
Trees and shrubs are valuable additions to most property, providing beauty, wind protection, shade, wildlife habitat, visual screening, and other benefits. Unfortunately, many landscape trees are not properly planted or cared-for. Here we describe up-to-date, research-proven techniques for planting landscape trees and for post-planting care. We assume you know what species and cultivar you want to plant.
Season to Plant
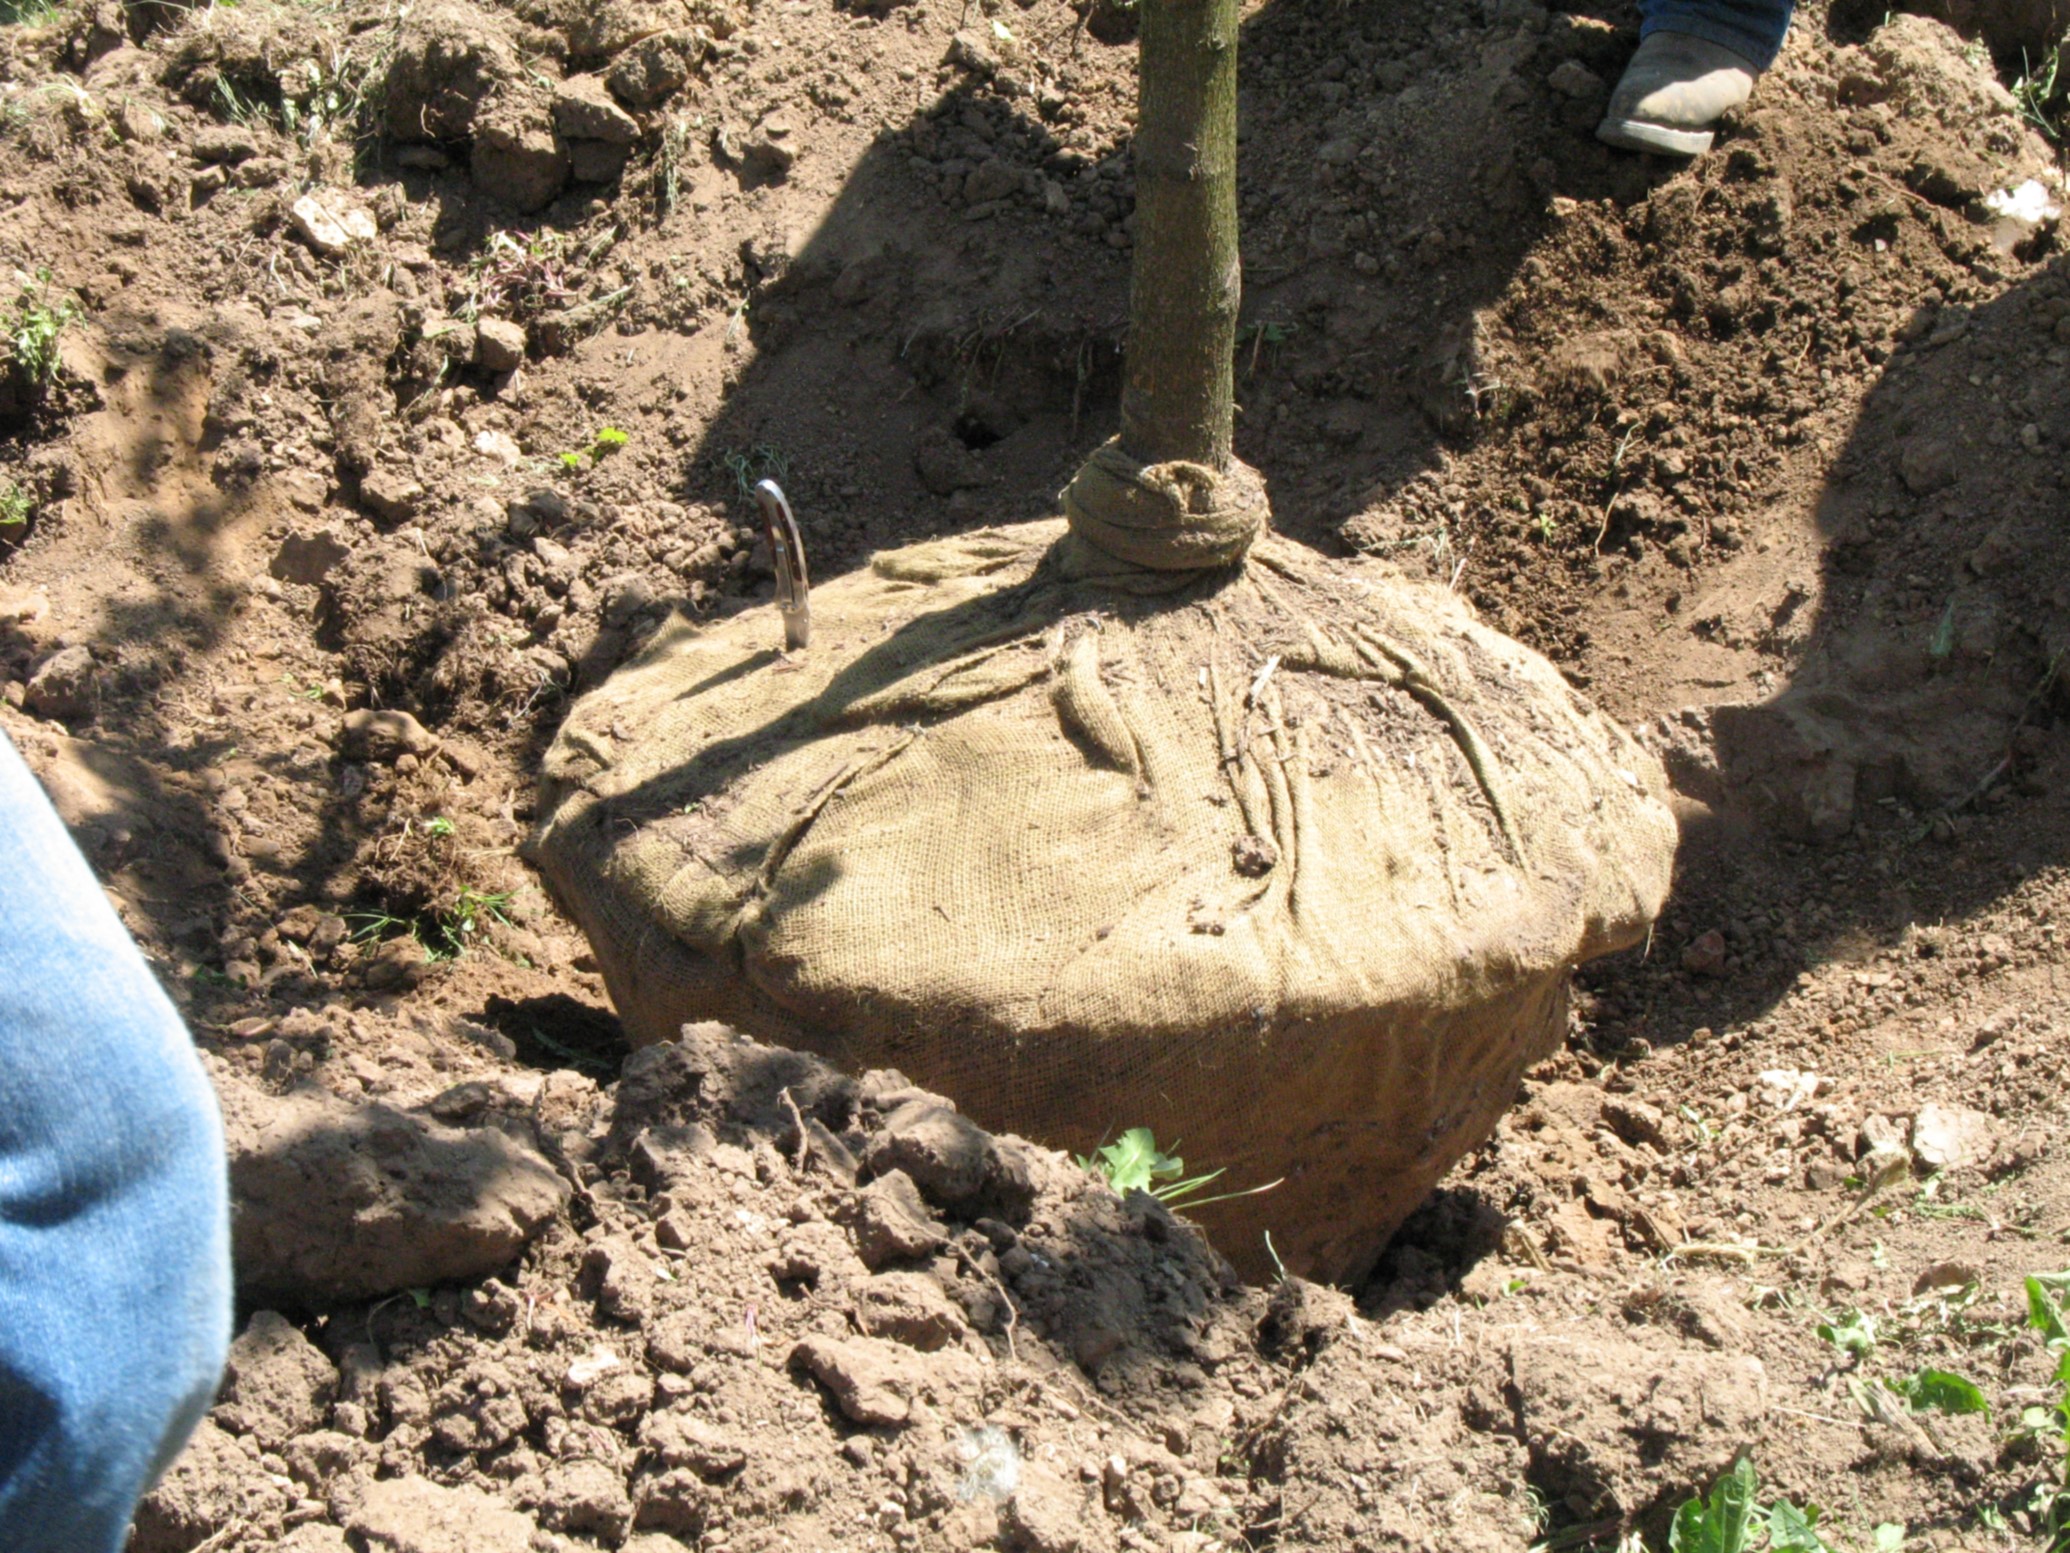
B&B tree before burlap removal
Trees are best planted when they are still dormant with tight, unopened buds in the early to mid-spring after the soil has thawed. Cool temperatures and good soil moisture in the spring help trees get established. Fall planting also works well for many species, though watering is critical if the fall is dry. Summer planting of B&B and container plants can be successful, though hot temperatures, dry conditions, and non-dormant trees makes good care especially important and survival less sure. Bare root trees should only be planted in spring while still dormant.
Tree Types
Landscape trees and shrubs can be obtained in four basic types: balled and burlapped, container/potted, bare-root, and tree-spaded. Each type has advantages and disadvantages and none is ideal for all situations. With all four types be sure that you have an adequate root system – a good rule-of-thumb is that the root system, root ball, or container diameter or spread should be 10 inches to 12 inches for every inch of stem caliper (diameter at ground-line just above any basal swell). Therefore, a 3 inch caliper tree should have a 30 inch to 36 inch wide root ball as a minimum. Root ball depth is not as critical as width but should be larger for larger trees.
Balled and Burlapped
Balled and burlapped (B&B) plants are dug from the nursery with a ball of soil around their roots. The root ball is tightly wrapped with burlap held in place with twine, nails, and possibly a wire basket. Both fine and coarse roots are contained in the root ball so transplant shock is reduced. Rough handling, though, breaks roots, so handle these trees with care. B&B plants are much more expensive than bare-root trees and are much heavier, but generally survive better. Tilling the soil just outside the root ball 8 to 12 inches deep and several feet wide right after planting is one way to ensure good root growth.
Container/Potted
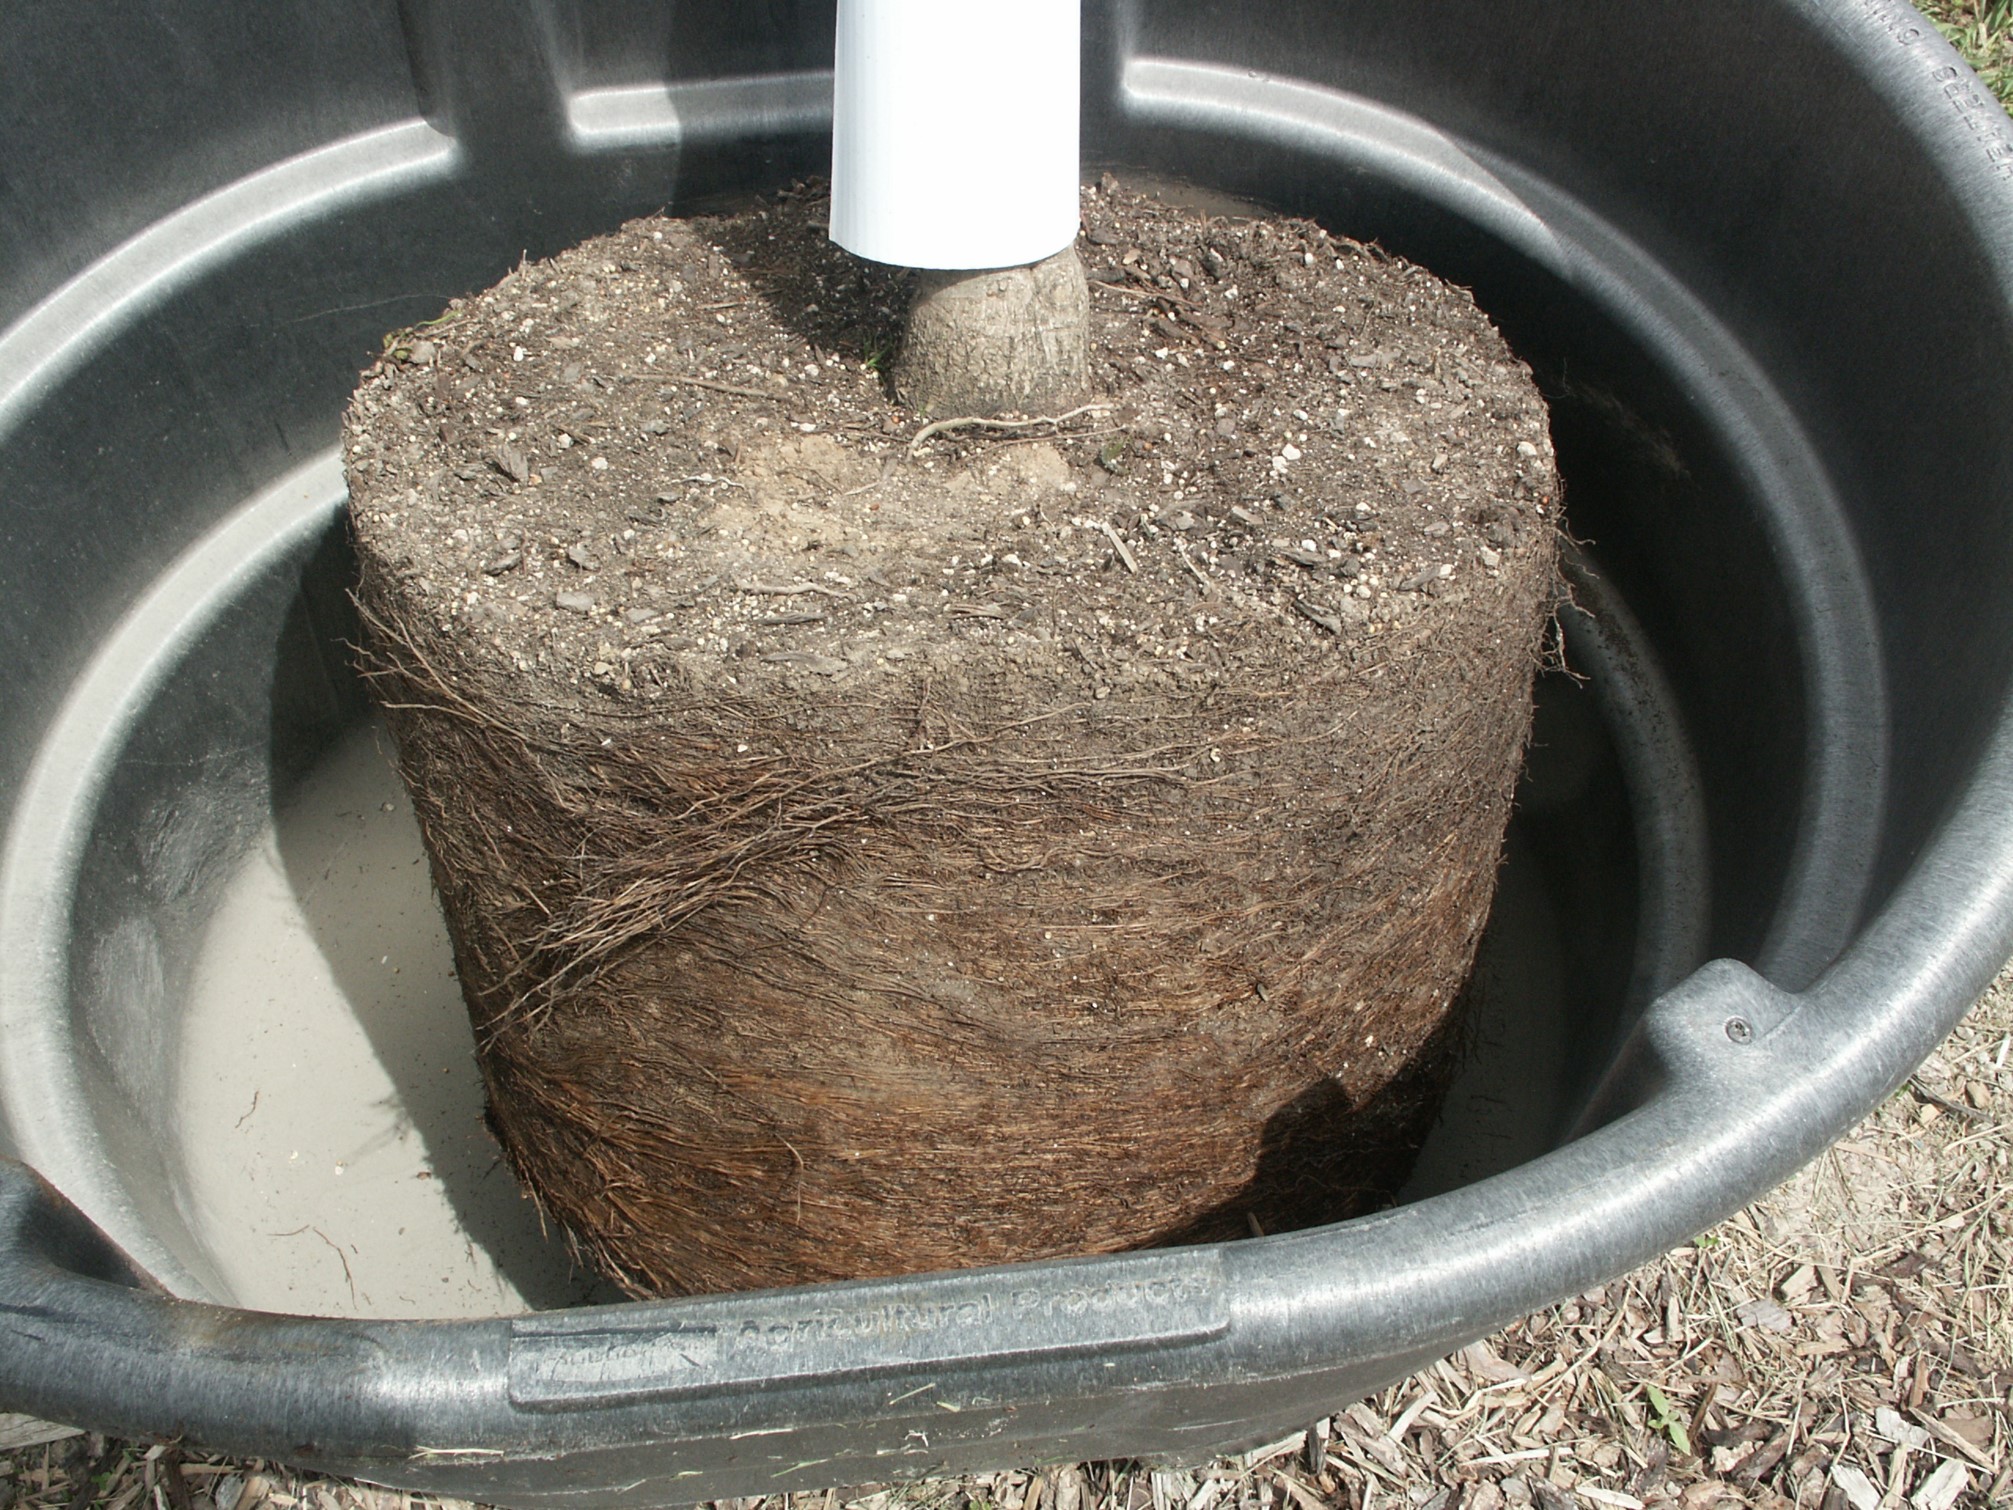
Root-bound potted tree after pot removal
Trees are sometimes grown and sold in pots for convenience and to avoid root loss during transplanting. Containers are made in a variety of materials (plastic, compressed peat, etc.) and sizes. Container-grown trees are normally more expensive and heavier than bare-root but less than B&B. Pots can cause roots to circle which may cause girdling roots later in a tree’s life. Such roots should be cut or straightened at planting time, but this can be very difficult. Container trees should be well-rooted without being root-bound. Sometimes bare-root trees are placed in a pot but are not wellrooted when you buy them; these trees generally are less expensive than established trees.
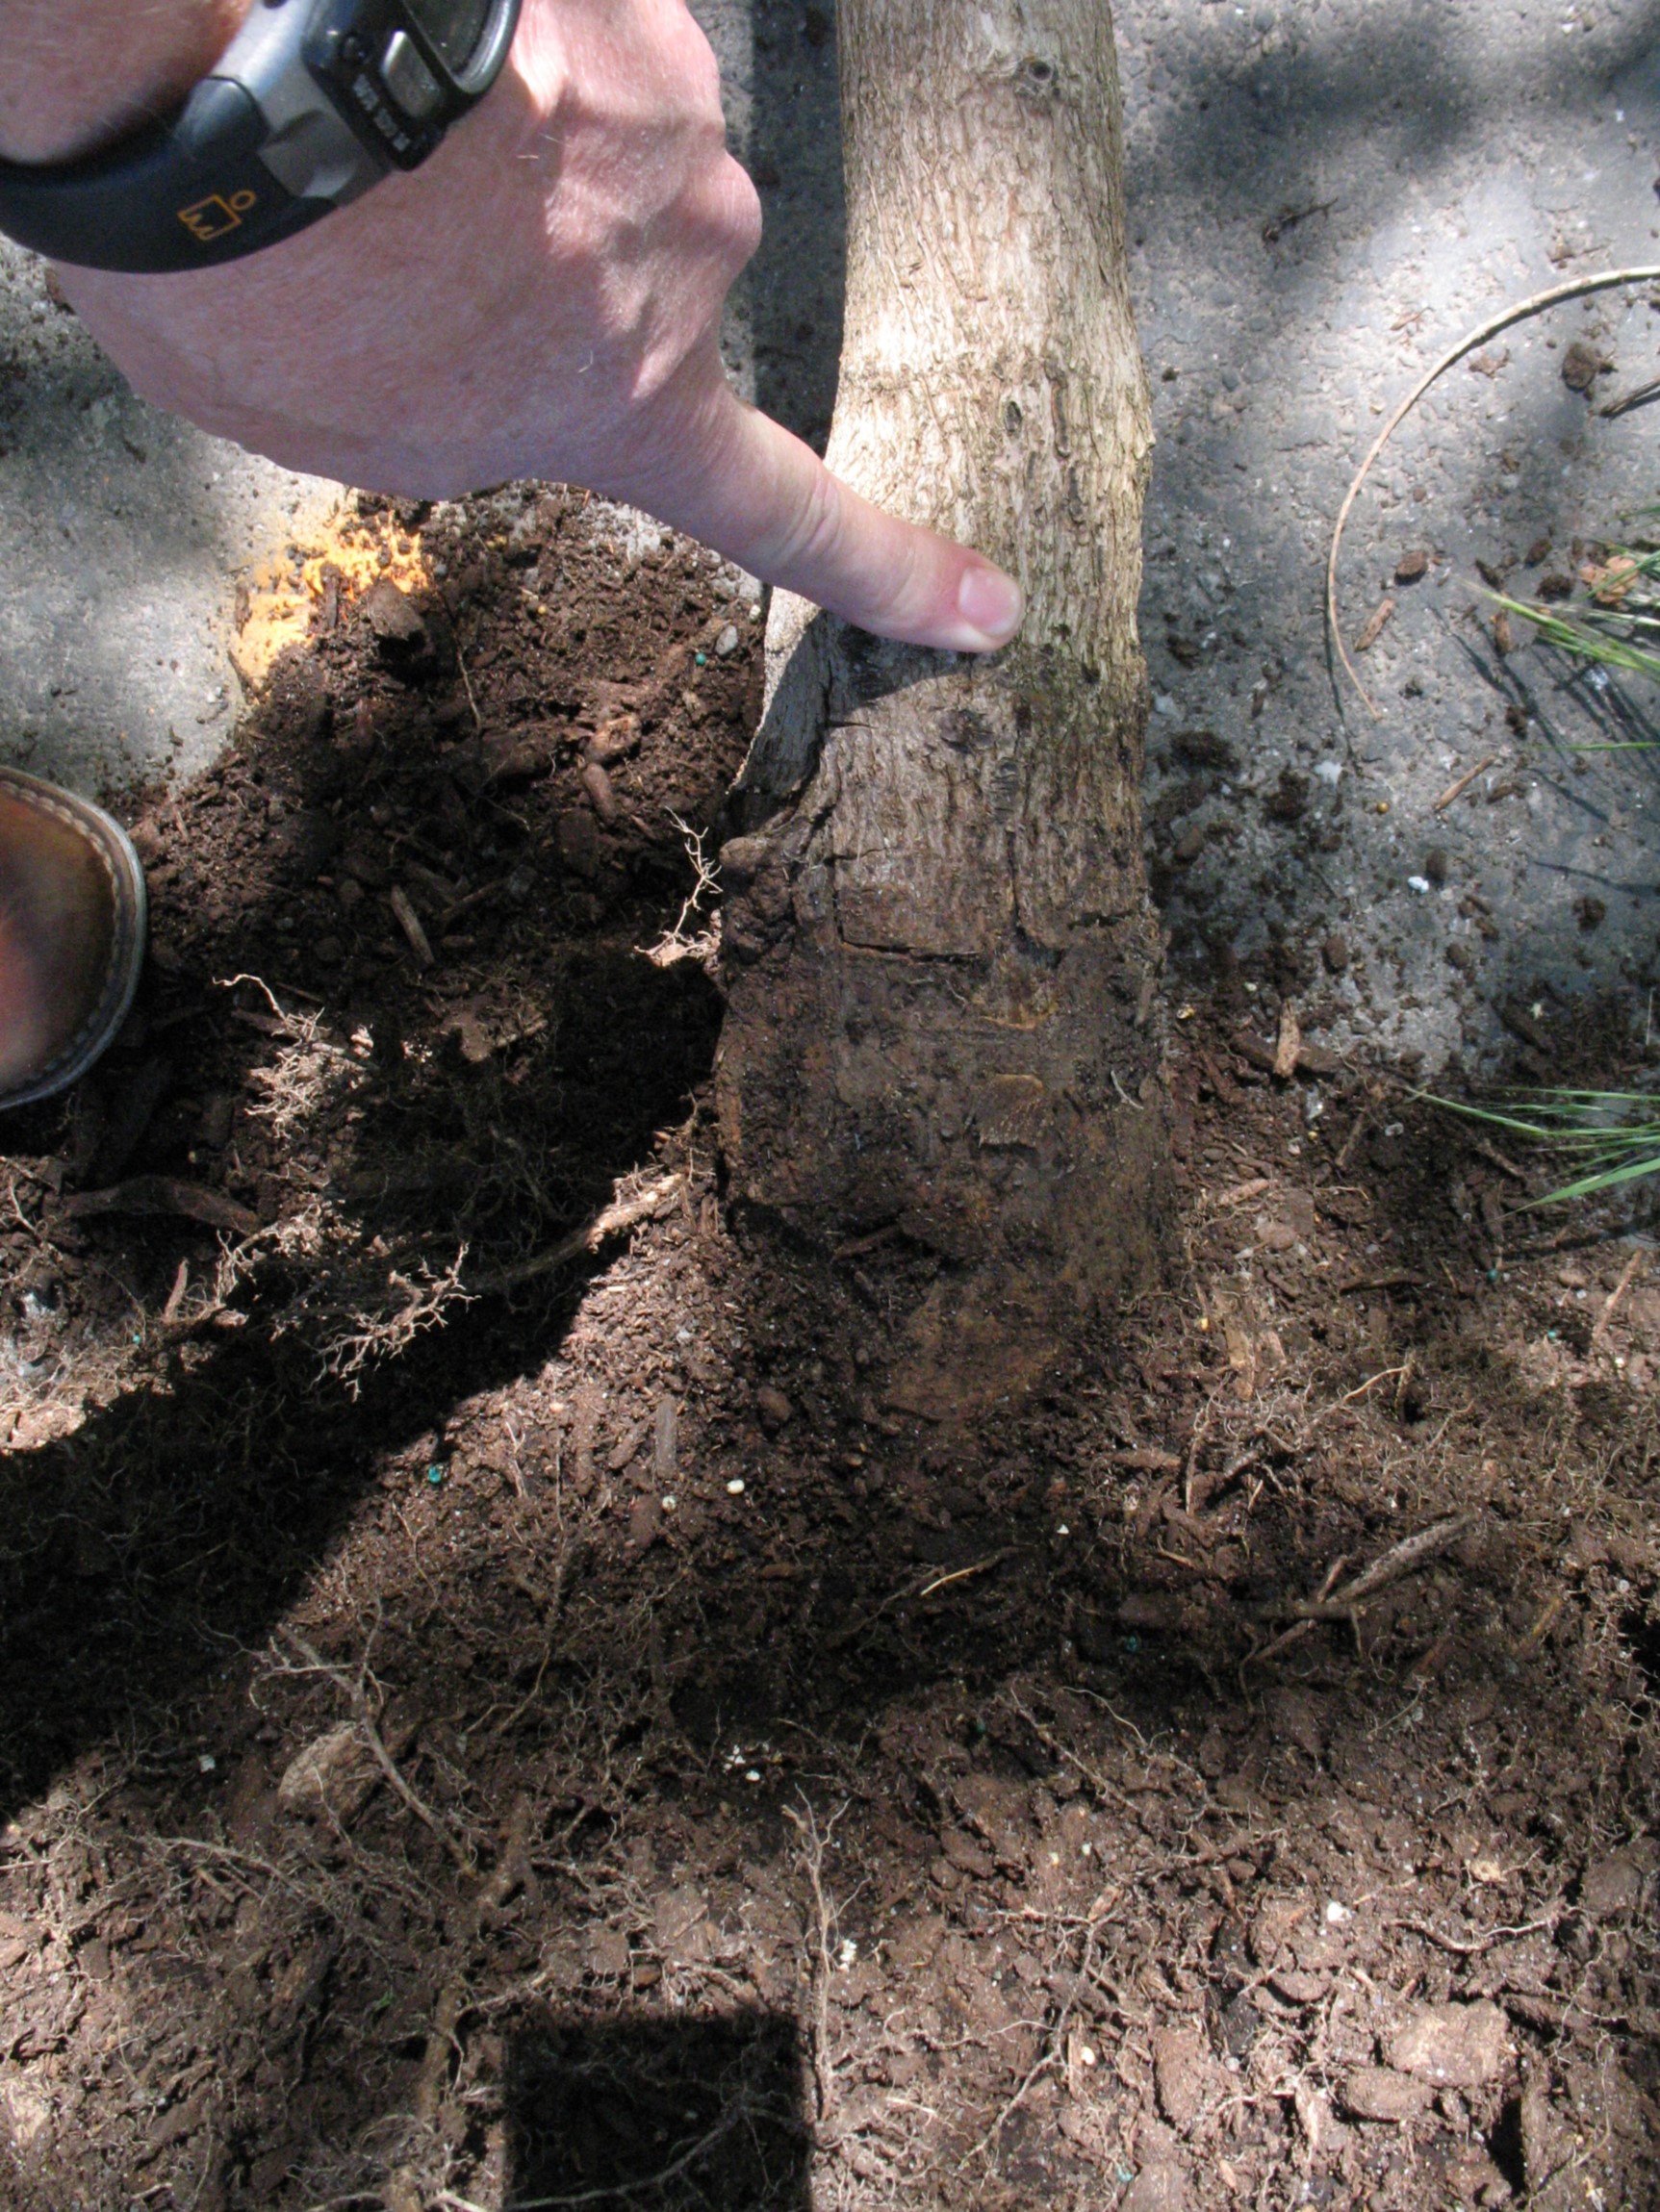
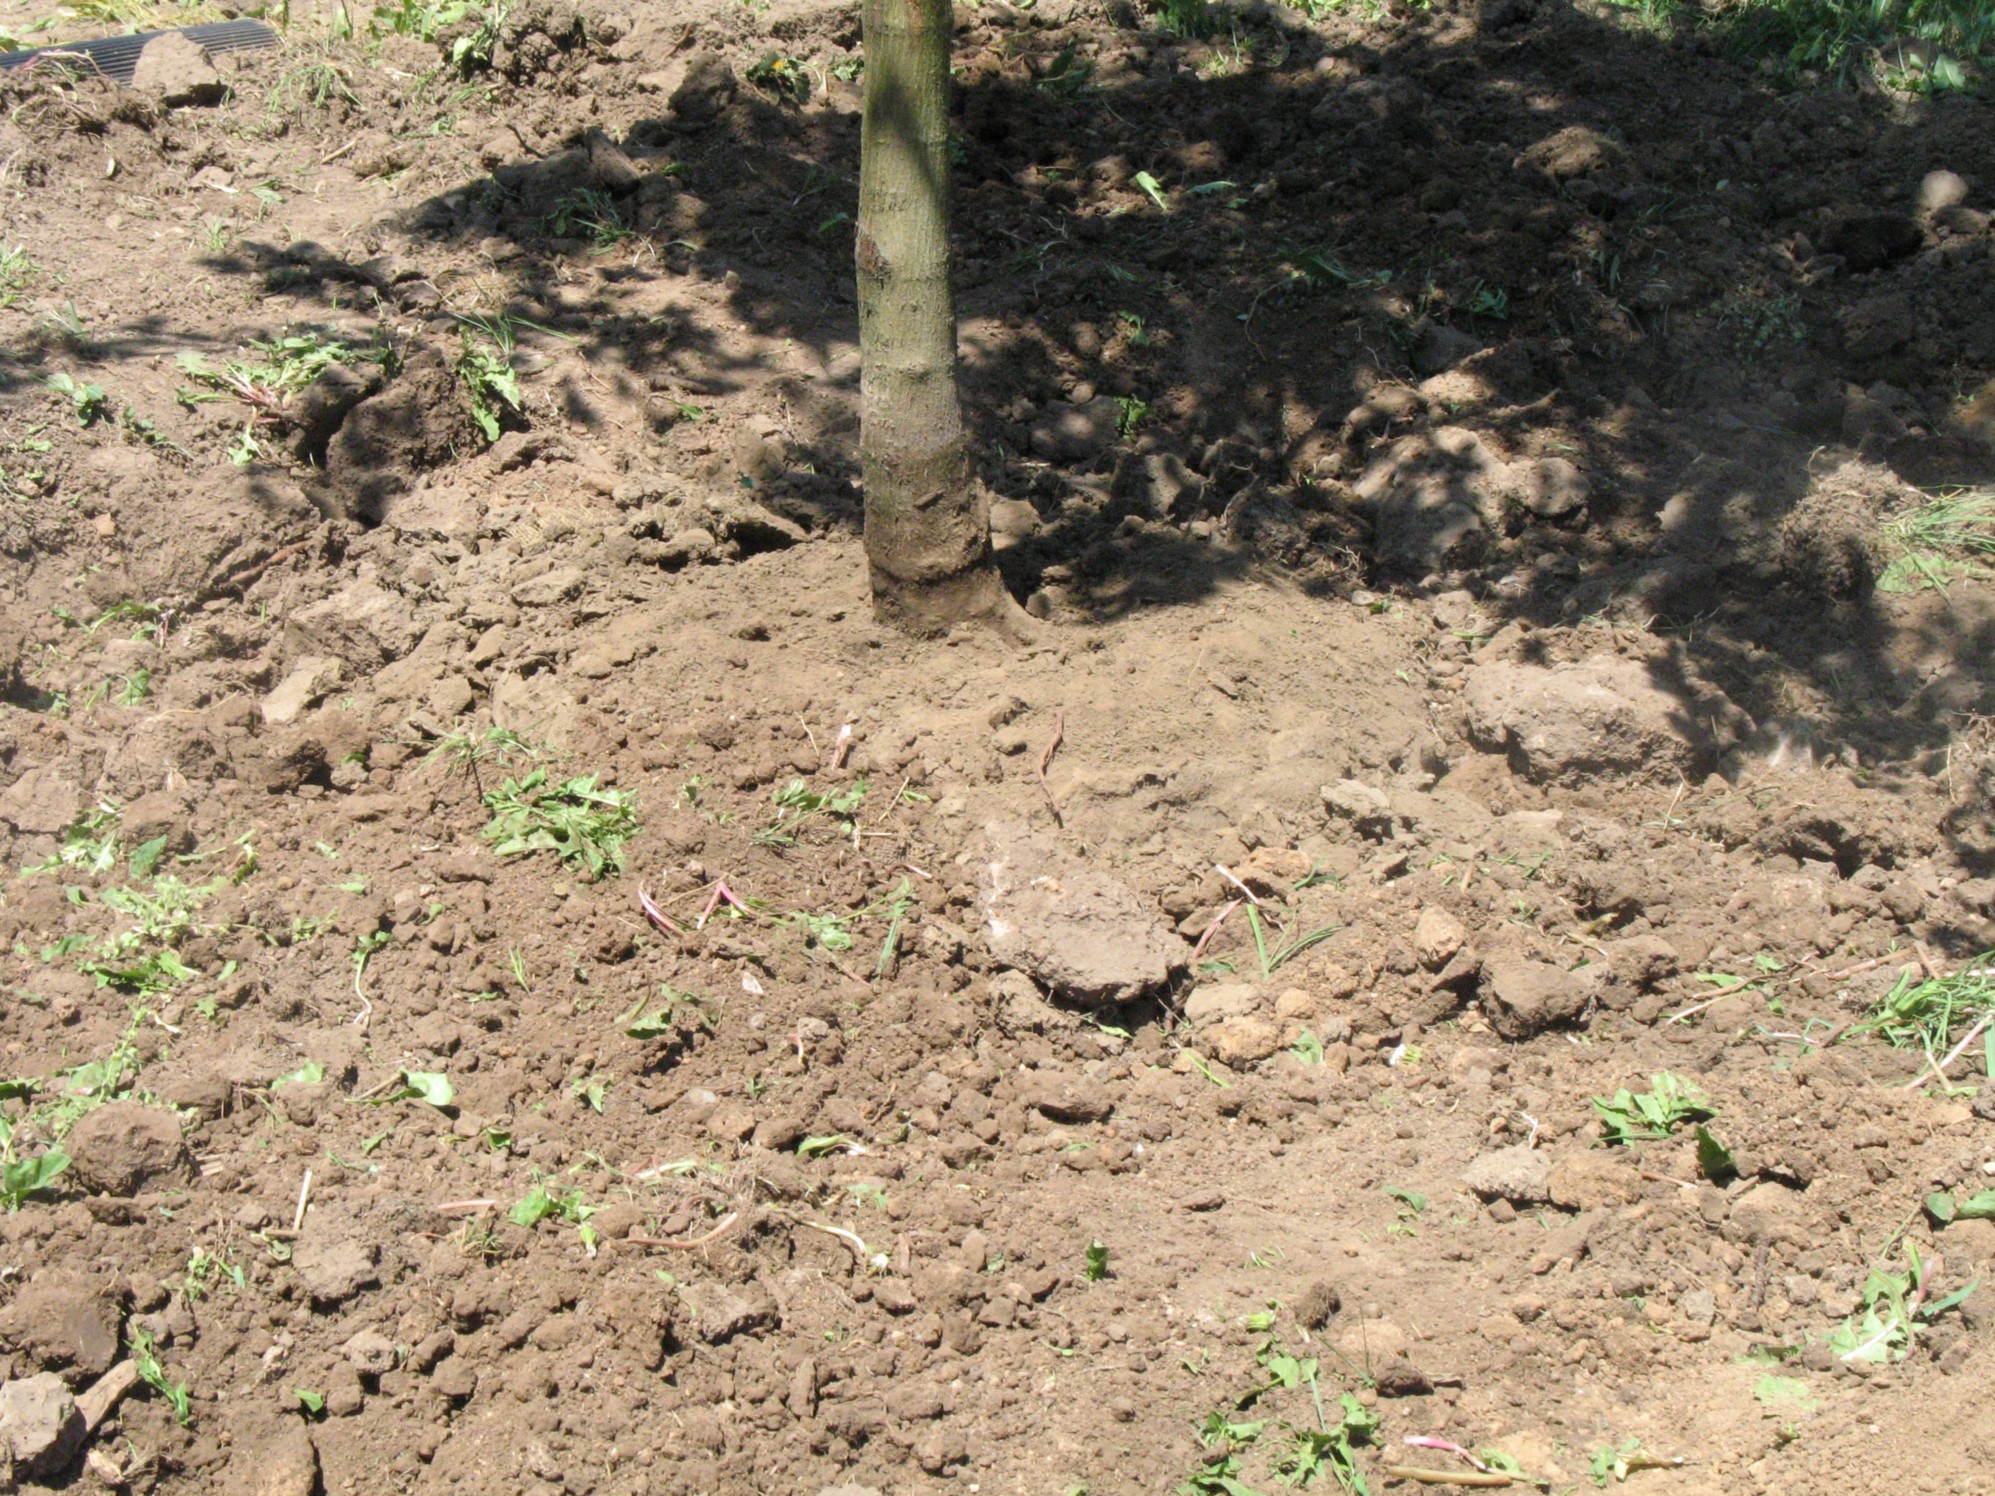
Root Collar Depth – The root collar is the point on a tree’s trunk where the root system starts, just above where the flare roots go out horizontally from the trunk (shown by the index finger in the picture below). The original nursery soil depth should have been at or just above the root collar. However, most potted and B&B trees in nurseries, because of current production methods, have root collars buried deeper in the soil. Therefore, if you plant the tree with the top of its root ball or potting soil level with your landscape soil surface, the root collar will end up too deep. This can cause the buried trunk to decay and makes the formation of girdling roots more likely as the tree grows. The remedy is to find the root collar and remove excess soil that has been placed on top of the root ball, then plant at the root collar depth. Much of the root system is lost with very deep root collars (collars buried more than 1/3 the depth of the root ball), so consider returning such trees to the nursery.
Bare-root
Bare-root plants are dug from a nursery with no soil around the roots. Though bare-root seedlings may have fairly complete root systems, larger plants usually only have a few coarse, woody roots. These plants have the advantages of being inexpensive and light weight. However, extra care must be taken to keep their exposed roots moist. They also may be difficult to find and generally are only available in the spring before bud burst. Bare-root deciduous trees should have a caliper smaller than 2 inches and bare-root evergreens should be very small (less than 2 feet tall). Bare-root trees should be dormant and therefore early spring planting is best.
Tree-spaded
B&B tree after exposing buried root collar
A tree spade, a large machine that cuts roots and soil so the root ball can be wrapped, is often used to dig B&B trees in the nursery. Some landscapers also move trees to the site and transplant them into a previously dug hole with a tree spade. These trees can be treated similarly to B&B trees, but be sure that the gap between the root ball and the hole is closed so roots can grow out. Tilling around the root ball, as mentioned previously, is a good way to ensure good contact between the root ball and soil.
Planting the Tree
Digging the Hole
Dig your planting hole much wider than the root ball with sloping sides, since most of the tree roots grow horizontally and stay fairly shallow. A hole at least 2-3 times the root ball width is best. The hole should be just deep enough so the bottom of the root ball will be placed on undisturbed soil and the root collar will be at or above the level of the surrounding soil. Do not loosen the soil in the bottom of the hole since this lets the heavy root ball settle and sink, causing the tree to end up too deep. If the sides of the hole become glazed and smooth during digging growing root tips may not penetrate. Roughen the glazed surfaces and open up the soil’s pores and cracks by picking at the soil with the tip of the spade.
Placing the Tree
Place the tree in the bottom of the hole on undisturbed soil with its stem vertical. Handle the tree by its root ball or container to avoid trunk damage. Never drop the tree or you will loosen the root ball and break roots. Make sure that the root collar is at or above the surrounding soil grade. Bare-root trees should be placed with their root collar positioned as mentioned above with their root system spread out in the flat-bottomed hole or over a shallow mound in the bottom of the hole. Do not bend or kink roots to make them fit. If roots are too long for the hole dig it wider or, as a last resort, cut off some root length with sharp pruners. Also cleanly cut any crushed, torn, or otherwise damaged roots.
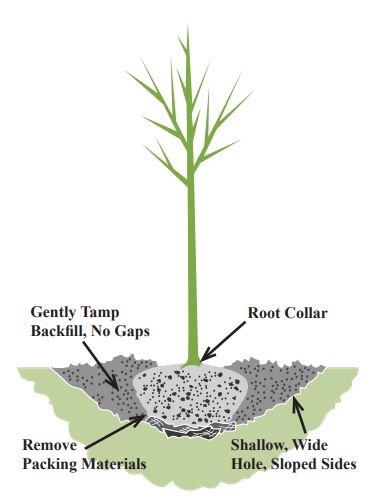
Removing Packing Materials
Twine surrounding the trunk or root collar should be removed, as well as other packing materials like wire baskets, burlap, and pots. Roots must quickly grow from the root ball into the surrounding soil for the tree to do well, and burlap and pots get in the way of this growth. Treated burlap can even constrict roots later in life as they grow in diameter. If the root ball is broken and loose remove packing materials carefully to keep the root ball together. Backfilling as you remove packing materials helps keep the root ball intact. Any burlap or potting material that must be left on should be slit in several places to allow roots to grow through. It is less important but still good to remove packing materials left underneath the root ball. Cleanly cut any circling or damaged roots that are exposed at this point to promote good root growth.
Trunk wounds caused by root collar burial
Proper planting depth with root collar at surface
Backfilling
Fill the hole with the original soil – this is the soil the tree must ultimately grow its roots into in order to survive. Large rocks can be removed, and up to 25% by volume of composted organic matter can be mixed in with the backfill soil if it has a very high clay content and is difficult to work, However, in such cases till the soil just outside the root ball 8 to 12 inches deep and several feet wide after planting to ensure good root growth. Otherwise use no other soil additions or amendments.
Break up large clods as you backfill and pack the soil occasionally to remove air pockets. Pack the soil with your hand or lightly with your foot to avoid over-compaction. Keep the tree vertical and its root collar at the right level as you backfill. Add and pack the soil until it is even with the surrounding soil level and the root collar. If you are purposely planting the tree shallow, mound the soil up to the root collar (bare-root) or to cover the sides of the root ball. No roots should be exposed when backfilling is complete and no soil should be put on top of existing root balls. Water well immediately after backfilling to help settle the soil and remove air pockets. Place additional soil where settling occurs but no packing should be done after the soil is wet.
Planting with Poor Drainage/Compaction
Poor drainage should be improved if possible by grading or installing drain tiles (perforated pipes) to carry water away. On flat sites or where drainage or compaction problems are less severe, trees can be planted shallow, with one-third or more of the root ball above grade and backfill soil mounded to cover the root system. Trees can even be placed on top of the existing, problem soil with their roots surrounded by a mound or berm. Such trees may do well but also may have a fairly small root system and will need more care and attention than trees on better sites.
Follow-up Maintenance
Watering
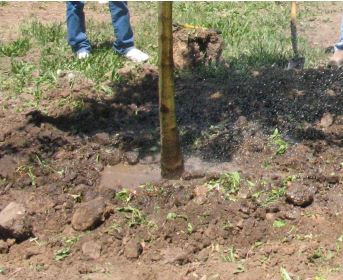
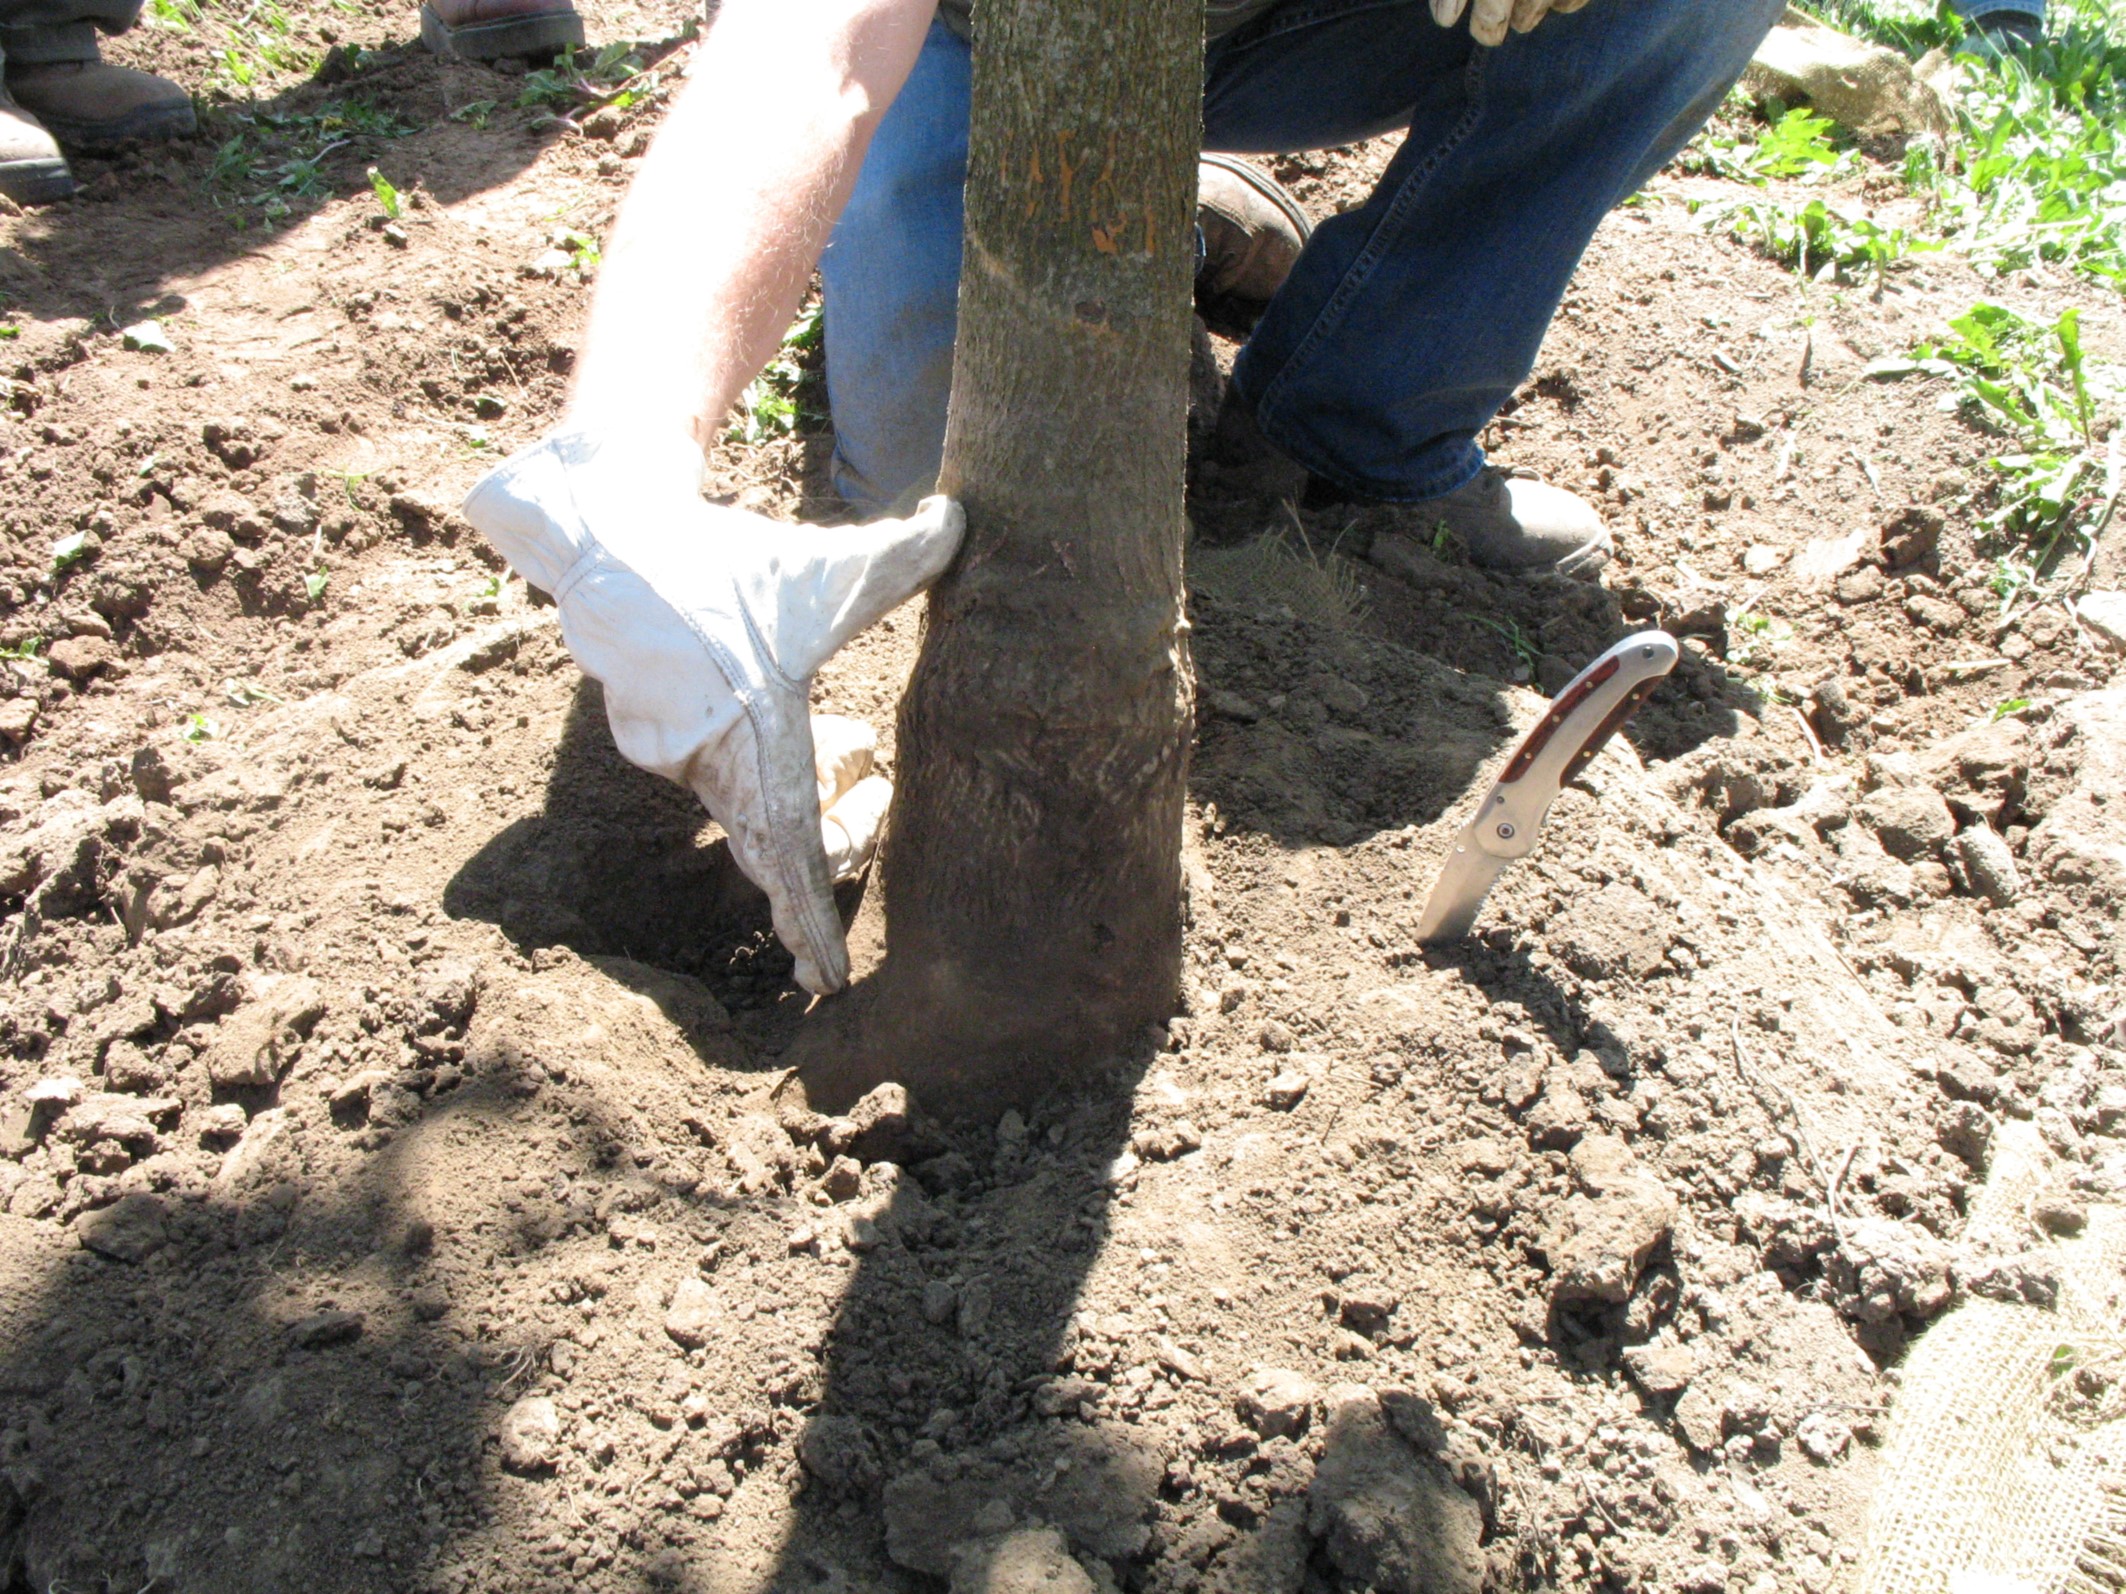
Water thoroughly at planting time
Up to 95% of a tree’s roots are cut off during transplanting, greatly decreasing its ability to take up water. Water, therefore, is a tree’s greatest need at planting time and for a year or two after transplanting until a good root system is established. Thoroughly water newly planted trees, applying the water with a hose or bucket to the entire planting area and letting it soak in well. Fill any holes that open due to soil settling but do not pack wet soil.
Watering needs after planting depend on weather, drainage, soil type, planting season, and tree species. Though water should be applied to the original planting area and root ball, it should also be applied to the soil surrounding the original hole so roots can grow out. Apply water often enough so the soil near the tree at least a foot below the surface is moist and will form a ball when squeezed. If it crumbles it is too dry. Water will be needed every two to four days as the tree is getting established in its first summer.
It is possible to over-water trees, especially in poorly drained soils. Do not water so often or so deeply that root systems become waterlogged. Older, established trees can withstand some soil drying around their root systems, but all landscape trees should be watered regularly during periods of severe drought.
Fertilizing and Soil Amendments
No fertilizers of any kind should be used at planting time since they have not been shown to increase root growth and may cause the crown to outgrow the roots. No hormones, extracts, vitamins or other such formulas have been shown to stimulate root growth or help tree establishment. Mycorrhizae (fungi that grow on plant roots and help growth and nutrition) are commercially available, but trees generally come from the nursery with the fungi already on their roots, so additions to the soil are not needed. Fertilizing should only be done after the tree has recovered from transplanting, and then only if needed. This recovery can take two or three years; longer with larger trees.
Mulching
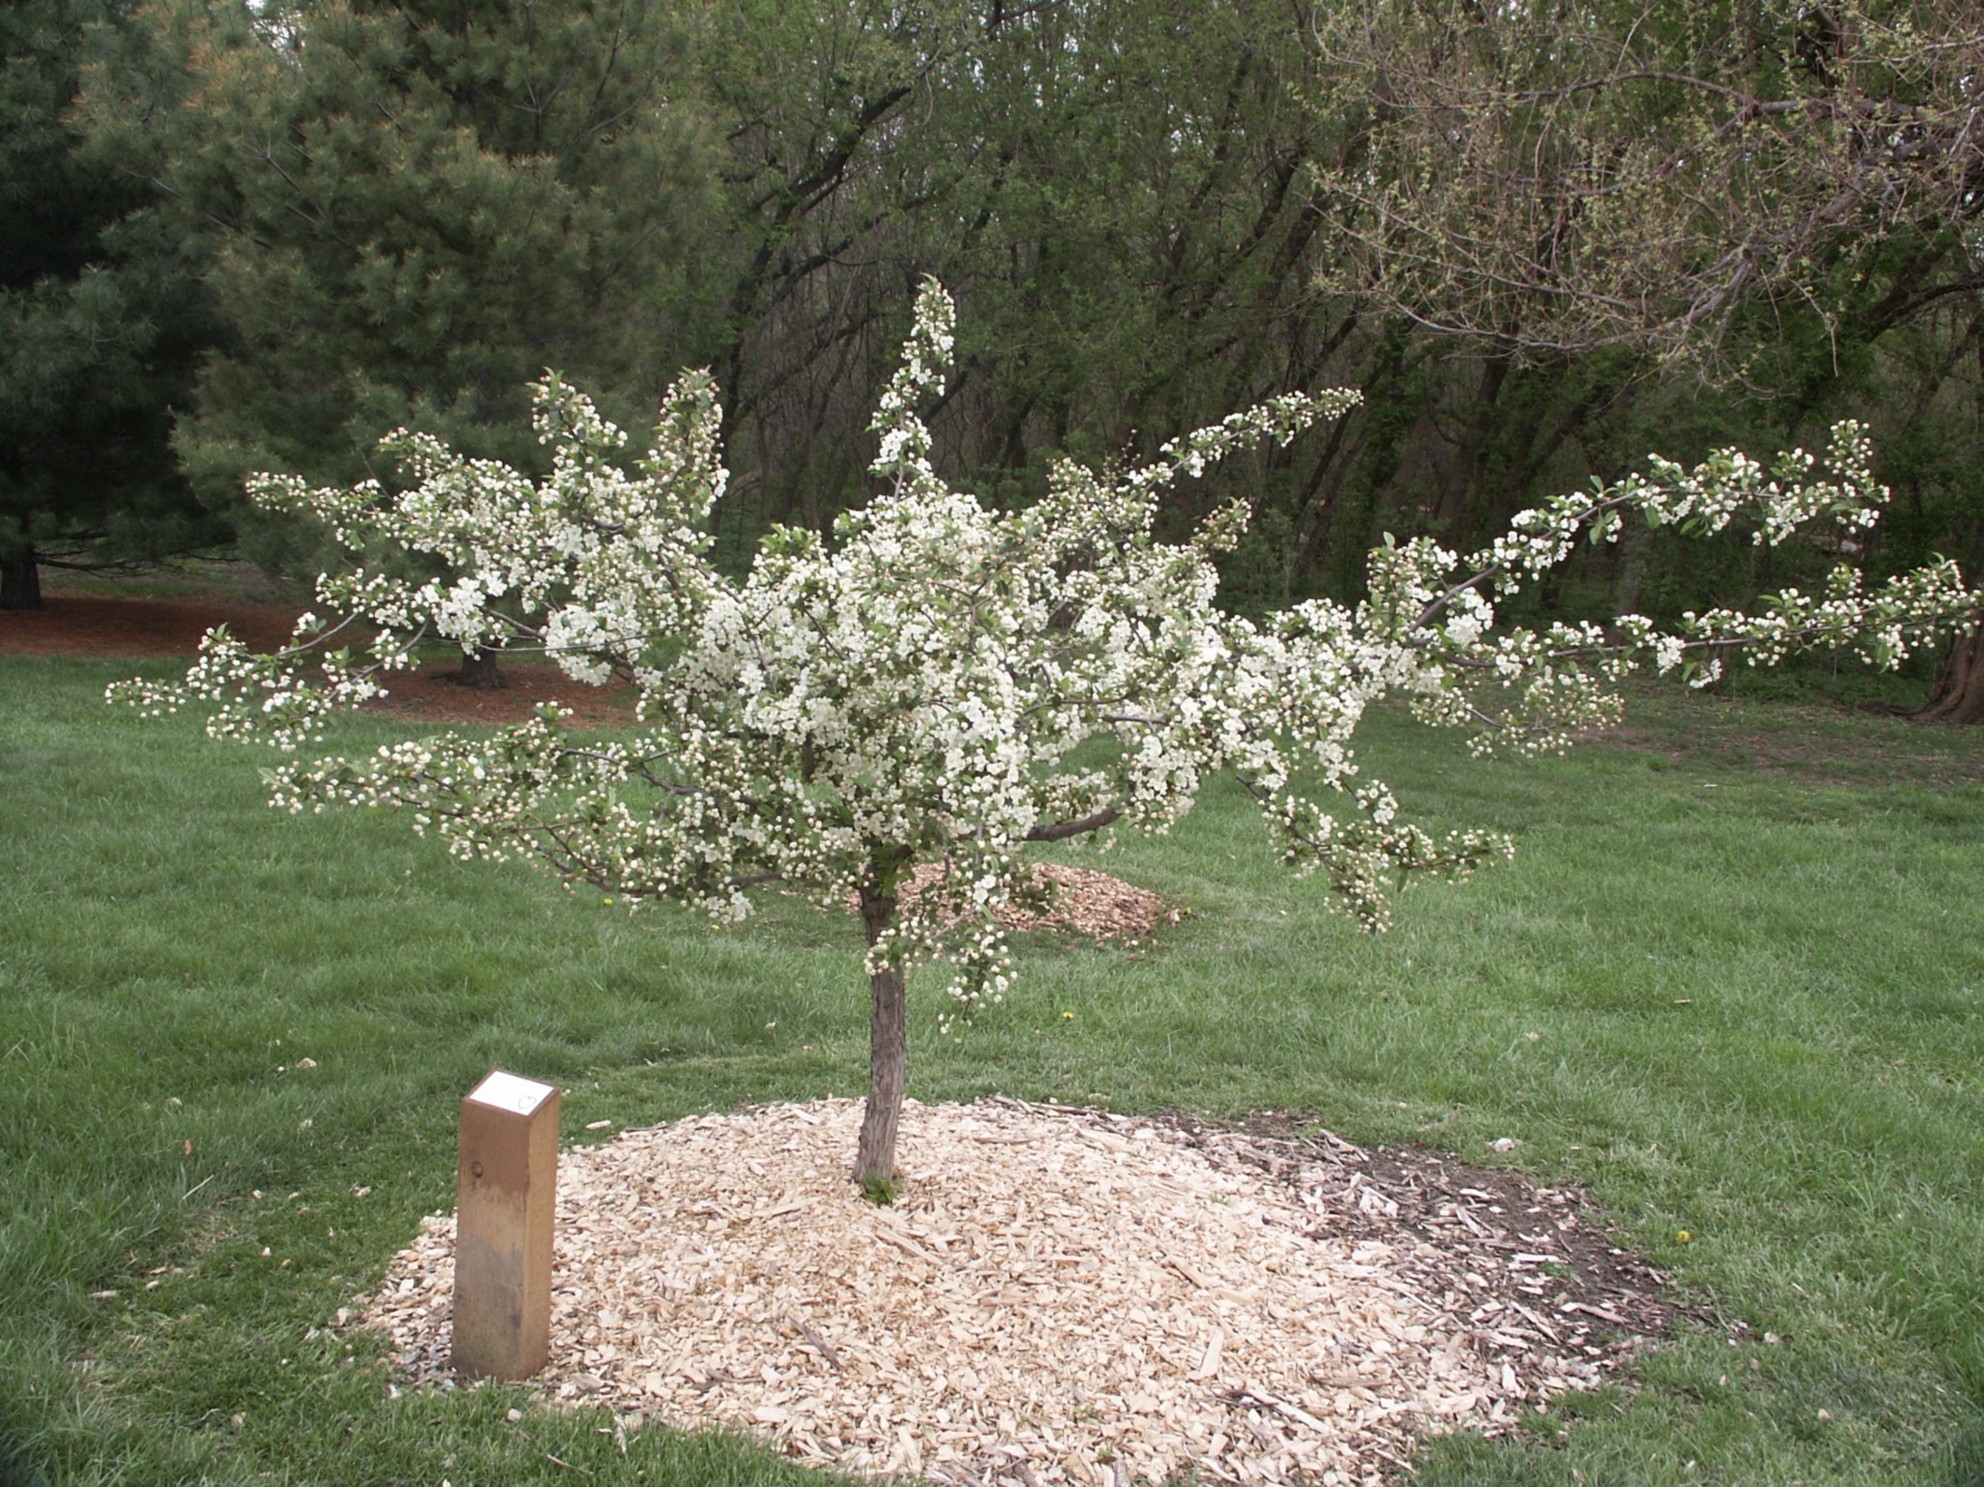
Wood chip or bark mulch simulates natural forest floor conditions
A bed of wood chips or other coarse organic mulch around a tree greatly increases root and tree health. Maintain a mulch bed around all newly planted and existing trees that extends several feet from the trunk; the farther the turf is away from the trunk the better. Mulch should be 3 to 4 inches deep and should be renewed as it breaks down. Keep the mulch a couple of inches away from the trunk to avoid root or trunk decay and rodent burrowing and damage. Rocks or gravel may be used for esthetics, but do not have some of the good properties of organic mulches. Air tight plastic sheeting should not be used around plants. Porous weed barrier fabrics provide some weed control but can be difficult to install and maintain and are not much more effective than an adequate organic mulch layer. Mulch can be placed right on top of existing turf. Either spray the turf first with glyphosate herbicide, or pull or spray the grass that makes it through the mulch, being careful to avoid spraying the tree’s trunk.
Staking
Properly planted trees seldom need staking, so stake only where severe wind or vandals are problems. Use canvas strapping or similar soft, flexible material around the tree to prevent trunk damage. Attach these materials loosely to allow stem movement. Remove staking materials after one or two years. In heavily used areas a couple of tall stakes can help physically protect the tree from people even if the stakes are not attached to the tree.
Trunk Protection
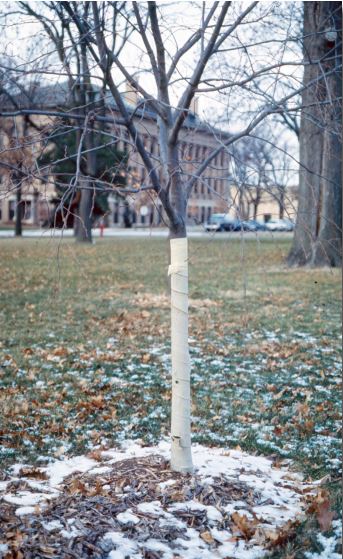
Light colored paper tree wrap
Light colored paper tree wrapLight colored paper tree wrap
Thin bark on lower trunks of young trees sometimes is damaged by “sunscald”. This damage appears as small cracks or wounds on the bark, especially on the southwest side of the tree. Though the underlying cause is uncertain, sunscald appears to be caused by bark being warmed by the winter sun and then being damaged by freezing when the sun sets. Wrapping the lower trunk can help shade and protect that thin bark. Wrap in the fall with flexible, light-colored tree wrap material made out of paper or perforated plastic. Remove the wrapping material in spring and reapply the next fall if needed. Tree wrap that is left on through the summer can harbor insects and encourage diseases.
Pruning
Little pruning should be done at planting time. The tree is very stressed when it is first transplanted, and pruning causes it to lose stored food and forces it to seal or heal pruning wounds. Dead, diseased, damaged, or rubbing branches can be removed at this time. Once the tree is established you can prune to ensure good form as it matures. See our tree pruning fact sheet.
Weed Control
A wide mulch bed several inches deep will do a lot to control weeds. Otherwise hand pull or use directed sprays of herbicides as needed to control weeds. Herbicides or weed killers that are taken up by roots should not be used since they may harm the tree. Keep all weed killers off of tree leaves, young bark, and sprouts coming from the tree base or the roots.
For More Information
Visit the USU Extension Forestry website for additional information on tree planting, selection, and care. Also visit the Utah Community Forest Council website for information on arboriculture and how to hire an arborist. If your town or city needs urban/community forestry assistance contact the Division of Forestry, Fire & State Lands at 801-538-5555. When you need tree work done it is best to hire an ISA (International Society of Arboriculture) Certified Arborist (look under Tree Services in your telephone directory).
Acknowledgements
We thank the Utah Community Forest Council and Utah Division of Forestry, Fire & State Lands for their financial and other support.
Published May 2010.